To prevent overspray on your landscaping while painting a wooden fence, first clear the area of plants, furniture, and debris. Cover nearby soil and plants with plastic sheeting or drop cloths, and use painter’s tape for precise edges. Choose an HVLP sprayer for better control, and keep the spray 6-12 inches from the fence, moving steadily along the grain. Monitoring weather conditions, especially wind, helps too. Stay safe and efficient—discover more tips to protect your garden effectively.
Key Takeaways
- Cover nearby plants and soil with plastic sheeting or drop cloths before starting to contain overspray.
- Use adjustable spray patterns and maintain a proper distance (6-12 inches) for targeted, controlled application.
- Prioritize painting fence edges first, then work inward to minimize overspray reach.
- Schedule painting during calm weather, avoiding windy days to prevent paint drift onto landscaping.
- Regularly inspect and clean equipment to ensure precise spray control and reduce unintended overspray.
Assessing Your Landscape and Planning Your Space
Before you begin painting your wooden fence, take a close look at your landscape and plan your space carefully. Conduct a landscape assessment to identify nearby plants, garden beds, and other features that might be affected by overspray. Consider how much space separates the fence from your landscaping elements, and note potential obstacles like outdoor furniture or structures. Effective space planning helps you determine the best angles for painting and where to position protective coverings. By understanding your landscape’s layout, you can strategize to minimize overspray and avoid damaging your plants. Additionally, consulting dog-friendly policies for outdoor spaces ensures you maintain a safe environment for your pets during your DIY project. A thorough assessment ensures you’re prepared, saving you time and effort later on. Planning ahead lets you paint confidently, knowing you’ve accounted for all landscape considerations. Being aware of overspray prevention techniques can further help you protect your landscaping from accidental paint drift. Incorporating landscape protection methods can also reduce the risk of paint reaching unintended areas, making your project more efficient. Taking the time to evaluate plant spacing and potential obstacles will help you better plan your painting approach and safeguard your garden features. Additionally, understanding the rustic charm of farmhouse design can inspire you to create a charming and cohesive outdoor space that complements your overall landscape aesthetic.
Choosing the Right Painting Equipment and Techniques
To get a smooth, even finish, you need to pick the right spray equipment and master proper technique. Choosing the right sprayer depends on your fence’s size and material, so consider options carefully. Don’t forget to maintain your tools regularly to guarantee consistent results and prolong their lifespan. Additionally, using the appropriate painting techniques can help minimize overspray and ensure a professional-looking finish. Selecting the correct tip size is also crucial for achieving the desired spray pattern and finish quality. Using professional-grade spray tips can further improve control and precision during application, especially when considering the materials used in your fencing, such as wood or composite, to ensure optimal adhesion and durability.
Selecting Appropriate Sprayers
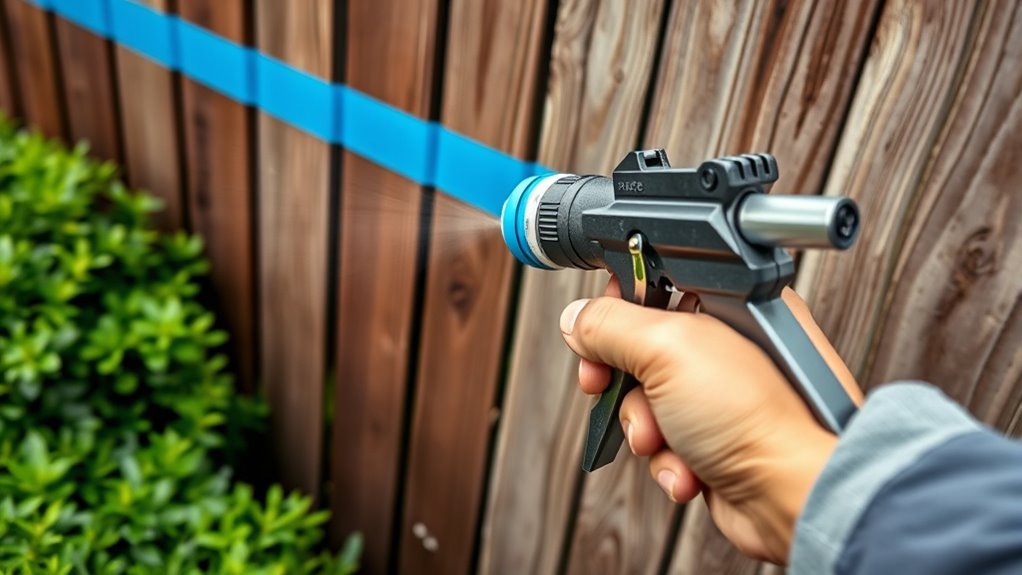
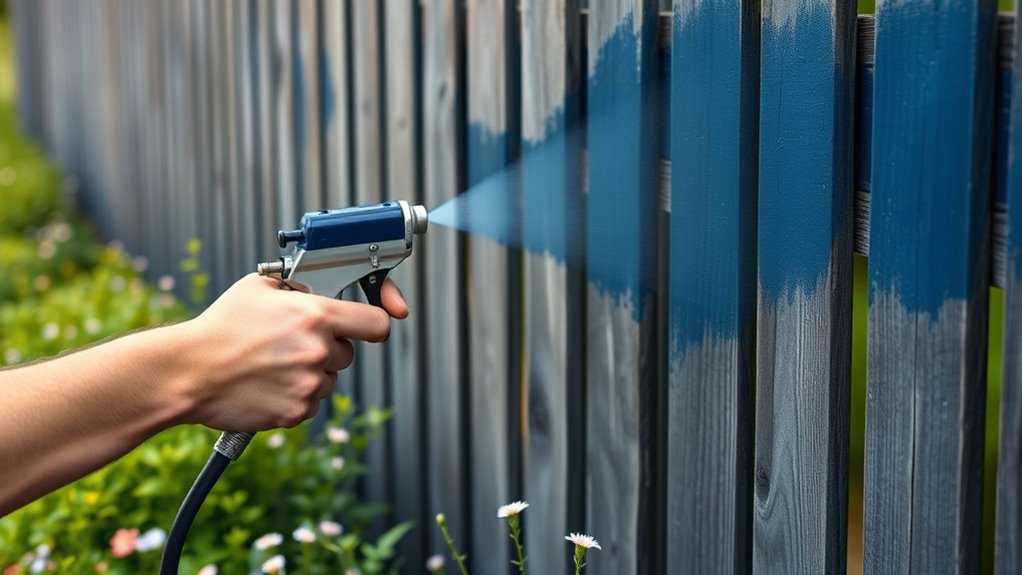
Selecting the right sprayer is essential for achieving a smooth, even finish on your wooden fence. You need to evaluate different sprayer types, such as airless, HVLP, or compressed air sprayers, each offering unique advantages. For fences, HVLP sprayers are popular because they deliver fine spray patterns, reducing overspray and ensuring controlled application. Spray patterns also matter; choose adjustable spray patterns to target specific areas and avoid overspray on landscaping. A sprayer with adjustable settings allows you to control the width and volume of the spray, making it easier to cover large surfaces evenly while maintaining precision around plants. Picking the right equipment tailored to your project ensures a professional-looking finish without mess or waste.
Proper Spray Technique
Choosing the right spray technique is essential for achieving a professional-looking finish on your wooden fence. To do this, maintain a consistent spray distance—usually 6-12 inches from the surface—and avoid overlapping strokes that cause uneven coverage. Keep your spray perpendicular to the fence for smooth, even application, minimizing brush strokes and drips. Use smooth, steady motions and avoid stopping mid-spray to prevent streaks. Adjust your spray pattern based on the area, using wider patterns for large sections and narrower ones for details. Additionally, practicing your technique on a scrap piece can help improve your spray control and ensure a flawless finish. Proper pressure adjustment on your sprayer can also make a significant difference in achieving an even coating. Understanding the paint flow rate helps in controlling the amount of paint delivered, reducing overspray and waste. Being aware of the AI vulnerabilities in spray equipment technology can help you select more reliable tools for your project. Staying informed about the latest AI detection methods can also assist in troubleshooting issues with automated spray systems.
Equipment Maintenance Tips
Proper maintenance of your painting equipment guarantees a smooth, even finish and extends the lifespan of your tools. Regularly check equipment calibration to ensure spray patterns and flow rates are accurate, preventing uneven coats or overspray. Follow a consistent maintenance schedule, including cleaning brushes, rollers, and spray nozzles after each use to prevent clogs and paint buildup. Inspect hoses and fittings for leaks or damage, replacing parts as needed. Lubricate moving components to keep equipment operating smoothly. Proper storage also prevents rust and deterioration. Staying on top of these maintenance tasks saves you time and money, guaranteeing your tools perform at their best. Well-maintained equipment delivers professional results and helps you avoid overspray on landscaping. Additionally, understanding yoga techniques can improve your focus and precision during tasks like painting. Regularly inspecting and replacing worn parts is essential for maintaining airless paint sprayer performance and ensuring a clean, controlled application. Incorporating routine maintenance practices can further enhance your painting process, reducing the likelihood of errors such as overspray and ensuring a clean finish.
Preparing Your Garden and Surroundings Before Painting
Before you start painting, clear the area around your fence to prevent any accidents or obstructions. Cover nearby plants and soil with protective sheets to keep them safe from paint splatters. Taking these steps guarantees a clean workspace and a successful paint job.
Clear the Nearby Area
To guarantee a smooth painting process, you need to clear the area around your fence thoroughly. Remove furniture, garden tools, and any loose debris that could interfere with your work. This step is essential for landscape protection, preventing overspray from reaching plants, flower beds, or pathways. Prioritize gardening safety by keeping children and pets away from the area during painting. If you have delicate or valuable plants nearby, consider temporarily relocating them or covering them with protective materials. Clearing the space not only helps you achieve a cleaner, more even coat but also reduces the risk of accidental damage. Additionally, being aware of electric bike speed options, such as high-speed models like Super73 and Stealth Hurricane, can be beneficial if you need quick transportation around your property. Taking these precautions makes the entire project safer and more efficient, ensuring your landscape stays pristine throughout the painting process.
Cover Plants and Soil
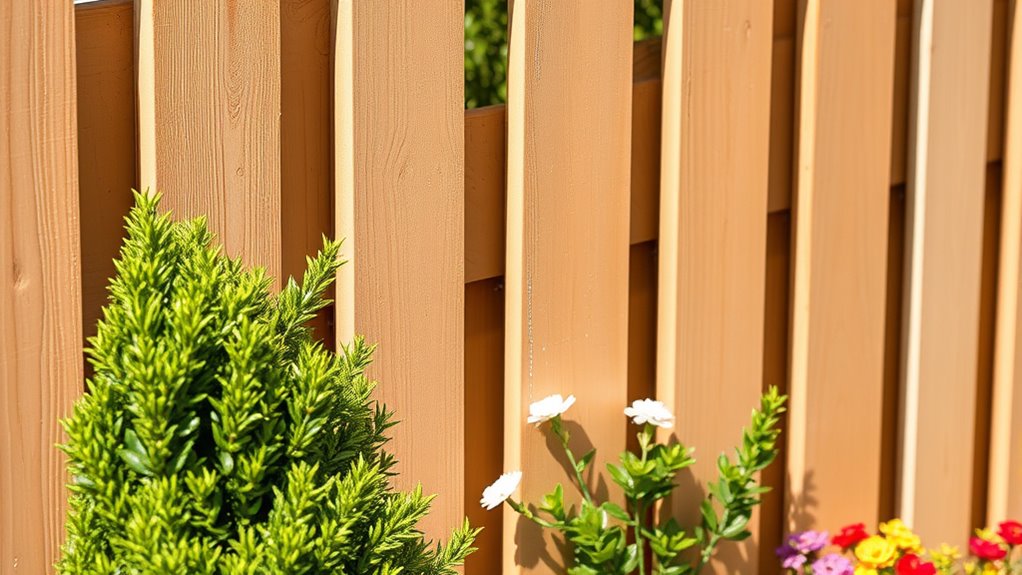
Since overspray and drips can easily harm your plants and soil, it’s important to cover them thoroughly before you start painting. Use protective coverings like plastic sheeting or drop cloths to shield delicate plants and soil from paint splatters. Plant shielding is essential for preventing damage and ensuring your garden remains healthy. Gently secure coverings around the base of the plants and over the soil, making sure they’re snug but not restrictive. Remove or relocate small potted plants out of the way if possible. To ensure your landscaping remains protected, consider analytical cookies that track how well your protective measures are working. Proper plant shielding and protective coverings help you focus on painting your fence while keeping your landscaping safe and clean. Additionally, choosing glycolic acid products that are gentle and effective can help maintain the health of plants that might be exposed to paint-related chemicals.
Setting Up Protective Barriers and Coverings

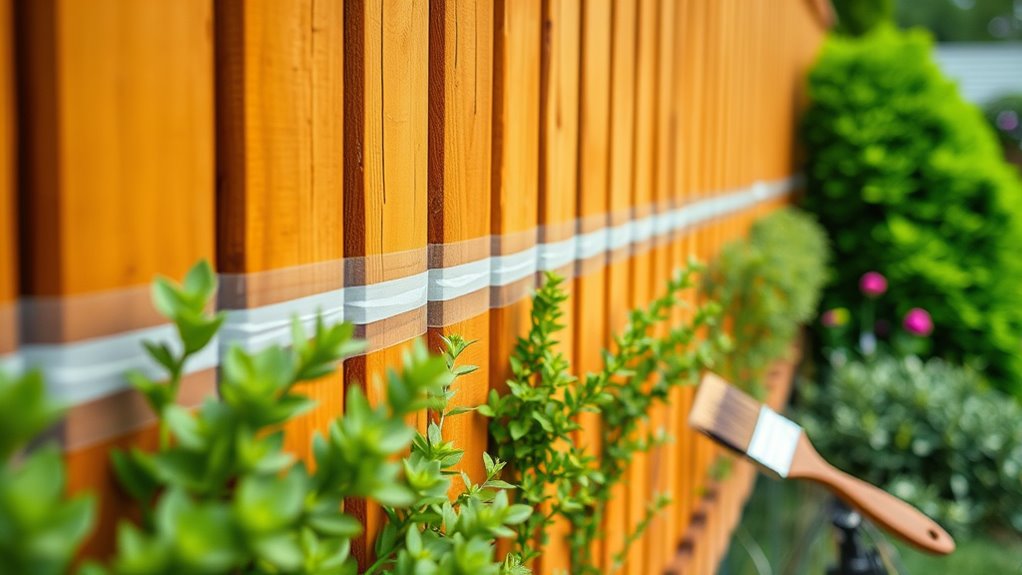
Protecting surrounding areas is essential to prevent paint splatters and accidental drips from causing damage or creating a mess. Start by applying painter’s tape along edges where the fence meets other surfaces, such as siding or trim. This creates a clean line and keeps paint from seeping onto unwanted areas. Cover nearby plants, walkways, and outdoor furniture with drop cloths to catch any overspray or drips. Secure the cloths firmly to prevent shifting during painting. If you’re working near delicate landscaping, consider using plastic sheeting or additional barriers for extra protection. Taking these precautions guarantees your landscaping remains pristine and your painting project stays controlled, saving you time on cleanup and avoiding accidental damage.
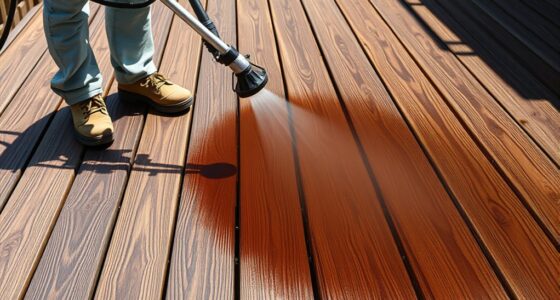
Applying Paint With Precision and Control
Applying paint with precision and control is essential for achieving a smooth, professional-looking finish on your wooden fence. Use proper brush techniques to ensure even coverage, starting with long, smooth strokes along the grain. Keep your paint at the right consistency—neither too thick nor too runny—to prevent drips and uneven layers. Dip your brush lightly, wiping off excess paint before applying. Focus on steady, controlled movements, especially around edges and corners. To help visualize, here’s a quick guide:
| Technique | Benefit |
|---|---|
| Long, smooth strokes | Avoid streaks and achieve even coverage |
| Consistent paint load | Prevent drips and uneven layers |
| Light brush dips | Maintain control and reduce mess |
| Edges first | Keep clean lines and avoid overspray |
| Steady hand | Enhance precision and finish quality |
Mastering these tips ensures a flawless, controlled paint job.
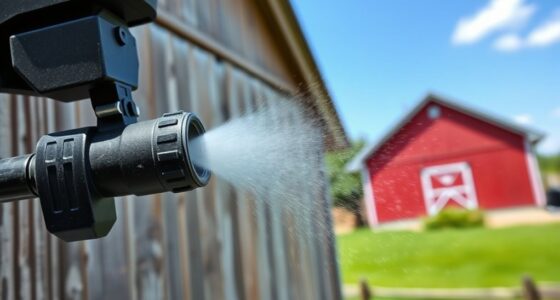
Managing Wind and Weather Conditions During Painting
Controlling your environment is key to achieving a flawless finish when painting wooden fences. Wind mitigation is vital because even light breezes can cause overspray and uneven coats. Check weather forecasting before starting—avoid painting on windy days or when rain is imminent. If wind speeds are high, postpone painting or set up windbreaks to shield your work area. Planning your project around calm weather conditions helps guarantee paint adheres properly and reduces overspray risks. Keep an eye on local weather updates, and monitor wind speeds regularly. By managing wind and weather effectively, you create a controlled environment that promotes smooth application, minimizes mess, and results in a professional-looking fence. Proper planning and awareness of weather conditions are essential for successful fence painting.
Cleaning Up and Ensuring Your Landscaping Remains Damage-Free
Have you considered how your painting project might impact your surrounding landscape? To protect landscape durability, start by thoroughly cleaning any paint spills or overspray from plants and soil immediately. Use gentle, non-abrasive cleaners to prevent damage and avoid harsh chemicals that could harm your landscaping or affect pest prevention. After cleanup, inspect your yard for paint splatters or drips, and remove them carefully. Cover nearby plants with plastic sheeting or tarps if there’s a risk of overspray, ensuring they stay unaffected. Proper cleanup not only preserves your landscape’s health but also maintains its appearance. Taking these steps helps prevent pest issues, keeps your yard looking pristine, and ensures your fencing project remains damage-free.
Frequently Asked Questions
How Can I Remove Overspray From My Garden Plants Effectively?
To remove overspray from your garden plants effectively, start by gently brushing off loose paint with a soft brush. Then, use garden netting or plant protective covers to shield your plants during future painting projects. For stubborn overspray, try a mixture of mild soap and water or a gentle plant-safe solvent. Always test on a small area first to prevent damage and verify safe removal.
What Types of Paint Are Best for Minimizing Overspray?
Did you know that latex and acrylic paints are known for minimal overspray compared to oil-based options? When you’re choosing paint for your fence, opt for latex or acrylic because they’re easier to control and clean up. These paints dry quickly and produce less airborne particles, helping you avoid overspray on your landscaping. Stick with these water-based paints for a cleaner, more precise finish without damaging your garden.
Are There Eco-Friendly Options to Reduce Overspray During Painting?
You can definitely choose eco-friendly paint to reduce overspray, as these options often have lower VOCs and less harmful chemicals. Using natural overspray barriers like landscaping fabric or biodegradable drop cloths helps protect your plants and lawn. When you mix eco-friendly paint with natural barriers, you minimize environmental impact and keep your landscaping safe. Always spray carefully and control your distance to further avoid unwanted overspray during your project.
How Can I Prevent Overspray on Nearby Outdoor Furniture?
Think of your outdoor furniture as a delicate canvas waiting for protection. To prevent overspray, set up spray barriers like plastic sheets or old blankets around your furniture. Cover it thoroughly to shield it from paint mist, ensuring furniture protection. Always spray from a distance, use gentle strokes, and check for any gaps in your barriers. This way, your furniture stays pristine, and your landscape remains untouched.
What Are the Best Tools for Controlling Overspray in Tight Spaces?
To control overspray in tight spaces, you should focus on precise spray gun techniques, keeping the spray at a consistent distance and using slow, steady motions. Apply masking tape carefully around areas you want to protect, ensuring a tight seal. These tools, combined with controlled spray gun handling, help prevent paint from spilling over onto unwanted surfaces, giving you a clean, professional-looking finish even in confined areas.
Conclusion
With careful planning and the right tools, you can paint your wooden fences without damaging your landscaping. Don’t worry if overspray seems tricky—using protective barriers and adjusting for weather makes all the difference. Take your time, stay patient, and you’ll achieve a clean, professional look. Remember, a little extra prep effort now saves you cleanup headaches later. Your garden will look beautiful—and protected—every step of the way.