To update your bookshelves and built-ins, start by choosing a color that complements your decor or creates a bold statement. Clean and sand the surfaces before applying primer for a smooth base. Use quality brushes and thin coats of paint, working in sections to prevent streaks. Layer colors carefully for a sleek finish, and consider sealing for extra protection. With proper prep and technique, you’ll achieve a professional look—continue to explore for detailed tips to perfect your project.
Key Takeaways
- Choose a color that complements your decor or creates a seamless look with the walls for a cohesive appearance.
- Clean, sand, and prime shelves thoroughly to ensure smooth paint application and vibrant, durable finish.
- Use high-quality brushes or rollers and apply thin, even coats with steady strokes for a professional look.
- Pay attention to corners and tight spots with fine-tipped brushes, and layer coats for depth and uniformity.
- Finish with a clear sealer if desired, and inspect for touch-ups to achieve a sleek, polished result.

Painting bookshelves and built-ins is a straightforward way to give your space a fresh, updated look. When you’re ready to start, the key to a professional finish lies in understanding color matching and mastering your brush techniques. Selecting the right color is vital; you want it to complement your existing decor while also making a statement. To achieve this, consider the overall palette of the room. If your walls are neutral, you might opt for a bold, contrasting hue on the shelves to create a focal point. Conversely, matching the color of your shelves to the wall can produce a seamless, integrated appearance. To do this effectively, use a color-matching tool or bring a sample to your local paint store to find the perfect shade. Once you’ve chosen your color, preparation becomes essential for a smooth finish.
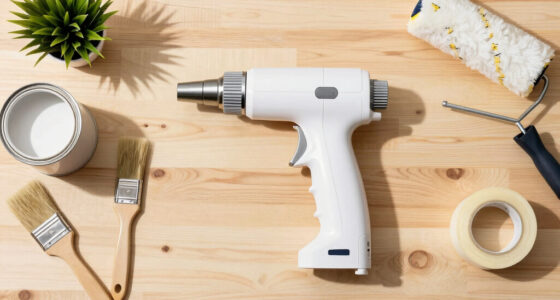
Start by cleaning the shelves thoroughly to remove dust and grease, then lightly sand the surface to help the paint adhere better. Wipe away any dust with a damp cloth before priming. Priming ensures that the paint covers evenly and that the color appears vibrant. When it’s time to paint, your choice of brush techniques can greatly influence the final look. For smooth, even coverage, use a high-quality angled brush or a small roller, depending on the detail and size of the surface. Use long, steady strokes to avoid streaks, and work in sections to maintain a wet edge. For corners and tight spots, a fine-tipped brush allows you to achieve precision. Applying thin coats of paint is better than one thick layer, as it reduces drips and uneven textures, and allows each coat to dry thoroughly before the next.
Additionally, using the proper tip size can help achieve a more professional finish, especially if you choose to utilize an airless sprayer for larger surfaces or multiple shelves. Pay close attention to brush techniques to avoid visible brush marks. Light, feathering strokes can help keep the finish sleek and uniform. If you’re working with multiple colors or want a more textured look, layering and blending your brushwork can add depth and personality. After the final coat, inspect your work carefully and touch up any uneven areas with a small brush. Once everything is dry, consider applying a clear protective sealer to prolong the life of your paint job and keep your shelves looking fresh. With the right color matching and meticulous brush techniques, your painted bookshelves and built-ins will transform your space with minimal effort and maximum impact.

Pro Grade Paint Brushes, 5-Piece Paint Brush Set, Flat & Angle Brushes for Walls, Trim, Cabinets, Interior & Exterior Latex and Oil Paints, Stains
- Complete 5-Piece Set: Includes various sizes for all painting tasks
- Professional Grade Performance: High-quality brushes at a fraction of store prices
- Zero Bristle Loss: Secure adhesive bonding prevents bristle shedding
As an affiliate, we earn on qualifying purchases.
As an affiliate, we earn on qualifying purchases.
Frequently Asked Questions
What Type of Paint Is Best for Bookshelves?
You should use a semi-gloss or satin finish paint for bookshelves, as these options are durable and easy to clean, perfect for shelf organization tips. These paint finishes resist smudges and stains while providing a smooth, attractive look. Choose high-quality latex or acrylic paints for best results, ensuring your shelves stay vibrant and protected. This way, you combine style and practicality, making your bookshelves both functional and visually appealing.
How Do I Prevent Paint From Chipping Over Time?
To prevent paint from chipping over time, focus on proper surface prep and paint adhesion. Start by cleaning the surface thoroughly to remove dust and grease. Sand lightly to create a good grip, then apply a high-quality primer. Use durable paint suited for your material. These steps guarantee the paint adheres well, reduces chipping, and prolongs the finish’s life, keeping your bookshelves looking fresh longer.
Can I Paint Over Stained or Varnished Wood?
Yes, you can paint over stained or varnished wood, but first, you’ll need to prepare the surface. Start with stain removal techniques like sanding or using a deglosser to remove the glossy finish. If there’s varnish, consider varnish stripping methods to fully remove it. Once the surface is clean and dull, apply a primer designed for glossy surfaces, then paint for a smooth, long-lasting finish.
What Tools Are Necessary for a Smooth Finish?
Imagine a feather gliding across paper—smooth and effortless. To achieve that finish, you’ll need quality brushes and the right primer. Use brush techniques like long, even strokes to prevent streaks, and choose a primer suited for your wood’s finish. Sand lightly between coats for a silky surface. With these tools and techniques, your painted shelves will gleam like a mirror, flawless and inviting.
How Do I Choose the Right Color Scheme?
To choose the right color scheme, start by considering your overall room decor and existing color palette coordination. Think about what mood you want to create—calm, vibrant, or sophisticated—and select colors accordingly. Use accent color ideas to add pops of contrast or interest, perhaps through accessories or trim. Test samples on your shelves to see how they look in different lighting, ensuring your chosen colors complement each other beautifully.
Conclusion
Transforming your bookshelves and built-ins with a fresh coat of paint breathes new life into your space, turning ordinary wood into a canvas of character. With each brushstroke, you’re not just changing colors—you’re weaving a tapestry of personality that reflects your style. As the final layer dries, your room becomes a gallery where stories and colors dance together, inviting you to sit back and marvel at how a simple touch of paint can elevate your home’s soul.