To rebuild your pump, start by turning off the power and inspecting for obvious damage or blockages. Remove the casing and check internal components like the impeller, seals, and shaft for wear or cracks. Clean debris from inlet and outlet areas, replace damaged parts, and make certain electrical connections are secure. Reassemble the pump carefully, then test its operation for leaks and strange noises. Following these steps will guide you through a thorough rebuild—keep going to learn more detailed procedures.
Key Takeaways
- Turn off and disconnect the pump from power before beginning disassembly.
- Remove the pump cover or casing and inspect internal parts for damage or wear.
- Clean or replace filters, clear blockages, and check for debris in inlet and outlet pathways.
- Inspect and test electrical connections, fuses, and motor voltage supply.
- Reassemble the pump securely, then run a test to ensure proper operation and address any issues.
Have you ever wondered what it takes to restore a malfunctioning pump? When your pump isn’t working as intended, it’s essential to understand the importance of proper pump maintenance and troubleshooting tips. These steps can help you identify issues early and prevent costly repairs down the line. Restoring a pump might seem intimidating, but with a systematic approach, you can bring it back to peak functionality. The key is to start with a thorough inspection and then methodically diagnose the problem.
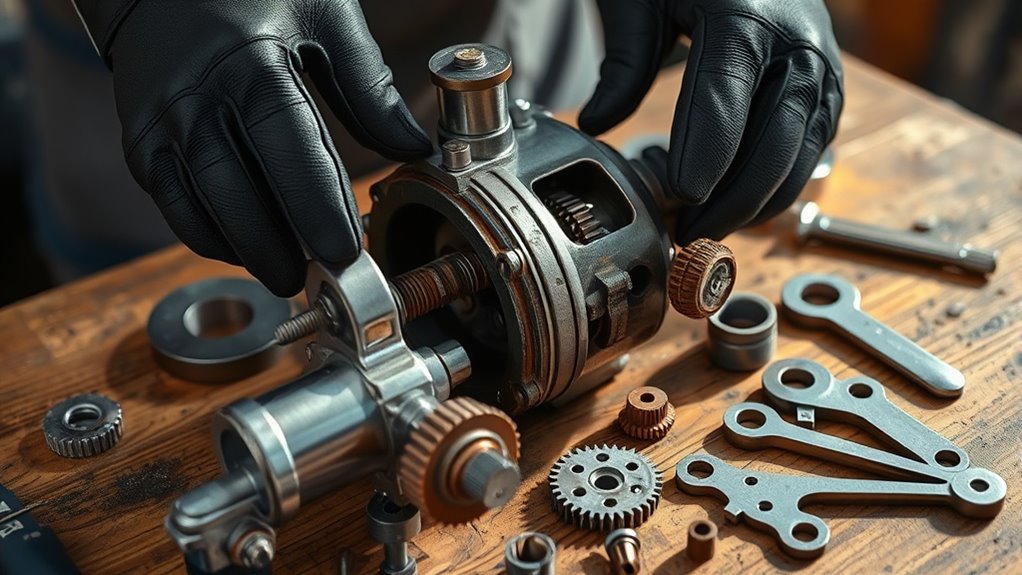
Begin by turning off the pump and disconnecting it from the power source. Safety always comes first. Once it’s safe, remove the pump cover or casing to access the internal components. During this initial inspection, look for obvious signs of damage, such as leaks, corrosion, worn-out seals, or broken impellers. This visual check is part of effective pump maintenance and can often reveal the root cause of the malfunction. When troubleshooting, keep a detailed record of what you observe; this helps in pinpointing recurring issues and prevents overlooking minor problems that could escalate.
Always turn off the pump and inspect internal parts for damage before troubleshooting.
Next, check the pump’s inlet and outlet for blockages or debris that could be restricting flow. Clogged filters or buildup inside the pipes can mimic pump failure symptoms. Clean or replace filters as needed, and clear any obstructions carefully. If the pump still isn’t operating properly, move on to testing the electrical components. Use a multimeter to verify voltage and ensure the motor is receiving the correct power supply. Faulty wiring or a blown fuse can often cause operational failures, and these are quick fixes if you’re familiar with electrical troubleshooting tips.
If the motor appears to be functioning but the pump isn’t producing the right pressure or flow rate, examine the impeller and shaft alignment. Wear and tear on these parts is common, especially if maintenance has been neglected. Remove the impeller and inspect it closely for cracks or erosion. Sometimes, impellers just need cleaning or balancing. If they’re damaged, replacing them will restore proper operation. Remember, regular pump maintenance—such as lubrication, seal replacement, and impeller inspection—can extend your pump’s lifespan and reduce unexpected breakdowns.
Finally, once you’ve identified and repaired the issues, reassemble the pump carefully, ensuring all seals and connections are tight. Before putting it back into full operation, run the pump for a few minutes to observe its performance. Listen for unusual noises and check for leaks or vibrations, which can signal further problems. Proper troubleshooting tips and diligent maintenance are your best tools for rebuilding a pump successfully. Additionally, understanding the contrast ratio can help ensure your pump and system operate under optimal visual conditions if it’s part of a display or monitoring setup. With patience and attention to detail, you’ll be able to restore your pump’s efficiency and keep it running smoothly.
Frequently Asked Questions
What Tools Are Essential for Rebuilding a Pump?
You’ll need essential tools like wrenches, screwdrivers, and pliers to rebuild a pump. Make sure you have seal replacement tools and a gasket selection kit to guarantee proper sealing. A gasket scraper helps remove old gaskets, while a torque wrench ensures proper tightening. Having a clean workspace and safety gear also helps. These tools make sealing and gasket replacement easier, ensuring your pump functions reliably after rebuilding.
How Long Does the Rebuilding Process Typically Take?
The rebuilding process can feel like an eternity, but it usually takes between 4 to 8 hours, depending on your experience and the pump’s complexity. The rebuilding timeline varies, but with the right tools and focus, you can complete the process efficiently. Expect the process duration to include disassembly, inspection, parts replacement, and reassembly, all of which require patience and attention to detail to guarantee a successful rebuild.
Can I Rebuild a Pump Without Professional Training?
You can attempt DIY repairs to rebuild a pump, but it’s not recommended unless you have proper training. Without certification requirements, you might risk improper assembly or damage. If you’re inexperienced, professional help ensures safety and proper functioning. Consider taking courses or consulting experts before starting. While DIY repairs save money, they can lead to costly mistakes if you lack the necessary knowledge or certification, so proceed with caution.
What Are Common Signs Indicating a Pump Needs Rebuilding?
You’ll know your pump needs rebuilding if you notice decreased flow, unusual noises, or persistent leaks, which are common signs during pump maintenance. Troubleshooting techniques like checking for cavitation or bearing wear can help identify issues early. Regularly inspecting seals and impellers also prevents major problems, ensuring your pump operates smoothly. If these signs persist, it’s time to evaluate rebuilding to restore peak performance and avoid costly repairs.
How Do I Prevent Future Pump Failures After Rebuilding?
To prevent future pump failures after rebuilding, you should follow a regular maintenance schedule, inspecting and servicing the pump frequently. Use proper lubrication techniques to reduce wear and friction, ensuring all moving parts stay well-lubricated. Keep an eye on operating conditions and address issues promptly. Consistent maintenance and effective lubrication help extend your pump’s lifespan and keep it running smoothly, minimizing the risk of breakdowns.
Conclusion
Now that you’ve followed every step, your pump is almost ready to run again. But remember, the final test could reveal surprises—hidden issues you didn’t see before. Will your repairs hold, or will something still go wrong? Keep a close eye on it during its first few runs. The true test is yet to come. Stay vigilant, and you’ll guarantee your pump keeps working smoothly for years to come—if you catch everything before it’s too late.