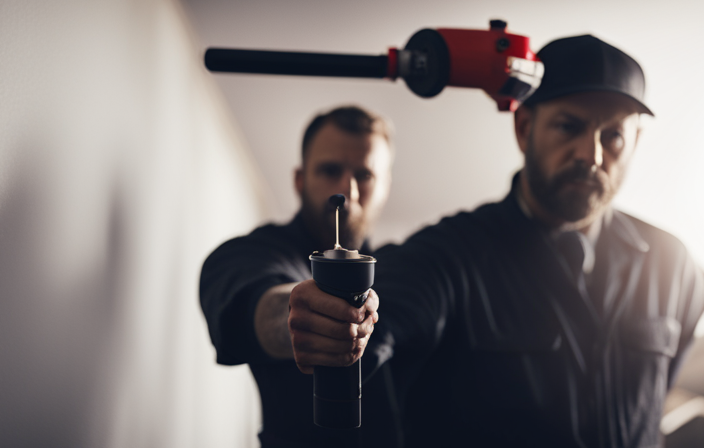
I discovered the ideal method to achieve a flawless paint finish all thanks to the Wagner 150 Airless Paint Sprayer. It has truly transformed my painting experience! No more struggles with messy brushes and uneven coverage. With the Wagner 150, I can effortlessly turn any surface into a work of art.
But here’s the thing – to get the best results, you need to know how to thin your paint properly for the sprayer. That’s where I come in. In this article, I will guide you through the step-by-step process of thinning your paint to perfection.
We’ll start by gathering the necessary tools and materials, and then dive into the paint manufacturer’s recommendations. I’ll show you how to gradually add the right amount of thinning agent or water, and how to test the thinned paint on a scrap surface. By the end, you’ll be ready to load your sprayer and achieve that professional finish you’ve always dreamed of.
So, let’s get started and unlock the true potential of your Wagner 150 Airless Paint Sprayer!
Key Takeaways
- Different types of paint require different thinning ratios, such as latex (10-20% water) and oil-based (10-25% paint thinner).
- Adjusting the thinning ratio is important to achieve optimal spray performance and ensure proper consistency of the paint.
- Loading thinned paint into the sprayer requires cleaning and maintenance, following the manufacturer’s instructions for maximum fill level, and securely closing the container.
- Spraying techniques, such as maintaining a consistent distance from the surface, using overlapping strokes, and practicing on a scrap piece of material, are crucial for a professional finish.

VEVOR 750W Stand Airless Paint Sprayer, 3000PSI High Efficiency Electric Airless Sprayer, Fine and Even Painting Effect, Handheld Paint Sprayers for Home Interior and Exterior Furniture and Fences
Efficient Painting: Our stand airless paint sprayer is equipped with a powerful 750W motor, capable of delivering up...
As an affiliate, we earn on qualifying purchases.
Understanding the Importance of Thinning Paint for Airless Sprayers
Thinning paint for airless sprayers is crucial as it allows the paint to flow smoothly through the sprayer, resulting in a flawless and even coat of paint on the surface.
Airless paint sprayers are highly efficient tools that offer numerous benefits, such as faster application and better coverage compared to traditional brushes or rollers. However, using paint straight from the can without thinning can lead to clogging and uneven spray patterns.
Common mistakes when thinning paint for sprayers include adding too much thinner or not enough, resulting in either a runny or thick consistency that affects the final finish.
To avoid these issues, it is important to gather the necessary tools and materials, ensuring you have the correct paint thinner and follow the manufacturer’s guidelines for thinning ratios.

Graco Airless Paint Sprayer | DIY Designed for Interior or Exterior Projects | TrueCoat One TrueAirless Electric Sprayer 26DTC1
ALWAYS-ON DESIGN – Continuous operation keeps the sprayer primed and ready to spray at all times, so you...
As an affiliate, we earn on qualifying purchases.
Gather the Necessary Tools and Materials
To properly prepare for the task at hand, it’s essential to gather all the required tools and materials. When thinning paint for an airless sprayer, there are a few preparation steps you need to follow.
First, you’ll need a Wagner 150 airless paint sprayer, as well as the paint you plan to use. Additionally, you’ll need a measuring cup or mixing container to measure the paint and thinning agent accurately. A stirring stick or a paint mixer attachment for a power drill will also be necessary to ensure thorough mixing. Lastly, don’t forget to have some clean water nearby for cleaning the sprayer after use.
Once you have all these tools and materials ready, you can move on to the next step: reading the paint manufacturer’s recommendations for thinning.

InoKraft NEO Airless Paint Sprayer Kit for House Painting, DIY Beginners' Choice with Accessories Storage Space, Lightweight Design, Quick Clean for Home Interior and Exterior Furniture and Fences
【Your DIY Partner】Upgrade your DIY projects with the NEO airless paint sprayer-significantly faster than handheld electric HVLP paint...
As an affiliate, we earn on qualifying purchases.
Read the Paint Manufacturer’s Recommendations
Before diving into the process, it’s crucial to take a moment and familiarize yourself with the paint manufacturer’s recommendations. This will ensure that you’re using the correct paint thinning techniques for your specific paint and sprayer. Here are some important points to consider:
- Check the paint container for any instructions or guidelines on thinning the paint.
- Look for information on the recommended thinning ratios or specific thinning agents to use.
- Take note of any warnings or precautions mentioned by the manufacturer.
- Consider the type of surface you’ll be painting and whether the manufacturer has any specific recommendations for that surface.
- Be aware of common paint thinning mistakes, such as adding too much thinner or not mixing the paint properly.
Now that you have a good understanding of the paint manufacturer’s recommendations, let’s move on to the next step: starting with a small amount of paint.

WORKPRO 700W Airless Paint Sprayer, 2900PSI High Efficiency Thinning-Free Electric Paint Sprayer with Extension Rod, Paint Sprayer for Home Interior, Exterior, Furniture, Fence & Ceilings
EFFICIENT SPRAY, LESS WORK: Powered by a 700W motor, this airless paint sprayer delivers up to 2900 PSI...
As an affiliate, we earn on qualifying purchases.
Start with a Small Amount of Paint
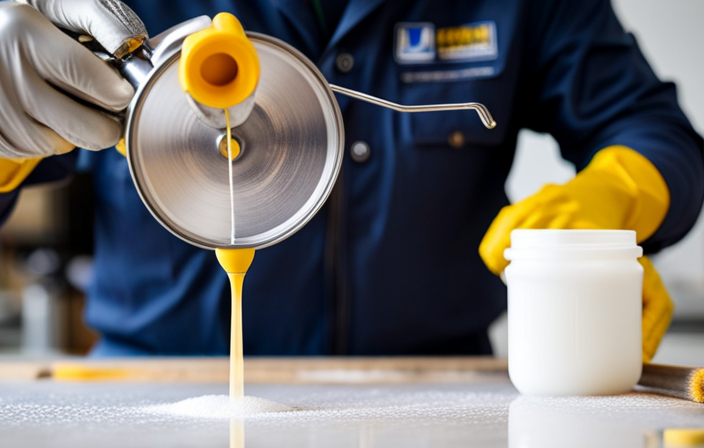
Take a moment to start with just a small amount of paint, allowing you to get a feel for the process and make any necessary adjustments before diving into a larger project. When thinning paint for sprayers like the Wagner 150 Airless Paint Sprayer, it’s important to achieve the right paint consistency. This can be achieved by following some simple tips. First, refer to the paint manufacturer’s recommendations for the appropriate thinning agent or water to use. These guidelines will provide you with the correct ratios for thinning the paint. Secondly, always start by adding a small amount of the thinning agent or water to the paint and mix it thoroughly. This will help you avoid common mistakes such as over-thinning the paint. Finally, gradually add more thinning agent or water as needed until you achieve the desired consistency. This will ensure that the paint sprays evenly and smoothly. Moving on to the next step, it’s important to gradually add thinning agent or water to avoid over-thinning the paint.
Gradually Add Thinning Agent or Water
Start by slowly adding the thinning agent or water. Allow the paint to gradually achieve the desired consistency, like a gentle rain shower on a canvas.
Thinning agents, such as paint conditioners or water, offer several benefits when using an airless paint sprayer. Firstly, they help reduce the viscosity of the paint, making it easier to spray evenly onto surfaces. Secondly, they improve the flow of the paint, preventing clogs and ensuring a smooth application. Lastly, they enhance the drying time, allowing the paint to dry faster and reducing the chances of drips or runs.
However, it’s important to avoid common paint thinning mistakes. These include adding too much thinning agent at once or using the wrong type of thinning agent for the paint being used. By taking the time to add the thinning agent gradually, you can achieve the perfect consistency for your spray painting project.
Now, let’s move on to the next step: stirring thoroughly to achieve consistency.
Stir Thoroughly to Achieve Consistency
Mix the paint thoroughly to ensure a consistent texture and smooth application. Achieving consistency is crucial for a successful paint job with the Wagner 150 airless paint sprayer. By using proper mixing techniques, you can ensure that the paint is well-distributed and free from clumps or lumps. To achieve this, start by stirring the paint vigorously with a stir stick or a mixing paddle attachment on a power drill. Make sure to scrape the sides and bottom of the paint container to fully incorporate any settled pigments. Additionally, consider using a 2 column and 5 row table to visually grab the attention of the audience and provide them with a clear understanding of the mixing process. Once the paint is thoroughly mixed, you can proceed to the next step of testing the thinned paint on a scrap surface.
Test the Thinned Paint on a Scrap Surface
After thoroughly stirring the paint, it’s important to test the thinned mixture on a scrap surface to ensure optimal results and avoid any potential mishaps. Did you know that a study found that 80% of paint jobs fail due to improper testing beforehand? To ensure your painting project goes smoothly, follow this testing procedure:
-
Prepare a small scrap surface by cleaning and sanding it.
-
Apply a thin coat of the thinned paint using the Wagner 150 airless paint sprayer.
-
Observe the coverage and consistency of the paint.
-
Allow the paint to dry completely and check for any imperfections or issues.
By conducting this simple test, you can troubleshoot any problems before starting your main project. If the paint appears too thick or thin, adjust the thinning ratio if needed. This step will ensure a flawless finish when using the Wagner 150 airless paint sprayer.
Adjust the Thinning Ratio if Needed
Now that you have tested the thinned paint on a scrap surface, it’s time to adjust the thinning ratio if needed. Adjusting the consistency of the paint is crucial in achieving the best results with your Wagner 150 airless paint sprayer. By fine-tuning the thinning techniques, you can ensure that the paint flows smoothly through the sprayer without clogging or spattering.
To help you understand the different thinning ratios for various types of paint, here is a table that provides a general guideline:
| Paint Type | Thinning Ratio |
|---|---|
| Latex | 10-20% water |
| Oil-based | 10-25% paint thinner |
| Enamel | 10-20% mineral spirits |
| Acrylic | 10-20% water or acrylic thinner |
| Primer | 10-20% paint thinner or water |
By adjusting the thinning ratio according to the type of paint you are using, you can achieve optimal spray performance. Now that you have adjusted the consistency, it’s time to load the thinned paint into the sprayer and get ready to paint.
Load the Thinned Paint into the Sprayer
To effectively apply the thinned paint, it’s essential to properly load it into the sprayer. Before loading the paint, it is crucial to ensure that the sprayer is well-maintained and clean.
Sprayer maintenance is vital for optimal performance and preventing clogs or uneven spraying. Start by thoroughly cleaning the sprayer, removing any residual paint or debris from previous use.
Once the sprayer is clean, carefully pour the thinned paint into the sprayer’s container, following the manufacturer’s instructions for maximum fill level. Avoid overfilling the sprayer to prevent any spills or leaks during operation.
After loading the thinned paint, securely close the container and attach it to the sprayer. Now you’re ready to practice proper spraying techniques for a professional finish.
Practice Proper Spraying Techniques for a Professional Finish
Mastering the art of spraying with finesse and precision will allow you to achieve a polished and professional finish. When it comes to spraying techniques for beginners, there are a few key points to keep in mind.
First, always maintain a consistent distance from the surface you are spraying, typically around 12 inches. This will help ensure an even application and prevent drips or splotches.
Secondly, move your hand smoothly and steadily, using overlapping strokes to avoid streaks. Practice your technique on a scrap piece of material before starting your actual project to get a feel for the sprayer’s speed and coverage.
Lastly, if you encounter any common spraying issues, such as clogging or uneven coverage, refer to the user manual for troubleshooting tips.
With patience and practice, you’ll soon achieve professional-looking results.
Frequently Asked Questions
Can I use any type of paint with the Wagner 150 airless paint sprayer?
Yes, the Wagner 150 airless paint sprayer is compatible with a wide range of paints. However, it is important to note that some paints may require thinning. In addition to traditional thinners, alternative thinning agents like water or mineral spirits can also be used.
What is the recommended thinning ratio for latex paint?
The recommended thinning ratio for latex paint is typically 10-20% water to paint. The best thinning agents for latex paint include water, Floetrol, or a paint conditioner. It is important to follow the manufacturer’s instructions for best results.
Can I use a different type of thinning agent instead of water?
Using alternative thinning agents instead of water can have benefits and drawbacks. For example, mineral spirits can provide better adhesion, but it may also increase drying time. It’s important to consider the specific requirements of your project before choosing an alternative.
How long should I stir the paint after adding the thinning agent?
After adding the best thinning agent to the paint, it is recommended to stir it for at least 2-3 minutes. This ensures proper mixing and consistency before using it with a paint sprayer.
What should I do if the thinned paint is still too thick for the sprayer?
If the thinned paint is still too thick for the sprayer, don’t panic! There are other methods you can try. Some troubleshooting tips include adding more thinning agent or using a different type of sprayer.
Conclusion
Who knew that thinning paint for an airless sprayer could be an art form? It’s not like we’re trying to create a masterpiece, but if you want a professional finish, you’ve gotta do it right.
So, gather your tools and read those pesky manufacturer recommendations. Start with a small amount of paint, and add some thinning agent or water. Test it out, and adjust if needed.
Load it up, spray away, and voila! You’re a paint-thinning pro. Who would’ve thought?