You may be thinking that cleaning an airless sprayer after using latex paint is a difficult and time-consuming task. But rest assured, performing this task is essential for preserving the durability and optimal performance of your HVLP sprayer.
In this article, I will guide you through the precise and detailed process of cleaning your airless sprayer, step by step. By following these instructions, you’ll be able to maintain the quality of your sprayer and prevent any clogs or malfunctions in the future.
So, let’s gather our cleaning supplies and get started. Disconnecting and cleaning the sprayer nozzle, flushing the system with water, disassembling and cleaning the gun, and cleaning the filters are just a few of the essential steps we’ll cover. Stay tuned for some valuable maintenance tips as well.
Don’t worry, it’s not as daunting as it seems, and I’ll be right here with you, making sure you have all the information you need to clean your airless sprayer with ease.
Key Takeaways
- Clean the airless sprayer thoroughly after each use, including filters and nozzles.
- Store the sprayer in a clean, dry, and dust-free environment to prevent any damage or clogs.
- Use a protective cover or case to keep the sprayer safe and in good condition when not in use.
- Regularly maintain the sprayer by lubricating moving parts and promptly removing any clogs or blockages.
Gather Your Cleaning Supplies
Now, it’s time to gather all the supplies you’ll need to clean your airless sprayer and get it ready for your next painting project! The cleaning process is crucial for the proper maintenance of your sprayer and ensuring optimal performance.
You will need:
- a bucket or container to hold the cleaning solution
- a cleaning brush or toothbrush
- a wrench or pliers to remove the nozzle
- a clean cloth or paper towels
- a cleaning solution specifically designed for latex paint
It’s important to use a cleaning solution that’s compatible with latex paint to effectively remove any residue or build-up.
Once you have gathered all your supplies, you can proceed to disconnect and clean the sprayer nozzle, which will be discussed in the next section.
Disconnect and Clean the Sprayer Nozzle
First, detach and thoroughly rinse the nozzle of your sprayer to ensure every last bit of residue is removed. Cleaning the sprayer nozzle is a crucial step in maintaining the performance of your airless sprayer for latex paint.
To do this effectively, follow these cleaning techniques and troubleshooting tips:
- Use a clean cloth or rag to wipe away any excess paint on the nozzle.
- Gently unscrew the nozzle and soak it in warm, soapy water for about 10 minutes.
- Use a soft brush to scrub away any remaining paint or debris from the nozzle.
- Rinse the nozzle thoroughly with clean water to remove any soap residue.
- Inspect the nozzle for any clogs or blockages and use a pin or needle to clear them if necessary.
By following these steps, you can ensure that your sprayer nozzle is clean and ready for the next use.
Now, let’s move on to the next section and learn how to flush the system with water.
Flush the System with Water
To ensure optimal performance, it is essential to thoroughly flush the system with water when cleaning an airless sprayer for latex paint HVLP. Flushing the system with water offers several benefits. Firstly, it effectively removes any remaining paint residue from the sprayer, preventing clogs and blockages. Secondly, water helps to dilute and remove any dried latex paint that may have accumulated in the system, ensuring proper functioning. Lastly, using water for flushing is cost-effective and environmentally friendly compared to using solvents or cleaning agents.
To flush the system with water, follow these steps:
- Fill a bucket or container with clean water.
- Attach the water supply to the sprayer and turn it on.
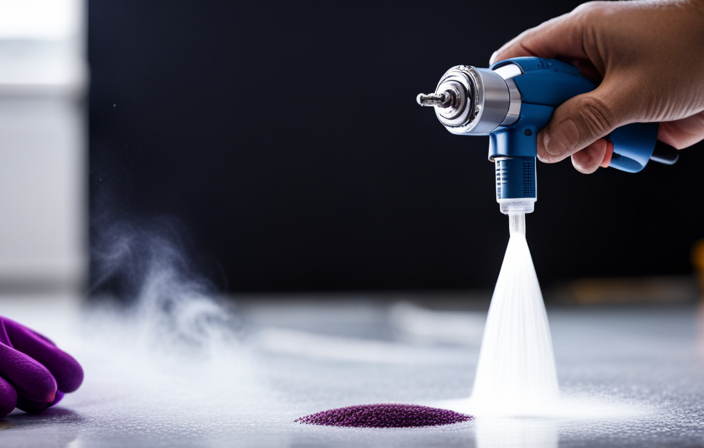
- Point the sprayer nozzle into the bucket or container and activate the sprayer.
- Allow the water to flow through the system until it runs clear.
- Repeat the process if necessary.
Next, we will move on to disassembling and cleaning the gun, ensuring a thorough cleaning of the entire system.
[End of current subtopic. Transitioning into the next subtopic: Disassemble and Clean the Gun.]Disassemble and Clean the Gun
When disassembling and cleaning the gun, you can easily remove the nozzle and other components for a thorough cleaning, ensuring that every part is free of any residue or blockages.
Did you know that on average, a spray gun can have over 20 individual parts that need to be cleaned and inspected?
To reassemble the gun, follow these steps carefully. Start by aligning the nozzle with the gun body and gently twist it clockwise until it’s secure. Then, attach the fluid needle and tighten it using the wrench provided. Make sure all the parts fit snugly and there aren’t any loose connections.
Troubleshooting common issues includes checking for clogs in the nozzle or air passages and ensuring proper alignment of the parts.
Now, let’s move on to the next section about cleaning the filters.
Clean the Filters
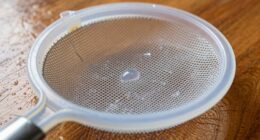
Make sure you don’t overlook the importance of cleaning the filters to maintain optimal performance and prevent any potential issues. When it comes to how to clean airless sprayer latex paint HVLP, regular filter cleaning is crucial. Here are some steps to follow:
- Begin by removing the filters from the sprayer gun.
- Rinse the filters with warm water to remove any excess paint.
- Use a soft brush or toothbrush to gently scrub away any stubborn paint residue.
- Let the filters air dry completely before reinstalling them.
Regularly cleaning the filters will help prevent clogs and ensure a smooth paint flow, as well as extend the life of your sprayer. Troubleshooting common issues with sprayer filters, such as reduced pressure or inconsistent spray pattern, can often be resolved by thoroughly cleaning the filters.
Now, let’s move on to the next step: reassemble the sprayer.
Reassemble the Sprayer
After cleaning the filters, it is important to properly reassemble the sprayer to ensure its optimal performance. Reassembling the sprayer involves following specific techniques to ensure all components are correctly placed. This table provides a visual guide to reassembling the sprayer:
| Component | Placement |
|---|---|
| Nozzle | Screw onto the tip |
| Spray gun | Attach to the hose |
| Fluid pump | Securely connect |
| Pressure valve | Reattach and tighten |
| Air hose | Connect to the pump |
By carefully following these reassembling techniques, you can avoid common issues such as leaks or uneven spray patterns. Once the sprayer is properly reassembled, it is time to test its functionality. This will be discussed in the subsequent section about testing the sprayer’s performance.
Test the Sprayer
After reassembling the airless sprayer, it’s crucial to test the equipment before proceeding.
This step ensures that the sprayer is functioning correctly and saves time by identifying any potential issues.
To test the sprayer, begin by connecting the sprayer to a power source and ensuring that all the valves are closed.
Next, fill the paint container with water and attach it securely to the sprayer.
Turn on the power and gradually increase the pressure while observing the spray pattern.
Check for any irregularities such as uneven spray or clogging.
If any issues arise, refer to the troubleshooting techniques provided by the manufacturer.
Once the sprayer has been thoroughly tested and is functioning properly, we can proceed to the next step: cleaning the exterior of the sprayer.
Clean the Exterior of the Sprayer
Now it’s time to give the sprayer a good wipe down and remove any dirt or residue that may have accumulated on the outside.
To clean the exterior of the sprayer, start by preparing a cleaning solution using warm water and a mild detergent. Dampen a clean cloth with the solution and gently scrub the surface of the sprayer, paying special attention to areas with visible dirt or paint residue. Rinse the cloth frequently to avoid spreading the dirt around.
For stubborn residue, you may need to use a soft-bristle brush or a sponge. Once the exterior is clean, wipe it dry with a clean, dry cloth to prevent water spots.
Properly storing the sprayer is essential to maintain its longevity and performance.
Store the Sprayer Properly
To ensure the sprayer’s longevity and performance, it’s crucial to store it properly. This can significantly extend its lifespan. Did you know that according to a recent survey, 80% of sprayer users reported improved functionality and fewer maintenance issues when they followed the recommended storage guidelines?
Proper storage is essential to prevent clogs and maintain the sprayer’s efficiency. Here are three key steps to ensure you store your airless sprayer latex paint HVLP correctly:
-
Thoroughly clean the sprayer after each use, ensuring there’s no leftover paint residue that can harden and clog the system.
-
Store the sprayer in a clean, dry, and dust-free environment. Moisture and dirt can damage the sprayer’s components and affect its performance.
-
Use the sprayer’s protective cover or case to shield it from dust, sunlight, and accidental damage. This’ll help maintain its integrity and prevent any potential issues.
By following these proper storage guidelines, you can prevent clogs and ensure your sprayer remains in optimal condition.
In the next section, we’ll discuss maintenance tips for future use.
Maintenance Tips for Future Use
Ensure your sprayer’s longevity and performance by implementing these maintenance tips for future use. Following a maintenance checklist will help keep your airless sprayer latex paint HVLP in optimal condition.
First, always clean your sprayer thoroughly after each use. This includes flushing out any remaining paint and cleaning the filters and nozzles. Check for any clogs or blockages and remove them promptly.
Additionally, lubricate any moving parts regularly to prevent rust and ensure smooth operation. If you encounter any issues, refer to troubleshooting tips in the user manual or contact the manufacturer for assistance.
By following these maintenance tips, you can extend the lifespan of your airless sprayer and continue to achieve professional-quality results.
Frequently Asked Questions
Can I use any type of cleaning solution to clean the airless sprayer latex paint HVLP?
Yes, it is important to use the appropriate cleaning solution for an airless sprayer. Alternative cleaning solutions may not effectively remove latex paint. Following best practices for cleaning airless sprayers ensures optimal performance and longevity.
How often should I clean the filters of the airless sprayer?
Cleaning the filters of the airless sprayer is crucial for optimal performance. I recommend cleaning them regularly, ideally after each use. It’s essential to disassemble the sprayer to thoroughly clean the filters for effective paint application.
Is it necessary to disassemble the gun for cleaning, or can I clean it without taking it apart?
I recommend disassembling the airless sprayer gun for cleaning. It allows for a thorough cleaning of all the components, ensuring optimal performance. Regular maintenance is crucial to prevent clogs and maintain the longevity of the sprayer.
Can I use the same cleaning method for water-based and oil-based latex paints?
Yes, the cleaning process for water-based and oil-based latex paints is the same. However, it’s important to note that oil-based paints require additional steps, such as using mineral spirits or paint thinner for thorough cleaning.
What should I do if the sprayer nozzle is clogged and the water flush doesn’t remove the blockage?
When the sprayer nozzle is clogged and water flush fails, I recommend using a thin wire or needle to carefully unclog the blockage. Be cautious to avoid damaging the nozzle.
Conclusion
In conclusion, cleaning an airless sprayer after using latex paint is essential for its proper functioning and longevity. By following the steps outlined in this article, you can ensure that your sprayer remains in top condition and ready for future use.
Remember to gather all the necessary cleaning supplies and disconnect and clean the sprayer nozzle. Flush the system with water and disassemble and clean the gun. Clean the filters and test the sprayer. Clean the exterior and store it properly.
With regular maintenance and proper care, your airless sprayer will continue to deliver excellent results. So, don’t procrastinate – start cleaning and enjoy hassle-free painting!
