Have you ever been frustrated by a clogged spray nozzle or a malfunctioning airless paint sprayer? Don’t worry anymore! In this article, I will guide you through the step-by-step process of disassembling an airless paint sprayer for cleaning and maintenance of its components.
By following these instructions, you’ll be able to keep your sprayer in peak condition and ensure smooth, even paint application every time.
To begin, gather the necessary tools and equipment, including a wrench, screwdriver, and cleaning solution.
Then, turn off and disconnect the power to the sprayer to ensure your safety.
Next, relieve pressure from the system by following a few simple steps.
Once the pressure is released, you can remove the spray tip and guard, disconnect the fluid hose and gun, and proceed to clean and maintain each component.
So, let’s dive in and learn how to disassemble an airless paint sprayer like a pro!
Key Takeaways
- Prepare the necessary tools and equipment, such as screwdrivers and an adjustable wrench, and wear appropriate safety gear before starting the disassembly process.
- Before disassembling the sprayer, make sure to turn off and disconnect the power, including the power cord and any hoses or extensions.
- Take precautions to relieve pressure from the system by turning off the sprayer, engaging the trigger lock, and pointing the spray gun away from yourself and others.
- Follow the proper steps to remove the spray tip and guard, disconnect the fluid hose and gun, disassemble the pump, and clean and maintain the components for optimal performance.
Gather the Necessary Tools and Equipment
Before you can start disassembling your airless paint sprayer, gather a few essential tools and equipment. Firstly, make sure you have a set of screwdrivers, including both Phillips and flathead. These will be needed to remove screws and detach various parts. Additionally, an adjustable wrench will come in handy for loosening and tightening nuts and bolts.
Safety precautions are important, so wear gloves and safety glasses to protect yourself from potential hazards.
In terms of equipment, you’ll need a clean and spacious work area where you can lay out all the parts and keep track of them.
Now that you have all the necessary tools and equipment, let’s move on to the next step of turning off and disconnecting the power.
Turn off and Disconnect the Power
Before disassembling the airless paint sprayer, it is important to turn off and disconnect the power. This step is crucial for your safety. To handle the equipment safely, follow these steps:
- Wear protective gloves and eyewear to protect yourself from paint splatters or chemical exposure.
- Place a drop cloth or tarp underneath the sprayer to catch any drips or spills.
- Use a wrench or pliers to disconnect the power cord from the electrical outlet.
- Additionally, disconnect any hoses or extensions connected to the sprayer.
By taking these precautions, you can avoid common troubleshooting issues and minimize the risk of accidents. Once the power is turned off and the machine is safely disconnected, you can move on to relieving pressure from the system.
Transitioning into the next section, let’s now focus on how to relieve pressure from the system.
Relieve Pressure from the System
To ensure safety, it is important to relieve the pressure from the system before proceeding with any maintenance tasks, as high pressure can lead to dangerous situations. Here are the steps to safely release the pressure and take necessary precautions before disassembling an airless paint sprayer:
| Steps to Safely Release Pressure | Precautions to Take Before Disassembling |
|---|---|
| 1. Turn off the sprayer and unplug it from the power source. | – Wear protective gloves and eyewear to prevent any potential injuries. |
| 2. Engage the trigger lock to prevent accidental spraying. | – Place a cloth or bucket underneath the sprayer to catch any residual paint. |
| 3. Point the spray gun away from yourself and others. | – Double-check that the sprayer is completely powered off before proceeding. |
By following these steps and taking the necessary precautions, you can safely release the pressure from the airless paint sprayer. Now, let’s move on to the next section and learn how to remove the spray tip and guard.
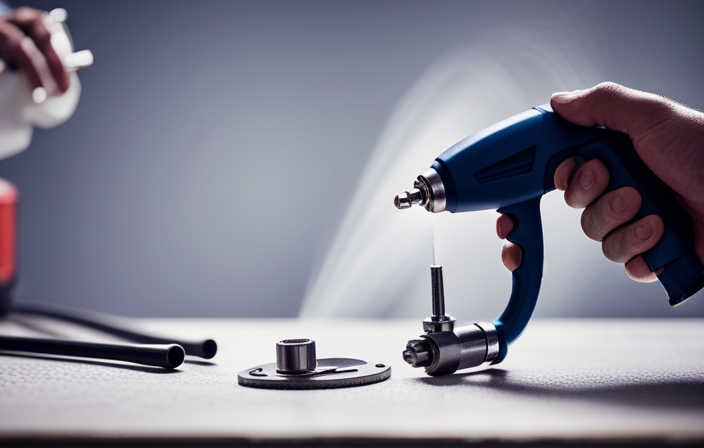
Remove the Spray Tip and Guard
To make it easier for you to handle the next steps, let’s dive into removing the spray tip and guard. Proper cleaning of the spray tip and guard is crucial to ensure optimal performance and prevent clogging.
Start by turning off the sprayer and relieving pressure as discussed in the previous section.
Next, hold the guard firmly and twist the spray tip counterclockwise to remove it from the gun. Inspect the tip and guard for any signs of wear or damage, such as cracks or build-up. If you notice any issues, it’s important to replace them before continuing. Common issues that may arise include a clogged tip or a damaged guard.
Once you have removed the spray tip and guard, you can move on to disconnecting the fluid hose and gun, as we will discuss in the next section.
Disconnect the Fluid Hose and Gun
Once you’ve successfully removed the spray tip and guard, the next step is disconnecting the fluid hose and gun. To ensure a smooth disassembly process, follow these step-by-step instructions:
- Begin by turning off the airless paint sprayer and releasing any pressure in the system. This is crucial for safety purposes.
- Locate the connection point where the fluid hose meets the gun. Depending on the model, this may involve unscrewing or releasing a clamp.
- Once the connection is visible, gently twist or pull to detach the fluid hose from the gun. Be cautious not to damage any components.
- With the fluid hose removed, it’s time to focus on cleaning the gun. Use a suitable cleaning solution and a brush to thoroughly remove any paint residue.
- Rinse the gun with water to remove any remaining cleaning solution, ensuring it is fully clean and ready for future use.
Now that the fluid hose and gun are disconnected and cleaned, we can move on to the next step of disassembling the pump.
Disassemble the Pump
After successfully disconnecting the fluid hose and gun, it’s time to break down the pump for cleaning. Here are the disassemble techniques and troubleshooting tips to guide you:
-
Remove the pump housing:
- Start by loosening the bolts holding the housing in place.
- Carefully lift the housing off the pump body, ensuring not to damage any internal components.
-
Disassemble the piston assembly:
- Unscrew the piston rod nut and remove the piston rod.
- Take out the piston assembly, consisting of the piston, piston seat, and seals.
- Inspect them for any signs of wear or damage.
-
Clean the components:
- Thoroughly clean all disassembled parts using a solvent and a brush.
- Pay close attention to removing any paint residue or debris from the piston and seals.
Once the pump is disassembled and cleaned, it’s crucial to clean and maintain the components to ensure optimal performance.
Clean and Maintain the Components
To ensure optimal performance, you should regularly clean and maintain the various components of the pump. This includes the piston assembly and seals. Cleaning techniques for these components may vary, but generally involve using a solvent or cleaner to remove any dirt or debris.
It is important to follow the manufacturer’s instructions when selecting a cleaner to avoid damaging the pump. Additionally, troubleshooting common issues, such as clogs or leaks, should be done during the cleaning process. This involves inspecting the components for any signs of damage or wear, and addressing any issues found.
By regularly cleaning and maintaining the pump, you can extend its lifespan and prevent problems down the line.
Now, let’s move on to reassembling the pump.
Reassemble the Pump
Now comes the fun part – putting all the components back together and getting your pump ready for action!
The reassembling process of the airless paint sprayer pump is crucial to ensure its proper functioning.
Start by carefully placing the piston rod back into the cylinder, making sure it is aligned correctly.
Next, reattach the pump housing and secure it tightly using the appropriate screws or bolts.
Don’t forget to reconnect any electrical connections that were removed during the disassembling process.
Once everything is in place, double-check all the connections and make sure they are secure.
If you encounter any issues during the reassembling process, refer to the troubleshooting tips provided by the manufacturer.
With the pump reassembled, we can now move on to reconnecting the fluid hose and gun, completing the setup of your airless paint sprayer.
Reconnect the Fluid Hose and Gun
Once the pump components are reassembled, it’s time to reconnect the fluid hose and gun and get ready to start painting again.
To reconnect the fluid hose, follow these steps:
- Locate the hose connection on the pump and ensure that it is clean and free from any debris.
- Insert the end of the fluid hose into the connection.
- Tighten the connection securely using a wrench.
Next, reconnect the gun by following these steps:
- Align the gun’s intake tube with the hose connection on the pump.
- Push the tube in until it clicks into place.
- Make sure it is firmly attached.
If you encounter any issues during the reconnection process, such as leaks or loose fittings, employ troubleshooting techniques such as checking for damaged O-rings, tightening connections, or replacing worn-out parts.
Once the fluid hose and gun are securely connected, we can move on to testing the sprayer for proper functioning.
Test the Sprayer for Proper Functioning
Make sure the pump components are properly connected and secured, then give the sprayer a test run to ensure it’s running smoothly like a well-oiled machine. To test the sprayer for proper functioning, follow these steps:
-
Check Pressure Levels: Start by ensuring that the pressure control knob is set to the desired level. Turn on the sprayer and observe the pressure gauge. It should register within the recommended range for optimal performance.
-
Troubleshoot Common Issues: If the sprayer is not working correctly, there may be some common issues to address. Check for clogged spray tips, loose fittings, or air leaks. Clean or replace any clogged components and tighten any loose connections.
To summarize, before using your airless paint sprayer, it’s crucial to test it for proper functioning. By checking pressure levels and troubleshooting common issues, you can ensure that your sprayer is ready to deliver a smooth and efficient painting experience.
Frequently Asked Questions
How do I choose the right size of spray tip for my airless paint sprayer?
To choose the right size spray tip for your airless paint sprayer, consider the type of material you’re spraying and the desired finish. Consult the manufacturer’s guidelines or use a spray tip sizing chart to determine the appropriate tip size for optimal performance and efficiency. Regular airless sprayer maintenance is crucial to ensure proper functioning and prolong the life of your equipment.
Can I use any type of paint with an airless paint sprayer?
To maintain the performance of an airless paint sprayer, it is important to choose the right paint. Consider factors like viscosity, solvent content, and compatibility with the sprayer’s materials. Follow the manufacturer’s guidelines for optimal results.
What should I do if my airless paint sprayer is not spraying evenly?
If my airless paint sprayer is not spraying evenly, I would follow these troubleshooting tips. First, check for common causes such as clogged nozzle or inadequate pressure. Clean or replace the nozzle and adjust the pressure accordingly.
How often should I clean and maintain the components of my airless paint sprayer?
I clean and maintain the components of my airless paint sprayer regularly. To ensure proper functioning, I clean it after every use, inspect and lubricate the parts, and replace any worn-out components as needed.
What safety precautions should I take when disassembling an airless paint sprayer?
Oh boy, disassembling an airless paint sprayer? Safety first, folks! Before you dive into the intricate world of airless paint sprayer disassembly, make sure to follow these essential safety precautions. Let’s get started!
Conclusion
In conclusion, disassembling an airless paint sprayer is a meticulous process that requires attention to detail and the use of specific tools. By following the step-by-step instructions and properly maintaining the components, you can ensure the longevity and efficient functioning of your sprayer.
Remember, it’s like unraveling the mysteries of a complex machine. Each step reveals the inner workings, allowing you to conquer any painting project with ease. So, go ahead and become a master of disassembly. Unleash your painting prowess!