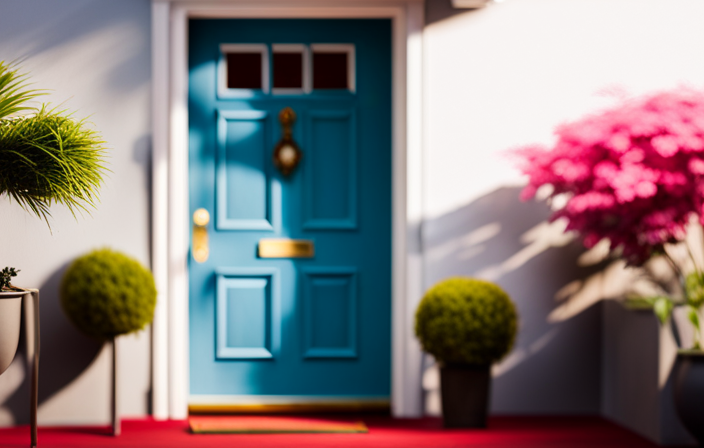
Were you aware that applying a new layer of paint to your front door could boost your home’s curb appeal by as much as 10%? Indeed, it’s a fact! Moreover, the greatest advantage is that you can attain a finish that looks done by a professional simply by employing an airless sprayer.
In this article, I will guide you through the step-by-step process of spray painting your front door with an airless sprayer, so you can transform the look of your home without breaking the bank.
We will start by preparing the front door for painting, ensuring a smooth and clean surface. Then, I will help you choose the right paint and equipment for the job. Setting up your workspace properly is crucial, so I’ll provide tips on that as well.
From priming the front door to dealing with drips and mistakes, I will cover every aspect of the painting process. And once you’re done, I’ll guide you on adding those finishing touches and properly disposing of materials.
Get ready to admire your newly painted front door and impress your neighbors with your DIY skills! Let’s get started.
Key Takeaways
- Painting your front door with an airless sprayer can increase curb appeal by up to 10% and achieve a professional-looking finish.
- Properly preparing the front door by removing old paint, sanding the surface, and ensuring a clean and smooth surface is crucial for paint adhesion.
- Choosing the right paint, such as a gloss or satin finish suitable for heavy traffic or harsh weather conditions, is important for durability and aesthetics.
- Setting up a well-organized workspace, protecting the floor, wearing protective gear, and using the right equipment are essential for a smooth and efficient painting process.
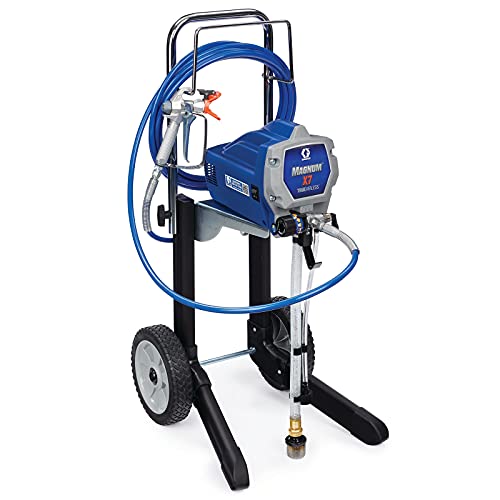
Graco Magnum 262805 X7 Cart Airless Paint Sprayer, Gray
CONTROL PAINT FLOW: Fully adjustable pressure to give you ultimate control of paint flow for any project size;...
As an affiliate, we earn on qualifying purchases.
Prepare the Front Door for Painting
Before you can start spraying paint onto your front door, you’ll need to take the necessary steps to prepare it for a flawless finish. Preparing the front door is crucial to ensure that the paint adheres properly and lasts for a long time.
The first step in this process is removing the old paint. Start by using a paint scraper to gently scrape off any loose or peeling paint. Then, sand the entire surface of the door to create a smooth and even base.
Make sure to remove any dust or debris by wiping the door down with a damp cloth. Once the door is clean and smooth, you can move on to choosing the right paint and equipment.

VEVOR Stand Airless Paint Sprayer, 650W, 3000PSI High Pressure Airless Sprayer with Cart, Cleaning Brush, Hose, Extension Rod, Nozzles, Electric Spray Paint Machine for House Exterior and Interior
Efficient Coating: The 650W motor, 0.31 GPM flow, and 3000 PSI pressure deliver spraying speeds 5x faster than...
As an affiliate, we earn on qualifying purchases.
Choose the Right Paint and Equipment
To ensure a smooth and professional-looking finish, it’s crucial to select the appropriate type of paint and the right equipment for the job. Using high-quality paint can increase the longevity of your door’s finish by up to 50%. When choosing paint for your front door, consider the following options:
-
Gloss finish: This type of paint provides a shiny, durable surface that is easy to clean and maintain. It is ideal for doors that are exposed to heavy traffic or harsh weather conditions.
-
Satin finish: This paint offers a subtle sheen and a smooth finish. It is a popular choice for front doors as it provides a sophisticated and elegant look.
When selecting an airless sprayer for your front door painting project, keep these tips in mind:
-
Look for a sprayer with adjustable pressure settings to ensure precise control over the paint flow.
-
Consider the size and weight of the sprayer, as it should be comfortable to hold and maneuver.
Now that you have chosen the right paint and equipment, it’s time to set up your workspace and prepare for the painting process.

VEVOR 750W Stand Airless Paint Sprayer, 3000PSI High Efficiency Electric Airless Sprayer, Fine and Even Painting Effect, Handheld Paint Sprayers for Home Interior and Exterior Furniture and Fences
Efficient Painting: Our stand airless paint sprayer is equipped with a powerful 750W motor, capable of delivering up...
As an affiliate, we earn on qualifying purchases.
Set Up Your Workspace
To set up your workspace for smooth and efficient painting, follow these steps:
-
Clear the area around your front door by removing any furniture or obstacles that could get in the way.
-
Cover the floor with drop cloths to protect it from paint splatters and spills.
-
Gather all the necessary tools and equipment, such as your airless sprayer, paint cans, and brushes, and arrange them in an easily accessible manner.
-
Take safety precautions by wearing protective goggles, a mask, and gloves to shield yourself from any potential harm.
With your workspace organized and safety measures in place, you’re ready to prime the front door and achieve a flawless finish.

Wagner Spraytech 2435698 Control Pro 130 Paint Sprayer with T2 Gun, High Efficiency Airless Sprayer with Low Overspray, Yellow
WAGNER AIRLESS PAINT SPRAYER: The Control Pro 130 Power Tank applies coatings 3X faster than a roller with...
As an affiliate, we earn on qualifying purchases.
Prime the Front Door
Now that your workspace is set up and ready, it’s time to prepare the front door for its stunning transformation. To achieve a smooth finish, there are a few tips you should keep in mind while priming the door. First, make sure to clean the door thoroughly to remove any dirt or grease. Next, sand the surface lightly to create a better bond for the primer. Use a high-quality primer specifically designed for the material of your door, such as wood or metal. Apply the primer evenly using the airless sprayer, keeping a consistent distance from the door. If you encounter any issues, such as drips or uneven coverage, troubleshoot by adjusting the sprayer settings or applying multiple thin coats. With these tips, your front door will be ready for the next step of the transformation: start painting.
Start Painting
I start by focusing on the panels and recessed areas of the front door. This allows me to ensure that these areas are properly covered and that the paint is evenly applied.
Once I have finished with the panels and recessed areas, I move on to the flat surfaces of the door. This step allows me to achieve a smooth and flawless finish on the front door.
Begin with the Panels and Recessed Areas
Start by tackling the panels and recessed areas, using an airless sprayer to effortlessly coat your front door with a fresh and vibrant layer of paint. When spraying, it’s important to use proper spraying techniques to achieve a smooth and even finish. Before starting, make sure you have all the necessary cleaning supplies to prepare the door surface, removing any dirt or grime that could affect the paint’s adhesion.
To begin, focus on the panels, which are the raised sections of the door. Hold the sprayer about 12 inches away from the surface and move it in a sweeping motion from side to side. Ensure that the paint is evenly distributed, covering the entire panel.
Next, move on to the recessed areas, such as the grooves or decorative patterns. Adjust the sprayer to a narrower spray pattern to effectively reach these areas. Hold the sprayer closer, around 8 inches away, and apply the paint in a controlled manner, making sure to get into all the nooks and crannies.
Now that the panels and recessed areas are complete, it’s time to move on to the flat surfaces of the door.
Move on to the Flat Surfaces
Move on to the flat surfaces of your entryway. Allow your brush to glide across the surface effortlessly, bringing new life to your front door. When tackling these areas, remember these tips for achieving a smooth finish. Use long, even strokes to avoid visible brush marks. Work in small sections, overlapping each stroke slightly to maintain a wet edge. This prevents drying lines and uneven coverage. Avoid applying too much paint at once to prevent drips and an uneven finish. Instead, apply thin coats and allow ample drying time between each layer. Following these tips will help you achieve a flawless front door makeover. Now, let’s discuss the importance of applying multiple coats for a professional-looking finish.
Apply Multiple Coats
To achieve a smooth and even finish, it’s essential to apply multiple coats of paint when using an airless sprayer. This ensures that the color is consistent and that any imperfections are covered.
Before starting, make sure you have proper ventilation in the area to avoid inhaling fumes. Additionally, choosing the right spray tip size is crucial for achieving the desired spray pattern and coverage. A smaller tip size is ideal for detailed work, while a larger tip size is better for larger areas.
Start by applying a thin and even coat of paint, allowing it to dry completely before applying the next coat. Repeat this process until you achieve the desired color and coverage.
Now, let’s move on to the next section where we’ll discuss how to deal with drips and mistakes.
Deal with Drips and Mistakes
Don’t panic if you encounter any drips or make mistakes while applying the coats; there are simple ways to fix them and achieve a flawless finish. Here’s what you can do:
-
Fixing paint drips: If you notice any drips or runs on your front door, don’t worry. Wait for the paint to dry completely, then gently sand the affected area with fine-grit sandpaper. Afterward, use a clean cloth to wipe away the dust and apply a thin coat of paint to blend it in seamlessly.
-
Blending in mistakes: If you accidentally make a mistake while painting, like creating an uneven line or smudging the paint, don’t fret. Wait for the paint to dry and carefully sand the area using a fine-grit sandpaper. Then, touch up the mistake with a small brush and a steady hand. Make sure to blend it in with the rest of the door to maintain a smooth finish.
To add the finishing touches to your front door, continue reading the next section on how to apply the final coat and protect your newly painted door.
Add Finishing Touches
Enhance the overall look of your front entrance by adding the final details to your freshly painted door.
Once the paint has dried, it’s time to touch up any imperfections and make sure the color is perfect. To do this, use touch up techniques such as lightly sanding any rough spots or using a small brush to fix any areas that need more paint.
When selecting a color for touch ups, it’s important to choose a shade that matches the existing paint as closely as possible. Take a small sample of the paint to a local hardware store and ask for assistance in finding the right color.
Once you’ve added the finishing touches, you can move on to properly disposing of any leftover paint and materials.
Properly Dispose of Materials
Make sure you dispose of any leftover materials properly to ensure a clean and environmentally friendly project. When it comes to paint disposal, there are several methods you can consider. It’s important to weigh the pros and cons of each option to make an eco-friendly choice. Here are a few options to consider:
| Method | Pros | Cons |
|---|---|---|
| Recycling | Reduces waste and conserves resources | Limited availability in some areas |
| Donating | Benefits others in need | Can be time-consuming to find recipients |
| Drying and Solidifying | Easier to dispose of in regular trash | Takes time for paint to fully dry |
| Hazardous Waste | Proper disposal of toxic materials | Requires special handling and disposal |
By properly disposing of your paint materials, you can ensure a cleaner and more sustainable environment. Now, let’s move on to the next section and admire your newly painted front door.
Admire Your Newly Painted Front Door
Take a moment to appreciate the transformation of your entrance as you gaze upon your freshly painted front door. It’s amazing how a simple coat of paint can enhance curb appeal and give your home a whole new look.
The first step in admiring your newly painted front door is choosing the perfect color. Consider the style of your home and the overall theme you want to achieve. From vibrant reds to calming blues, the options are endless.
Once you’ve chosen the color, take a step back and admire how it complements the rest of your exterior. Notice how the fresh paint brings out the architectural details and adds a touch of personality to your home.
Stand back and take it all in – your front door has never looked better.
Frequently Asked Questions
Can I use a regular paintbrush instead of an airless sprayer to paint my front door?
Using a paintbrush instead of an airless sprayer to paint a front door has pros and cons. The pros include more control and precision. However, it can take longer and may result in visible brush strokes.
How long does it take for the primer to dry before I can start painting?
Oh boy, you won’t believe how quickly the primer dries! It usually takes around 2-4 hours, but it’s best to wait overnight for it to fully dry. Now, let me explain how to properly prepare a front door for painting.
Can I paint my front door without removing it from its hinges?
Yes, you can paint your front door without removing it from its hinges. Here are some tips and tricks for painting a front door: clean and sand the surface, apply primer, choose the right paint, use a brush or roller, and allow sufficient drying time.
What type of paint is best for a front door?
The best type of paint for a front door depends on your preferences and needs. Different types, such as latex, oil-based, and enamel, each have their pros and cons. Let’s explore the options.
Can I paint my front door in a different color than the original one?
Yes, you can paint your front door in a different color than the original one. There are many options for changing front door color, and some of the best paint colors for front doors include bold and vibrant shades like red, blue, and yellow.
Conclusion
Well, there you have it, folks! You’ve learned all the ins and outs of spray painting your front door with an airless sprayer. It’s been an absolute blast, hasn’t it?
I mean, who doesn’t love spending hours prepping, priming, and meticulously painting a door? But hey, all jokes aside, now you can sit back and admire your newly painted front door.
Just remember, it’s all worth it in the end… or so they say.
Happy painting!