To use an airless paint sprayer for whitewashing, start by prepping your workspace with proper ventilation and drop cloths. Mix equal parts white latex paint and water for a smooth whitewash, adding an extender for even coverage. Select the right spray tip and set the pressure between 1500-2000 PSI. Maintain a distance of 12 to 18 inches from the surface, using an overlapping back-and-forth motion for even application. Allow the whitewash to soak in for 1 to 1.5 hours, then sand lightly for a smooth finish. Stick around for more tips to perfect your technique and achieve stunning results!
Key Takeaways
- Prepare your workspace with ventilation, protection, and cleanliness to ensure safety and better paint adhesion before starting the project.
- Mix equal parts of water and white latex paint for whitewash, adding an extender for even coverage and strain the mixture to remove lumps.
- Select an appropriate spray tip and adjust the pressure to around 1500-2000 PSI, testing on a scrap piece for even coverage.
- Maintain a consistent distance of 12 to 18 inches from the surface while using a back-and-forth motion for even application.
- Allow the whitewash to soak into wood for 1 to 1.5 hours for optimal absorption before sanding lightly for a smooth finish.

VEVOR 750W Stand Airless Paint Sprayer, 3000PSI High Efficiency Electric Airless Sprayer, Fine and Even Painting Effect, Handheld Paint Sprayers for Home Interior and Exterior Furniture and Fences
- Powerful Motor: 750W motor with 3000 PSI pressure
- Fast Coverage: Up to 5x faster than rolling
- Smooth Painting: Flow rate of 1.2 LPM for continuous work
As an affiliate, we earn on qualifying purchases.
As an affiliate, we earn on qualifying purchases.
Preparing Your Workspace
Preparing Your Workspace
To get started, choose a well-ventilated workspace that guarantees proper air circulation and safety while you use your airless paint sprayer. This will help minimize any harmful fumes and establish a comfortable environment for your project.
Additionally, consider using headphone extension cables to enhance your audio experience while working, as they can provide better sound quality without interference.
Next, lay down drop cloths or plastic sheeting to protect your floor and surrounding surfaces from overspray and drips during the whitewashing process.
Organize your tools and materials, including the airless paint sprayer, whitewash mixture, and any necessary brushes or wipes, for easy access and efficiency. Keeping everything in one spot will save you time and help you stay focused.
Before you begin, make sure the surface you're planning to whitewash is clean and free of dust or debris. A clean surface promotes better adhesion and results in a smoother finish.
Additionally, prepare a test area to practice your spraying technique. Adjust the pressure settings to achieve the desired thickness and coverage. This practice will help you feel more confident tackling larger surfaces and establish a successful project overall.
With everything set up, you're ready to begin your whitewashing adventure!
Mixing Whitewash and Extender

When mixing whitewash for your airless paint sprayer, you'll want to achieve a smooth consistency that guarantees perfect application. Start by combining equal parts of water and white latex paint in a bucket. This foundational mix allows for ideal spraying and guarantees that you can apply the whitewash evenly across large surfaces, making it an excellent choice for airless paint sprayer basics.
To enhance the whitewash mixture, consider adding an extender. This addition not only helps achieve an even coverage but also extends the working time of your paint.
For the best results, mix the whitewash and extender thoroughly, confirming no lumps remain. This step is essential to prevent clogging in your sprayer during application. The typical mixing ratio for whitewash and extender usually ranges from 4:1 to 8:1, depending on how opaque you want the finish.
Once you've mixed everything well, it's important to strain the mixture through a fine mesh filter. This final step removes any impurities that could obstruct the sprayer nozzle and guarantees a smooth flow when you start painting.
With your whitewash and extender mixed correctly, you'll be ready to achieve a beautiful, even finish on your project.
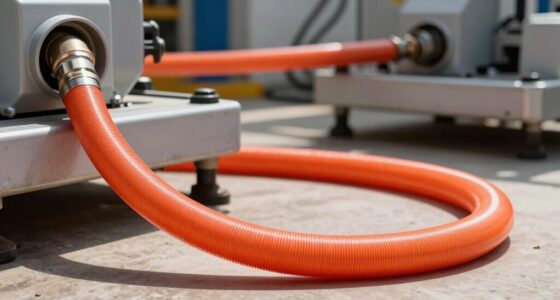
Setting Up the Airless Sprayer

After mixing your whitewash and extender, setting up your airless paint sprayer is the next step to confirm a successful application. Start by selecting an appropriate spray tip, typically between .015 to .019 inches, to guarantee ideal flow and coverage. It's crucial to prime the sprayer properly, using water or a thin mix of the whitewash to prevent clogging.
Next, adjust the pressure settings to around 1500-2000 PSI for a fine mist and even application. Before you begin on your project, always test the sprayer on a scrap piece of material. This helps you check for even coverage and allows you to adjust the spray pattern as needed.
Maintain a consistent distance of 12 to 18 inches from the surface while spraying to avoid drips or runs. Here's a quick reference table to help you with the setup:
| Step | Action |
|---|---|
| Select Spray Tip | .015 to .019 inches |
| Prime Sprayer | Use water or thin whitewash mix |
| Adjust Pressure | Set between 1500-2000 PSI |
With everything set, you're ready for a successful whitewashing project!
Application Techniques

When using an airless paint sprayer, mastering your spray application method is key to achieving a smooth finish.
Confirming that your workspace is well-ventilated is essential, especially if you're working with materials that release fumes.
You can adjust the thickness of your application by experimenting with spray speed and nozzle size, allowing for greater control over translucency or opacity.
Keeping a consistent distance from the surface will help you avoid drips and confirm an even coat.
Additionally, consider the importance of HVAC maintenance during your project to maintain comfortable working conditions.
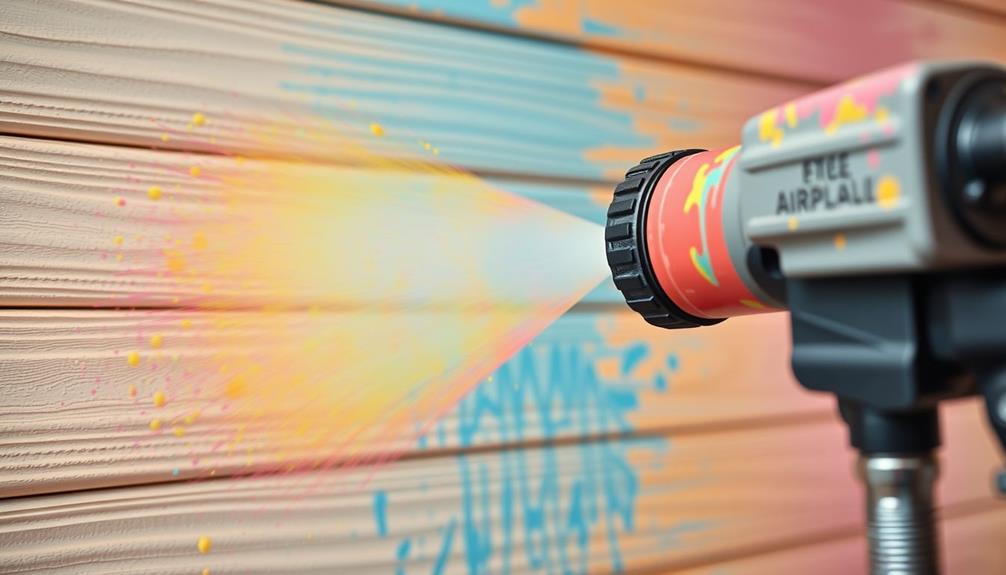
Spray Application Method
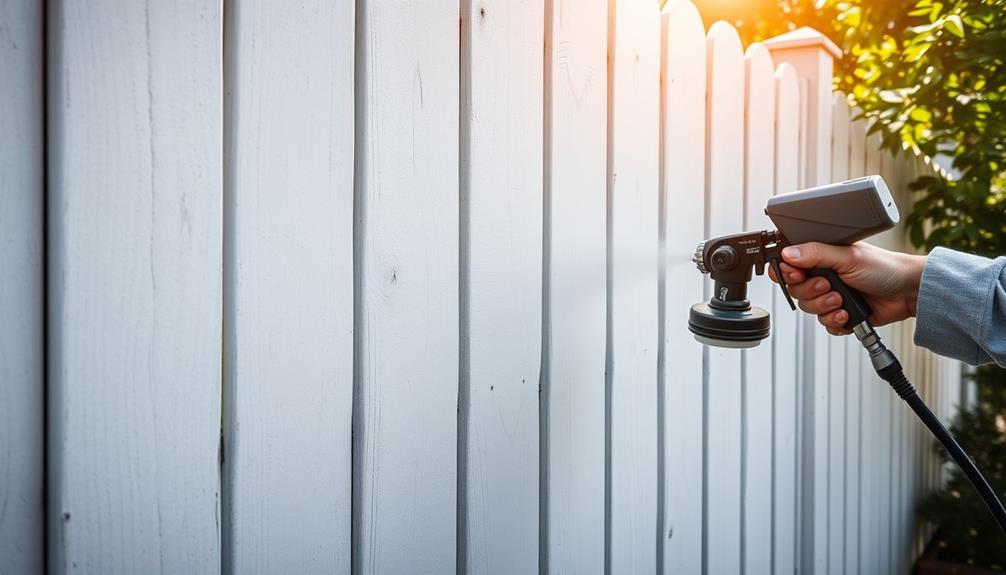
To achieve the best results with an airless paint sprayer, mastering the spray application method is essential. Start by ensuring your whitewash is thinned appropriately to avoid clogging the nozzle. Keeping a distance of 12 to 18 inches from the surface is vital; this helps you prevent drips and achieve a uniform application.
Use a back-and-forth motion while spraying, making sure each pass slightly overlaps the previous one for even coverage. Adjust the sprayer's pressure settings to control the flow—this allows you to create a lighter application for a translucent effect or a heavier one for an opaque finish.
Here's a quick reference table to help you remember these key points:
| Technique | Description | Tips |
|---|---|---|
| Distance | Maintain 12-18 inches from the surface | Prevents drips |
| Motion | Use a back-and-forth motion | Overlap passes for consistency |
| Pressure Adjustment | Control flow for desired application thickness | Lighter for translucency, heavier for opacity |
After spraying, let the whitewash soak for 1 to 1.5 hours for ideal absorption and finish quality.
Thickness Variation Techniques
Mastering thickness variation techniques is vital for achieving the desired finish with your airless paint sprayer.
To create a heavier whitewash application, adjust the nozzle size and increase the spray pressure. This will provide a more opaque finish that covers better. Conversely, if you're aiming for a lighter, more translucent effect, opt for a smaller nozzle and decrease the spray pressure. This allows for finer misting, giving you that delicate look.
Additionally, using quality tools can enhance your painting experience, similar to how selecting the right garage door openers improves home security.
Another important factor is the distance from the surface while spraying. Holding the sprayer closer will yield thicker layers, whereas spraying from further away will result in lighter coverage.
Remember to overlap your spray patterns by 50% to guarantee even coverage, particularly when applying multiple thin coats for a layered effect. This overlap helps blend the shifts seamlessly.
Soaking Time for Absorption
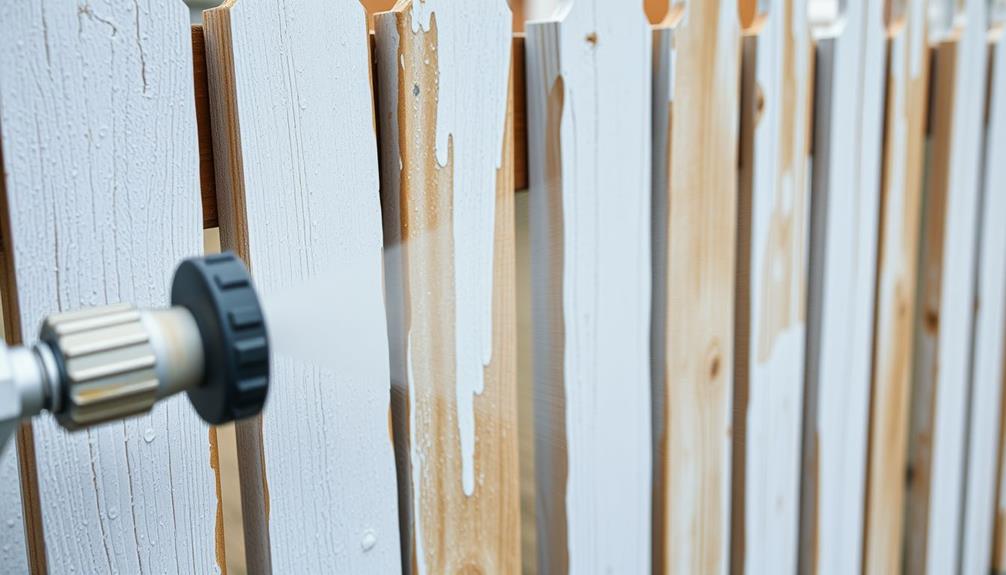
Achieving the best results with your whitewash involves allowing it to soak into the wood for 1 to 1.5 hours. This soaking time is vital for ideal absorption, as it enables the whitewash to penetrate the wood fibers effectively.
To guarantee a successful application, consider using a well-prepared surface that has been cleaned and lightly sanded, as this can enhance the absorption process and prevent uneven spots, similar to how well-draining soil is essential for plant health. The longer you let it soak, the deeper the coloration can become, enhancing the translucency of the finish.
During this period, the whitewash integrates with the wood, which promotes a more durable and even appearance. By confirming the wood is adequately soaked, you help prevent uneven spots and achieve a consistent look across the entire surface. Skipping this step can lead to unsatisfactory results, so it's worth the wait.
After the soaking period, you won't need to wipe off any excess. This allows the whitewash to fully meld with the wood, creating a unique finish that highlights the natural beauty of the material.
Drying the Whitewash

After applying your whitewash, you'll need to let it dry completely before sanding.
The drying time can vary based on environmental factors, such as humidity and temperature, so keep an eye out for signs that it's ready.
For ideal results, make sure that the area is well-ventilated to facilitate the drying process and reduce moisture levels, similar to proper disposal methods that can prevent plumbing issues.
Once it feels dry to the touch, you can move on to the smoothing process for the best finish.
Optimal Drying Time
How long should you wait for your whitewash to dry before moving on to the next steps? It's vital to let your whitewash soak into the surface for about 1 to 1.5 hours to guarantee peak absorption. After that, it's important to monitor the drying process. You'll want to confirm the whitewash is completely dry before you think about sanding the surface.
Here's a quick reference table to help you understand the key timings:
| Step | Time Needed |
|---|---|
| Initial Soaking | 1 to 1.5 hours |
| Drying Period | Varies (monitor) |
| Sanding with 220 Grit | After complete drying |
| Ready for Use | Immediately after sanding |
| Final Appearance Check | Post-sanding |
Keep in mind that environmental conditions, like temperature and humidity, can affect drying times. Once the whitewash is dry, a light sanding with 220-grit sandpaper will knock down any raised fibers, enhancing the final look. If you've applied the whitewash correctly and allowed sufficient drying time, the final product will be ready for use right after sanding!
Factors Affecting Drying
Once your whitewash has soaked in and begun drying, several factors come into play that can impact the drying time. Generally, you can expect the drying time to range from 1 to 1.5 hours, but this may vary based on conditions in your environment.
Proper air quality can aid in drying, as air purifiers improve indoor air quality by reducing humidity levels and preventing allergens from affecting the application process.
Here are three key factors to take into account:
- Humidity: High humidity levels can greatly prolong drying time. If it's particularly humid, be prepared for your whitewash to take longer to dry completely.
- Temperature: Warmer temperatures usually expedite the drying process. If you're working in a cooler environment, think about using a heater to help speed things up.
- Application Thickness: The thickness of your whitewash application also plays a role. Heavier applications will take longer to dry, so aim for a consistent, even coat to minimize drying time.
Signs of Complete Drying
To determine if your whitewash has completely dried, look for a uniform appearance free of wet spots or tackiness. This usually takes about 1 to 1.5 hours after application.
However, keep in mind that drying time can vary based on environmental factors like temperature and humidity, so it's vital to monitor these conditions closely for the best results. Additionally, confirming a clean application surface before starting can enhance the overall finish, similar to how essential items for a home cleaning kit contribute to effective cleaning.
To further check for dryness, lightly touch the surface. If it feels dry and no residue comes off on your fingers, it's likely ready for the next steps, such as sanding.
But hold off on sanding until the whitewash has fully dried, as premature sanding can create a rough texture rather than a smooth finish.
After you confirm that it's dry, wait at least 24 hours for the whitewash to cure completely. This waiting period is important before applying any additional coats or finishes, as it prevents any disruption to the drying process.
Sanding for a Smooth Finish

Achieving a smooth finish after applying whitewash is essential for a professional look. Once your whitewash is completely dry, it's time to sand for that refined appearance.
Use 220 grit sandpaper, as it effectively knocks down any raised fibers while guaranteeing a smooth surface. Sanding not only enhances the texture but also improves the overall finish of the wood, similar to the care needed for maintaining indoor plants like the best soil for String of Hearts plants.
To get the best results, follow these steps:
- Sand Uniformly: Verify you sand evenly across the entire surface. This maintains consistency in the finish and prevents any patchiness.
- Adjust for Desired Smoothness: The level of sanding can be tailored to your preference. If you want a smoother finish, you may need to sand a bit more, while a lighter touch can keep some character in the wood.
- Inspect Regularly: Periodically check your progress to verify you're achieving the desired look without over-sanding.
Adjusting Application Thickness

After you've sanded the surface for a smooth finish, it's time to focus on the application thickness with your airless paint sprayer. To achieve a heavier application, crank up the pressure setting. This allows more product to flow, resulting in a richer, more opaque finish.
If you want a lighter, more translucent effect, reduce the pressure for a finer mist that promotes better absorption and minimizes buildup. Utilizing a Graco FFLP Fine Finish Low Pressure Reversible Tip can enhance your control over the spray, leading to perfect finishes.
Experimenting with the distance between the sprayer nozzle and the surface is essential. Keeping the nozzle closer will yield a thicker coat, while moving it farther away creates a lighter layer of whitewash.
Additionally, vary your spraying motion speed. Moving more slowly lets you apply a thicker layer, while a quicker motion helps achieve that airy, transparent finish.
Before you commit to your final surface, always test your desired thickness on a scrap piece of plywood. This way, you can fine-tune the pressure and distance to get exactly the look you want.
Adjusting the application thickness effectively will guarantee that your whitewashing project turns out just right!
Final Touches and Customization
Once you've applied your whitewash and allowed it to soak in, it's time to focus on the final touches and customization of your project. This stage is essential for achieving that perfect look you envision.
Here are three key steps to enhance your finish:
- Experiment with Thickness: Try different application thicknesses to find your desired opacity. Heavier applications create a more opaque finish, while lighter ones yield a translucent effect. You can also draw inspiration from breathtaking destinations that feature similar aesthetic techniques.
- Sanding for Smoothness: After the whitewash has completely dried, usually 1 to 1.5 hours, sand the surface with 220 grit sandpaper. This will knock down any raised fibers and guarantee a smooth, polished surface.
- Adjusting Sprayer Settings: Customize your final appearance by tweaking the pressure and technique of your airless sprayer. This allows for creative expression, giving you control over the texture and finish.
Keep in mind that the drying and sanding periods require time, influencing your overall project timeline.
Frequently Asked Questions
Can I White Wash With a Sprayer?
Yes, you can whitewash with a sprayer! It enables even coverage and quick application. Just remember to thin your mixture slightly, adjust the nozzle, and let it absorb properly for the best results.
Do You Dilute Paint When Using an Airless Sprayer?
When you're in the thick of it, yes, you should dilute paint when using an airless sprayer. It helps prevent clogging and guarantees a smoother application, so your project turns out beautifully.
Can You Use a Paint Sprayer for Limewash?
Yes, you can use a paint sprayer for limewash. Just make sure to thin it with water for proper consistency, use a fine tip nozzle, and maintain a consistent distance for an even application.
Can You Whitewash Brick With a Sprayer?
Yes, you can whitewash brick with a sprayer. Just make certain to dilute your mixture properly, choose the right spray tip, and guarantee your brick surface is clean and dry before starting.
Conclusion
To sum up, using an airless paint sprayer for whitewashing can transform your space with ease and precision. Imagine giving an old wooden fence a fresh, weathered look in just a few hours. By following the steps outlined, you'll achieve a beautiful, even finish that enhances the charm of your outdoor area. Remember, a little practice goes a long way, so don't hesitate to experiment with different techniques to find what works best for you!