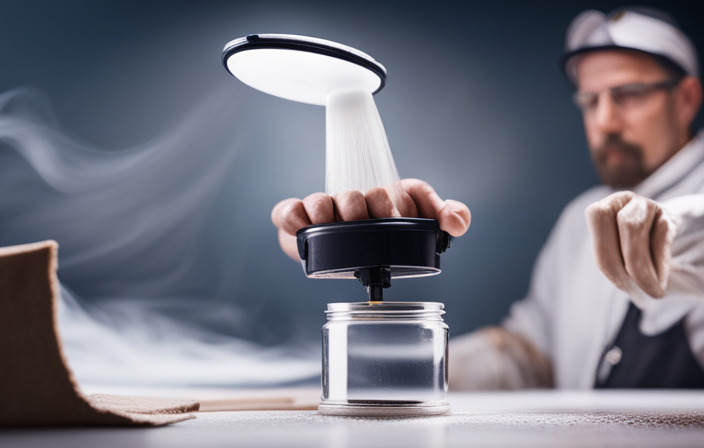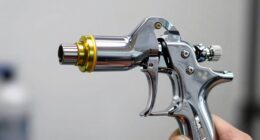
As a painting expert, I have always appreciated the precision and efficiency that airless sprayers bring to my projects. A common question that arises is how much paint is needed when using an airless sprayer – is it more or less? I am here to share my expertise and insights on this matter.
Imagine you are embarking on a painting project, armed with your trusty airless sprayer. The sprayer is like a magician’s wand, effortlessly transforming surfaces with a smooth and even coat of paint. But here’s the thing: with the power and efficiency of an airless sprayer, you actually need less paint compared to traditional methods.
In this article, we will delve into the functionality of airless sprayers, explore the factors that affect paint usage, and discuss how to determine the right amount of paint.
I will also provide tips for efficient paint application and highlight the benefits of using less paint with airless sprayers.
So, join me on this journey as we unlock the secrets to optimizing paint usage with airless sprayers.
Key Takeaways
- Airless sprayers use only the necessary amount of paint, reducing wastage.
- The high-pressure system of airless sprayers atomizes paint for better coverage with less paint.
- Less paint is needed when using an airless sprayer, resulting in faster completion of projects.
- Using an airless sprayer reduces interruptions for refilling and minimizes waste going into the environment.
Understanding the Functionality of Airless Sprayers
Using an airless sprayer allows me to apply paint more efficiently, saving me time and effort. The functionality of airless sprayers is quite straightforward.
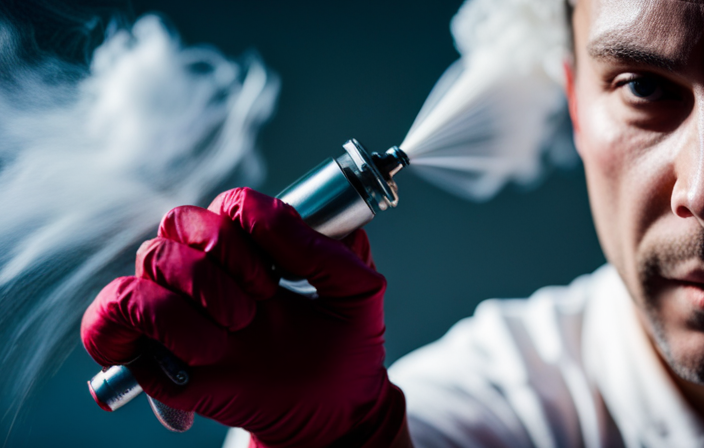
The sprayer pumps paint at high pressure through a small opening, creating a fine mist that evenly coats surfaces. This method eliminates the need for compressed air, making it more efficient than traditional spray guns.
However, there are some factors that can affect the efficiency of an airless sprayer. For example, the viscosity of the paint can impact how well it sprays. Additionally, clogged spray tips or worn-out seals can cause issues and reduce the effectiveness of the sprayer.
Understanding these factors and troubleshooting common issues can help ensure optimal performance.
Now, let’s explore the factors affecting paint usage with airless sprayers.
Factors Affecting Paint Usage with Airless Sprayers
When operating an airless sprayer, the amount of paint required can vary depending on several factors. Factors affecting paint thickness include the viscosity of the paint, the pressure at which the sprayer is set, and the speed at which the sprayer is moved.
Thicker paint will require more paint to achieve the desired coverage, while thinner paint will require less. Additionally, the size of the nozzle used in the sprayer can also impact paint usage. A smaller nozzle size will result in a finer spray pattern, requiring less paint, while a larger nozzle size will result in a wider spray pattern, requiring more paint.
Therefore, it is important to consider these factors when calculating the amount of paint needed for a project. Proper preparation for airless spraying involves ensuring a clean surface, removing any loose or flaking paint, and masking off areas that should not be painted.
Proper Preparation for Airless Spraying
When it comes to proper preparation for airless spraying, two key points to consider are surface cleaning and primer application. It’s crucial to ensure that the surface is thoroughly cleaned and free of any dirt, debris, or loose paint before applying the primer. This will ensure a smooth and even finish.
Additionally, masking and protecting the surrounding areas, such as windows, doors, and fixtures, will prevent any overspray and ensure a neat and professional result.
Surface Cleaning and Primer Application
To really make your surface shine, you’ll need a primer that’s as essential as a cup of coffee in the morning – it wakes up your surface and prepares it for the main event. Proper surface preparation is crucial before applying the primer. This includes cleaning the surface thoroughly to remove any dirt, dust, or grease. A clean surface ensures better adhesion and a smoother finish.
Once the surface is clean, it’s time to select the right primer. The primer acts as a foundation for the paint, providing a smooth and even base. It helps to hide imperfections, seals porous surfaces, and enhances the durability of the paint. The type of primer you choose will depend on the surface material and the type of paint you intend to use.
With the surface cleaned and the primer applied, you’re ready to move on to the next step of masking and protecting surrounding areas.
Masking and Protecting Surrounding Areas
Don’t forget to mask and protect surrounding areas to keep your project looking professional and avoid any accidental paint splatters. To minimize overspray and ensure clean edges, it’s crucial to choose the right masking materials.
Here are three key points to consider:
-
Use high-quality painter’s tape: This’ll help create crisp lines and prevent paint from bleeding through.
-
Cover large areas with plastic sheeting: Protect floors, furniture, and fixtures by covering them with plastic sheeting. This’ll catch any paint overspray and prevent damage.
-
Consider using drop cloths: Drop cloths are ideal for protecting smaller areas or furniture that can’t be easily covered with plastic. They provide an additional layer of protection against paint splatters.
By taking these precautions, you can achieve a clean and professional finish.
Now, let’s move on to determining the right amount of paint for your project.
Determining the Right Amount of Paint
When determining the right amount of paint to use, I always calculate the coverage rate to ensure I have enough paint to cover the desired area.
This involves measuring the square footage to be painted and then consulting the manufacturer’s instructions to determine the coverage rate per gallon.
Additionally, I make sure to adjust for overspray and wastage, as these factors can significantly impact the amount of paint needed for a project.
By taking these factors into account, I can ensure an efficient and cost-effective use of paint during airless spraying.
Calculating Coverage Rate
Calculating the coverage rate allows me to determine how much paint I’ll need when using an airless sprayer. Here are four key factors to consider when calculating efficiency and minimizing wastage:
-
Surface area: Measure the total area that needs to be painted, including walls, ceilings, and any other surfaces. This will help determine the amount of paint needed.
-
Paint type: Different paint types have different coverage rates. Check the manufacturer’s instructions to determine the coverage rate per gallon or liter for the specific paint you’re using.
-
Sprayer output: The sprayer’s output rate, measured in gallons per minute (GPM), determines how quickly the paint is applied. Knowing the sprayer’s output allows for more accurate calculations.
-
Overlapping strokes: When using an airless sprayer, overlapping strokes are necessary for an even coat. Account for this overlap when calculating the coverage rate.
Calculating the coverage rate helps me estimate the amount of paint required, but it’s important to also adjust for overspray and wastage.
Adjusting for Overspray and Wastage
To ensure optimal paint usage, it’s essential to factor in the potential for overspray and wastage when using an airless sprayer. Overspray occurs when the paint particles go beyond the intended surface, resulting in unnecessary paint wastage. Minimizing wastage is crucial not only to save on costs but also to reduce environmental impact.
Adjusting for overspray can be done by adjusting the spray pattern, reducing the pressure, or using additional masking materials to protect surrounding areas. It’s important to be precise and experienced when making these adjustments, as too much overspray can lead to uneven coverage and wasted paint.
By taking these measures, we can ensure efficient paint application and minimize unnecessary wastage. Now, let’s move on to some tips for efficient paint application.
Tips for Efficient Paint Application
When it comes to efficient paint application with an airless sprayer, two key points to keep in mind are maintaining a consistent spraying motion and overlapping sprays for even coverage.
By keeping a steady and fluid motion while spraying, you can ensure a smooth and consistent finish without any streaks or uneven patches.
Additionally, overlapping each spray pass will help to avoid any missed areas and create a more uniform coat of paint.
These techniques have proven to be effective in my years of experience, resulting in professional-looking results every time.
Maintaining a Consistent Spraying Motion
As you’re gliding the airless sprayer back and forth, make sure to keep a smooth, rhythmic motion to ensure an even coat of paint. Maintaining a consistent spraying speed is crucial in achieving optimal results.
By moving too quickly, you risk uneven coverage and may end up with thin spots. Conversely, if you move too slowly, you could create drips or a buildup of paint in certain areas. It’s important to find the right balance and maintain a steady pace throughout the application process. This will help you achieve a professional finish and avoid any inconsistencies in the paint job.
Now, let’s transition to the next section about overlapping sprays for even coverage.
Overlapping Sprays for Even Coverage
Achieving a professional finish requires maintaining a consistent spraying motion, which includes overlapping sprays for even coverage. Overlapping techniques are essential to ensure a uniform coat of paint. By applying each spray slightly overlapping the previous one, you can eliminate any streaks or unevenness in the finish. This technique ensures that every inch of the surface is coated evenly and provides a seamless appearance. To visualize the importance of overlapping sprays, imagine a beautiful masterpiece being painted stroke by stroke, layering colors to create depth and richness. Just like an artist, an airless sprayer operator must use overlapping sprays to achieve the desired result. By mastering this technique, you can create a flawless finish that will impress even the most discerning eyes. Transitioning into the subsequent section about monitoring and adjusting paint usage, it is crucial to understand the impact of overlapping sprays on the amount of paint used.
Monitoring and Adjusting Paint Usage
You’ll be amazed at how much less paint you’ll need when you switch to using an airless sprayer. Not only does this efficient tool provide even coverage, but it also helps minimize paint waste and overspray.
Here are three ways airless sprayers allow you to monitor and adjust paint usage:
-
Precise control: With an airless sprayer, you have the ability to adjust the pressure and flow rate, allowing for more accurate paint application. This ensures that you only use the necessary amount of paint without any excess.
-
Reduced overspray: Unlike traditional paint sprayers, airless sprayers produce a fine mist, which greatly reduces overspray. This means that more paint is being directed onto the surface, resulting in less wasted paint and more efficient coverage.
-
Faster application: Airless sprayers allow for quicker and more efficient paint application, saving you time and reducing the amount of paint needed for a project.
By using an airless sprayer, not only will you achieve a professional finish, but you’ll also benefit from using less paint. This not only saves you money but also reduces environmental impact.
Benefits of Using Less Paint with Airless Sprayers
Save time and money while achieving a professional finish by embracing the efficiency of an airless sprayer and reducing your environmental impact. When using an airless sprayer, you can significantly reduce paint wastage, maximizing your efficiency.
The high-pressure system atomizes the paint into tiny particles, allowing for better coverage with less paint. This means you can complete your projects faster and with fewer interruptions for refilling. Not only does this save you time, but it also saves you money by reducing the amount of paint you need to purchase.
Additionally, using less paint means less waste going into the environment, making airless sprayers a more sustainable choice. By embracing this technology, you can achieve professional results while reducing wastage and maximizing efficiency.
Moving on to potential challenges and solutions…
Potential Challenges and Solutions
Overcoming potential challenges is key to maximizing the efficiency and effectiveness of your painting projects with an airless sprayer. When using an airless sprayer, there are a few challenges that you may encounter, but fear not! There are solutions to help you overcome them:
-
Clogging: One challenge you may face is the clogging of the spray tip. To prevent this, make sure to strain your paint before pouring it into the sprayer and clean the tip regularly.
-
Overspray: Another challenge is dealing with overspray, which can lead to wasted paint and a messy work area. To minimize overspray, adjust the pressure settings on your sprayer and use masking tape to protect surrounding surfaces.
-
Uneven coverage: Achieving consistent and even coverage can be a challenge, but using the correct technique, such as overlapping strokes and maintaining the right distance from the surface, can help you overcome this obstacle.
-
Drying time: Airless sprayers can apply paint at a faster rate, which may result in quicker drying times. To avoid dried paint on the tip, regularly check and clean it during your painting project.
-
Noise and vibrations: Airless sprayers can be noisy and cause vibrations, which can be tiresome during long painting sessions. Wearing ear protection and taking regular breaks can help mitigate this challenge.
By understanding and addressing these challenges, you can ensure a smoother painting process with your airless sprayer.
Now, let’s transition to the subsequent section about the cleaning and maintenance of airless sprayers.
Cleaning and Maintenance of Airless Sprayers
To keep your airless sprayer in optimal condition, it’s essential to properly clean and maintain it after each use.
Cleaning equipment is a crucial part of this process. Make sure to thoroughly clean the sprayer by flushing it with water or an appropriate cleaning solution. Pay close attention to the nozzle, filters, and hoses, as they tend to accumulate paint residue.
Regularly inspect and replace any worn-out or damaged parts to prevent any potential issues. Troubleshooting issues may arise, such as clogged nozzles or uneven spray patterns. In such cases, refer to the manufacturer’s instructions or consult a professional for guidance.
Taking the time to clean and maintain your airless sprayer will ensure its longevity and efficient performance.
Transitioning into the subsequent section, optimizing paint usage with airless sprayers, we can now explore the benefits of using this equipment.
Conclusion: Optimizing Paint Usage with Airless Sprayers
In conclusion, by properly maintaining and cleaning your airless sprayer, you can ensure its longevity and maximize the efficiency of your paint application. Optimizing paint efficiency and reducing material waste are key goals when using an airless sprayer.
Regularly cleaning the sprayer after each use is essential to prevent clogs and maintain a smooth paint flow. Additionally, regularly inspecting and replacing worn-out parts such as filters and nozzles can help ensure consistent and even paint coverage. Adjusting the pressure settings on the sprayer can also help optimize paint usage by allowing for better control and reducing overspray.
By taking these steps, you can minimize paint waste and achieve the desired results with less paint, ultimately saving time, money, and resources.
Frequently Asked Questions
What are the advantages of using an airless sprayer over traditional painting methods?
Using an airless sprayer has numerous advantages over traditional methods. It allows for faster and more efficient painting, provides a smooth and even finish, and eliminates the need for brushes or rollers.
Are there any specific types of paint that work better with airless sprayers?
When using an airless sprayer, certain types of paint work better than others. It is important to choose a paint that is specifically designed for airless sprayer techniques to achieve optimal results.
Can airless sprayers be used for both interior and exterior painting projects?
Yes, airless sprayers can be used for both interior and exterior painting projects. However, there are some differences to consider. Interior painting with an airless sprayer provides a faster and more efficient process, while exterior painting requires more preparation and attention to weather conditions.
How do I properly clean and maintain my airless sprayer to ensure optimal performance?
To properly clean and maintain my airless sprayer for optimal performance, I follow these maintenance tips: regularly flush the system with solvent, clean the filters, inspect the hoses, and lubricate moving parts. Regular maintenance is crucial for airless sprayers to ensure their longevity and efficiency.
Are there any safety precautions I should take when using an airless sprayer?
Safety precautions and best practices are crucial when operating an airless sprayer. As an experienced user, I emphasize the importance of wearing protective gear, ensuring proper ventilation, and following manufacturer guidelines. Your safety is paramount.
Conclusion
In conclusion, after exploring the functionality of airless sprayers and understanding the factors that affect paint usage, it’s clear that using less paint with these sprayers is not only possible, but also beneficial. By properly preparing for airless spraying and determining the right amount of paint, one can achieve efficient and precise paint application.
While there may be challenges along the way, regular cleaning and maintenance of airless sprayers can ensure their longevity and continued optimal performance. So, remember, when it comes to airless spraying, less is definitely more.