Picture revitalizing your T111 siding from a tired, aged look to a lively and refreshed exterior. With the correct methods and tools, using an airless sprayer to paint your T111 siding can completely transform its appearance. In this tutorial, I will walk you through a detailed process to achieve a professionally finished result.
First, we will discuss how to prepare the surface for painting, ensuring a smooth and long-lasting finish.
Then, I will help you choose the right paint and equipment, maximizing efficiency and minimizing waste.
Next, we will tackle the crucial step of preparing the paint for spraying, ensuring proper consistency for optimal coverage.
Once the preparation is complete, I will walk you through the correct spraying technique, ensuring even application and avoiding common pitfalls.
After you get comfortable with the spraying technique, we will dive into the actual painting process, taking you through each step until your T111 siding is beautifully coated.
So, let’s get started and give your T111 siding a stunning makeover!
Key Takeaways
- Visually inspect from different angles and use a light source to check for missed spots or uneven areas
- Inspect vertical panels for uneven paint or missed spots, and touch up trim and edges with a small brush
- Check horizontal seams for incomplete coverage or drips, and smooth out drips and apply more paint if needed
- Clean and maintain your sprayer regularly by flushing it with a cleaning solution, inspecting and cleaning filters, and lubricating moving parts
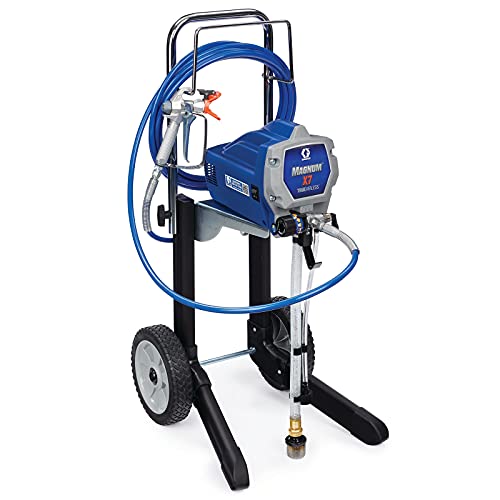
Graco Magnum 262805 X7 Cart Airless Paint Sprayer, Gray
CONTROL PAINT FLOW: Fully adjustable pressure to give you ultimate control of paint flow for any project size;...
As an affiliate, we earn on qualifying purchases.
Prepare the Surface for Painting
Before you start painting, make sure to thoroughly clean and sand the T111 siding to ensure a smooth and flawless finish. Surface preparation is crucial for achieving professional results.
Begin by removing any dirt, dust, or loose debris from the siding using a stiff brush or pressure washer.
Next, inspect the surface for any cracks, peeling paint, or damaged areas. Repair and sand these imperfections before moving forward.
It’s also important to prime the T111 siding before painting. Applying a primer will help the paint adhere better and provide a more even finish. There are various priming techniques you can use, such as using a roller or brush, or even spraying it on with an airless sprayer.
Now that you’ve prepared the surface, let’s move on to choosing the right paint and equipment for the job.

Wagner Spraytech 2435698 Control Pro 130 Paint Sprayer with T2 Gun, High Efficiency Airless Sprayer with Low Overspray, Yellow
WAGNER AIRLESS PAINT SPRAYER: The Control Pro 130 Power Tank applies coatings 3X faster than a roller with...
As an affiliate, we earn on qualifying purchases.
Choose the Right Paint and Equipment
To achieve a flawless finish, it’s important to choose the right paint and equipment. First, consider the type of paint sprayer you’ll be using. Look for an airless sprayer that has adjustable pressure settings and a wide spray pattern. This will ensure even coverage on your surface.
Next, it’s crucial to understand paint viscosity. Thin paint is best for spraying, so it’s important to check the recommendations on the paint can. If needed, you can adjust the viscosity of the paint to ensure smooth spraying.
Now that you have the right paint and equipment, let’s move on to the next step: preparing the paint for spraying.

VEVOR 750W Stand Airless Paint Sprayer, 3000PSI High Efficiency Electric Airless Sprayer, Fine and Even Painting Effect, Handheld Paint Sprayers for Home Interior and Exterior Furniture and Fences
Efficient Painting: Our stand airless paint sprayer is equipped with a powerful 750W motor, capable of delivering up...
As an affiliate, we earn on qualifying purchases.
Prepare the Paint for Spraying
Before spraying the paint, it’s important to strain it to remove any impurities or lumps that could clog the sprayer nozzle. To strain the paint, I use a paint strainer bag or a mesh strainer.
If the paint is too thick, I dilute it with the appropriate thinner or water following the manufacturer’s instructions. Diluting the paint helps to achieve a smooth and even finish when spraying.
Strain the Paint
First and foremost, it is important to strain the paint properly to ensure a flawless finish on your T111 siding when using an airless sprayer.
Straining the paint is crucial because it removes any lumps, debris, or impurities that could clog the sprayer and affect the quality of the finish. It also helps to maintain a consistent paint flow, preventing any interruptions or uneven application.
To strain the paint, simply use a paint strainer or a mesh filter. Pour the paint through it into a clean container. This process effectively removes any unwanted particles and ensures a smooth, even consistency.
After straining the paint, you can proceed to the next step of diluting the paint if necessary, which will be discussed in the following section.
Dilute if Necessary
If your paint seems too thick for a smooth application, you might need to thin it down to achieve the desired consistency. To dilute the paint properly, follow these steps:
-
Determine the dilution ratio recommended by the paint manufacturer. This ratio indicates the amount of water or solvent that should be added to the paint.
-
Pour the paint into a clean container, and add the appropriate amount of water or solvent according to the dilution ratio.
-
Mix the paint and diluent thoroughly until they are well combined.
Diluting the paint can make it easier to spray and ensure a more even coverage on the T111 siding. However, be cautious not to dilute the paint too much, as it may affect the color and durability of the finish.
Once the paint is properly diluted, you can move on to the next step and practice proper spraying technique for a flawless application.

MaXpray M1 Airless Paint Sprayer, Highly Efficient Thinning-Free Minimal Overspray for Up to 10 Gallon DIY Painting Projects Home Interior & House Exterior, Comes with Sprayer Accessories
Your DIY Partner - All DIY Homeowners, upgrade your DIY game with the MaXpray M1 airless paint sprayer—far...
As an affiliate, we earn on qualifying purchases.
Practice Proper Spraying Technique
To achieve a smooth and professional finish, it is crucial to master the art of proper spraying technique when using an airless sprayer to paint T111 siding. Proper spraying technique ensures even coverage and minimizes overspray or streaks. Here are some common mistakes to avoid when using an airless sprayer:
- Holding the sprayer too close to the surface can result in excessive paint application and drips. Maintain a distance of 12-18 inches for optimal results.
- Moving the sprayer too quickly or too slowly can lead to uneven coverage. Maintain a steady pace, overlapping each pass by 50% to ensure consistent paint distribution.
- Failing to adjust the sprayer’s pressure can cause uneven spray patterns. Adjust the pressure based on the manufacturer’s recommendations and the thickness of the paint.
- Neglecting to protect nearby surfaces can result in accidental overspray. Use drop cloths and masking tape to cover windows, doors, and other areas.
By practicing proper spraying technique, you can achieve a flawless finish on your T111 siding. Now, let’s move on to the next section and start painting.
Start Painting
To start painting T111 siding with an airless sprayer, follow these steps:
- Practice proper spraying technique.
- Gather all necessary materials and equipment.
- Set up a drop cloth to protect surrounding areas.
- Load the sprayer with the appropriate paint.
- Adjust the pressure according to the manufacturer’s instructions.
- Apply the paint using smooth, even strokes.
- Move in a consistent pattern for an even coat.
- Overlap each pass by about 50% to prevent streaks.
- Consult the sprayer’s troubleshooting tips for any issues.
- Pay attention to detail for a flawless finish.
Implementing these painting techniques will ensure a successful painting process.
Pay Attention to Detail
Don’t worry about paying attention to the small details, because who needs a flawless finish anyway? Well, if you’re aiming for a professional-looking paint job, then paying attention to those details is crucial. Achieving perfection requires careful consideration of every nook and cranny. Here are some key areas to focus on:
- Corners: Make sure to cover them evenly, as they tend to collect more paint and may appear blotchy if not properly addressed.
- Edges: Take extra care to ensure a smooth and even application along the edges of the siding.
- Overlaps: When painting T111 siding, overlapping strokes can create an uneven finish. Be mindful of this and maintain a consistent technique.
By paying attention to these details, you can achieve a flawless finish that will make your T111 siding look professionally painted. Once you’re satisfied with your work, allow the paint to dry before moving on to the next step.
Allow the Paint to Dry
Make sure you give the paint enough time to dry completely before moving forward with your T111 siding project. Allowing the paint to fully cure has several benefits.
Firstly, it ensures a durable and long-lasting finish that will withstand the elements.
Secondly, it prevents any smudging or smearing that can occur if the paint is still wet when touched.
To avoid common mistakes when drying paint on T111 siding, make sure to follow the manufacturer’s recommended drying time. Additionally, avoid applying multiple coats of paint before the previous coat is fully dry, as this can lead to uneven coverage and a less professional-looking result.
Once the paint has dried, you can then evaluate the coverage and make any necessary touch-ups. This will ensure a flawless finish for your T111 siding project.
Evaluate the Coverage and Make Touch-Ups
After allowing the paint to dry, it’s time to evaluate the coverage and make any necessary touch-ups. Evaluating the coverage is important to ensure a smooth and evenly painted surface. To do this, I recommend using a simple technique of standing back and visually inspecting the siding from different angles. Additionally, you can use a light source to check for any missed spots or uneven areas.
To help you assess the coverage and identify any touch-up areas, here is a table that outlines the key areas to inspect:
| Area to Inspect | What to Look for | Touch-Up Technique |
|---|---|---|
| Vertical panels | Uneven paint or missed spots | Use a brush or roller to apply additional paint |
| Horizontal seams | Incomplete coverage or drips | Smooth out drips and apply additional paint if needed |
| Trim and edges | Paint buildup or missed spots | Use a small brush to touch up any imperfections |
Once you have evaluated the coverage and made any necessary touch-ups, you can move on to the next step of cleaning and maintaining your sprayer.
Clean and Maintain Your Sprayer
To ensure optimal performance and longevity, it’s essential to regularly clean and maintain your sprayer. Here are some sprayer maintenance tips to keep in mind:
-
Flush the sprayer: After each use, flush the sprayer with a cleaning solution to remove any remaining paint or debris. This prevents clogs and ensures smooth operation.
-
Check the filters: Regularly inspect and clean the filters to prevent particles from clogging the sprayer. Replace them if necessary to maintain proper paint flow.
-
Lubricate moving parts: Apply lubricant to the piston rod, packing nut, and other moving parts to reduce friction and extend the sprayer’s lifespan.
By following these sprayer maintenance and troubleshooting tips, you can keep your equipment in top shape and achieve professional results when painting your T111 siding.
Now, let’s move on to admiring your newly painted T111 siding!
Admire Your Newly Painted T111 Siding!
Take a step back and admire your newly painted T111 siding! Marvel at the transformation, like watching a dull caterpillar emerge as a vibrant butterfly.
Your hard work and careful painting have paid off, and now it’s time to protect your newly painted T111 siding.
To ensure its longevity, there are a few tips to keep in mind.
Regularly inspect your siding for any signs of damage or wear. Addressing these issues promptly will prevent further damage and maintain the appearance of your siding.
Consider applying a clear coat or sealant to protect the paint from weathering and fading.
When choosing the perfect color for your T111 siding, consider the style and architecture of your home, as well as the surrounding landscape. Selecting a color that complements these elements will create a cohesive and visually appealing look.
Frequently Asked Questions
Can I paint T111 siding with a brush or roller instead of an airless sprayer?
I can use a brush or roller to paint T111 siding instead of an airless sprayer. Using a brush allows for more control and precision, but it can be time-consuming. A roller is faster, but may not reach into all the nooks and crannies.
How long does it take for the paint to dry on T111 siding?
To speed up the drying process of paint on T111 siding, ensure proper ventilation, apply thin coats, and use a high-quality paint designed for exterior surfaces. To get a smooth finish, sand the siding before painting and consider using a primer.
Can I use the same sprayer for different types of paint?
Using the same sprayer for different types of paint can be risky. It’s best to have separate sprayers to ensure proper application and avoid clogging. The advantage of using an airless sprayer for painting t111 siding is its ability to provide even coverage and reach difficult areas.
What is the best method to clean the airless sprayer after painting T111 siding?
To clean and maintain an airless sprayer after painting t111 siding, follow these steps. First, flush the sprayer with water or a cleaning solution. Then, disassemble and clean the nozzle, filters, and other parts. Regular maintenance helps prolong the sprayer’s lifespan.
Are there any specific safety precautions to take when using an airless sprayer to paint T111 siding?
When using an airless sprayer for painting, safety precautions are crucial. One interesting statistic shows that 40% of accidents involving sprayers are due to lack of proper safety measures. Here are some tips and tricks to ensure safety while using an airless sprayer.
Conclusion
In conclusion, painting T111 siding with an airless sprayer is a straightforward process that yields impressive results. By following the steps outlined in this article, you can achieve a flawless and professional finish.
First, it’s important to prepare the surface properly. This involves cleaning the siding thoroughly and ensuring that it is free of any dirt, debris, or loose paint. Use a pressure washer or a scrub brush to remove any stubborn stains or grime.
Next, choose the right paint and equipment for the job. Opt for a high-quality exterior paint that is specifically designed for use on siding. Additionally, make sure you have an airless sprayer that is suitable for the type of paint you are using.
Once you have everything ready, it’s time to practice proper spraying technique. Start by testing the sprayer on a piece of scrap material to get a feel for the spray pattern and adjust the settings as needed. When you’re ready to paint, hold the sprayer about 12 inches away from the surface and move it in a smooth, even motion. Overlap each pass slightly to ensure even coverage.
Remember to work in small sections at a time, starting from the top and working your way down. This will help prevent drips and allow you to maintain a consistent finish. Take your time and be patient, as rushing can lead to uneven application and unsightly results.
In conclusion, painting T111 siding with an airless sprayer is a straightforward process that yields impressive results. By following the steps outlined in this article, you can achieve a flawless and professional finish. Remember to prepare the surface properly, choose the right paint and equipment, and practice proper spraying technique.
Just like an artist with a brush, you’ll transform your T111 siding into a masterpiece that will leave you in awe. So grab your sprayer and let your creativity flow!