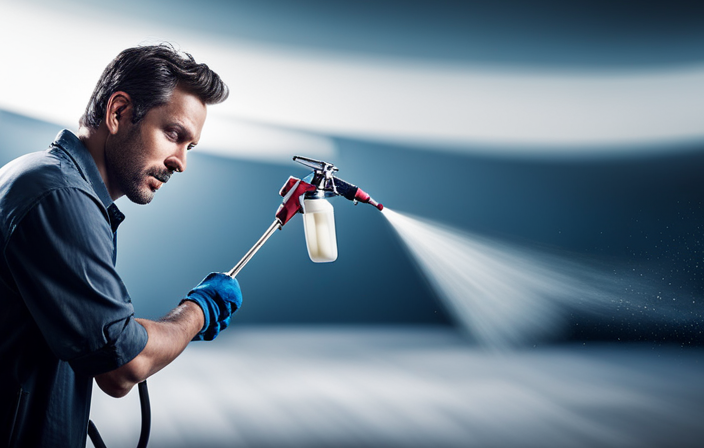
Did you know that a clogged airless sprayer can decrease its efficiency by up to 50%? After experiencing the frustration of a malfunctioning sprayer due to dried paint, I understand the importance of thorough cleaning and maintenance.
In this article, I will guide you through the step-by-step process of cleaning dried paint in an airless sprayer, ensuring that it functions at its optimal level.
First, we will assess the condition of the sprayer, checking for any visible paint build-up or blockages. Then, we will disassemble the sprayer and remove any excess paint.
Next, we will soak the parts in a cleaning solution, scrub and rinse them thoroughly, and use a brush or toothbrush to tackle stubborn paint stains. After flushing the system with clean water, we will dry and reassemble the sprayer before testing it to ensure proper functioning.
By following these maintenance and cleaning tips, you can prolong the life of your airless sprayer and achieve consistent, professional paint results. Let’s get started!
Key Takeaways
- Flush the sprayer after each use
- Clean the nozzle by disassembling and using water or a cleaning solution
- Regularly check and clean or replace the filters to prevent clogs and maintain paint flow
- Lubricate moving parts regularly for smooth functioning
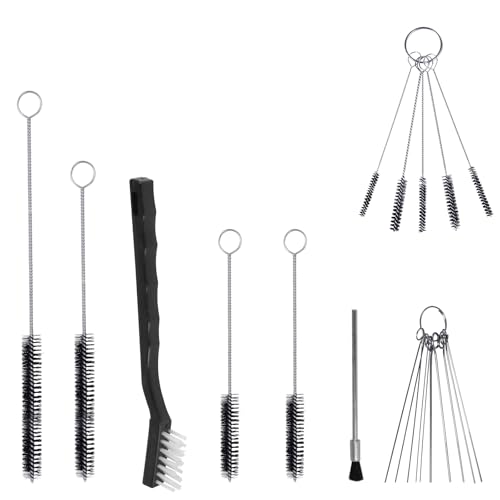
17pcs Multi-Purpose Spray Gun Cleaning Kit,Nylon Brushes Paint Gun Cleaning Kit Mini Brushes & Needles for Clean Airbrush Nozzles Spray Guns Tattoo Equipment (17)
- Complete Cleaning Kit: Includes 17 tools for spray gun maintenance
- Universal Compatibility: Works with all spray gun types and solvents
- Enhances Performance: Keeps spray guns in optimal working condition
As an affiliate, we earn on qualifying purchases.
As an affiliate, we earn on qualifying purchases.
Assess the Condition of the Sprayer
Take a deep breath and assess the condition of your sprayer – you’ll be amazed at the satisfaction you’ll feel once it’s clean and ready for your next painting project.
Start by evaluating any damage or wear on the sprayer, such as clogged nozzles or leaks. Troubleshoot common issues like inconsistent spray patterns or loss of pressure.
Check the hoses, filters, and valves for any signs of damage or blockage. Inspect the motor and electrical components for any malfunctioning parts. Once you’ve identified any problems, make a note of what needs to be fixed or replaced.
This evaluation will help guide you through the cleaning process and ensure that your sprayer is in optimal condition for future use.
Now, let’s move on to disassembling the sprayer and removing any excess paint.
Disassemble the Sprayer and Remove Excess Paint
Start by carefully breaking down the sprayer into its individual parts, making sure to remove any leftover residue that may hinder its performance. Removing dried paint is essential to prevent paint buildup, which can lead to clogs and decreased functionality.
Begin by removing the spray tip and guard, followed by the gun filter and any other detachable components. Use a brush or cloth to gently scrub away any dried paint that may be stuck to the parts. Pay close attention to the smaller crevices and hard-to-reach areas.
Once all the excess paint has been removed, transition into the subsequent section about soaking the parts in a cleaning solution.
Soak the Parts in a Cleaning Solution
Immerse the disassembled components of your sprayer in a revitalizing solution, allowing them to luxuriate in its gentle cleansing properties. To effectively clean dried paint in an airless sprayer, there are various cleaning solution options available.
Here are three effective alternatives:
-
Vinegar and Water Mixture: Create a solution by mixing equal parts of white vinegar and water. This solution helps break down and remove dried paint from the sprayer parts.
-
Commercial Cleaning Solvent: Use a commercial cleaning solvent specifically designed for removing paint. These solvents are effective in dissolving dried paint and can be easily found at hardware stores.
-
Soapy Water: Prepare a mixture of warm water and dish soap. This mild solution is gentle on your sprayer parts while effectively removing dried paint.
Once the components have soaked in the cleaning solution for the recommended time, it’s time to move on to the next step of scrubbing and rinsing the parts.
Scrub and Rinse the Parts
Once the components have soaked in the cleaning solution, it’s crucial to thoroughly scrub and rinse them to ensure all residue is removed. When it comes to cleaning dried paint in an airless sprayer, different types of paint may require different cleaning techniques.
For water-based paints, a mild detergent solution can be used, while solvent-based paints may require a stronger solvent or paint thinner. It’s important to carefully read the instructions on the paint can to determine the appropriate cleaning method.
Additionally, there are some common mistakes to avoid when cleaning an airless sprayer, such as using abrasive materials that could damage the parts or failing to clean all the nooks and crannies.
By scrubbing the parts thoroughly and rinsing them with clean water, you can ensure that all traces of paint are removed. This will prepare the components for the next step, which involves using a brush or toothbrush to remove any stubborn paint residues.
Use a Brush or Toothbrush to Remove Stubborn Paint
To tackle those stubborn paint residues, grab a trusty brush or toothbrush and give those components a good scrubbing, getting into all the nooks and crannies for a squeaky clean finish. When it comes to removing dried paint from an airless sprayer, both a brush and a toothbrush can be effective tools. A brush with sturdy bristles is great for larger areas, while a toothbrush with its smaller size and finer bristles can easily reach tight spaces. Simply dip the brush or toothbrush into a bucket of warm soapy water and scrub away the dried paint. Use circular motions and apply gentle pressure to loosen the paint. For more stubborn paint, you may need to repeat the process or try alternative methods such as using a paint remover or scraping with a plastic scraper. Once the paint is removed, rinse the parts thoroughly to ensure all residue is gone. Now, let’s move on to cleaning the filters and nozzles to ensure optimal performance.
Clean the Filters and Nozzles
Start by thoroughly rinsing the filters and nozzles to ensure they’re free from any residue or debris.
Cleaning techniques for the filters and nozzles are crucial for maintaining the efficiency of your airless sprayer. To successfully clean the filters and nozzles, follow these troubleshooting tips:
- Use a soft brush or toothbrush to gently scrub away any dried paint particles.
- Soak the filters and nozzles in warm soapy water for about 15 minutes to loosen stubborn paint.
- Rinse them thoroughly with clean water to remove all traces of paint and soap.
- Inspect the filters and nozzles for any clogs or damages and replace them if necessary.
- Allow the filters and nozzles to air dry completely before reassembling them.
After cleaning the filters and nozzles, it’s time to flush the system with clean water to ensure all paint residues are removed.
Flush the System with Clean Water
Now it’s time to give your system a good flush with fresh water to ensure all those pesky paint residues are completely gone.
To clean the airless sprayer, start by filling a bucket with clean water. Attach the garden hose to the sprayer’s intake valve and place the other end of the hose in the bucket. Turn on the water and let it run through the system for a few minutes.
This flushing process will help remove any remaining paint particles from the filters, hoses, and nozzles. While flushing, check for any clogs or blockages and use a soft brush or toothbrush to remove them if necessary.
Once the water runs clear, you can move on to the next step of drying and reassembling the sprayer.
Dry and Reassemble the Sprayer
Once the water has finished running through the system, it’s time to dry and put the sprayer back together. To ensure optimal performance, it’s essential to inspect the sprayer for any worn-out parts that may need replacing. Check the nozzle, hose, and trigger for any signs of damage or wear. If you notice any issues, replace the parts accordingly.
Additionally, take this opportunity to troubleshoot common issues that may arise with airless sprayers, such as clogs or inconsistent spray patterns. Clean any clogged filters or tips and adjust the pressure settings if necessary.
Once all the components are dry and any necessary replacements or adjustments have been made, you can proceed to reassemble the sprayer. This will allow you to test the sprayer and ensure it’s functioning properly in the subsequent section about testing the sprayer for proper functioning.
Test the Sprayer to Ensure Proper Functioning
Make sure to give the sprayer a thorough test to guarantee it’s working flawlessly and ready to tackle your next project.
After reassembling the sprayer and ensuring all the parts are properly fitted, it’s important to test its functioning. Start by connecting the sprayer to a water source and turning on the power.
Check the pressure gauge to ensure it’s within the recommended range. If the pressure is too high or too low, adjust it accordingly using the pressure control knob.
Next, trigger the sprayer to see if it dispenses water smoothly without any clogs or sputtering. If there are any issues, refer to the troubleshooting guide provided by the manufacturer to resolve common sprayer problems.
Once you’re satisfied with the sprayer’s performance, move on to the next section about regular maintenance and cleaning tips, which will help prolong its lifespan and maintain optimal performance.
Regular Maintenance and Cleaning Tips
It’s essential to regularly maintain and clean your sprayer to keep it in optimal condition and ensure long-lasting performance. Cleaning techniques and preventing clogs are crucial for maintaining the effectiveness of your airless sprayer. Here are some tips to help you with regular maintenance and cleaning:
-
Flush the sprayer after each use: After completing your painting job, flush the sprayer with water or a cleaning solution to remove any leftover paint.
-
Disassemble and clean the nozzle: Remove the nozzle and clean it thoroughly using a small brush or toothpick to remove any dried paint or debris.
-
Check the filters: Regularly inspect and clean or replace the filters to prevent clogs and maintain a steady flow of paint.
-
Lubricate moving parts: Apply a small amount of lubricant to the moving parts of the sprayer to keep them functioning smoothly.
By following these cleaning techniques and preventive measures, you can ensure that your airless sprayer remains in top-notch condition, providing consistent and reliable performance.
Frequently Asked Questions
Can I use any cleaning solution to soak the parts of the airless sprayer?
Using the right cleaning solution for an airless sprayer is crucial. Just like a tailored suit, not all solutions fit perfectly. Some may be too weak, while others are too strong. Finding the optimal solution is key to effectively cleaning the parts.
How often should I clean the filters and nozzles of the airless sprayer?
I clean the filters and nozzles of my airless sprayer regularly to ensure proper functioning. As a maintenance tip, it is recommended to clean them after each use or at least once a week to prevent clogs and maintain optimal performance.
Is it necessary to disassemble the sprayer to clean dried paint, or can I clean it while it’s assembled?
To effectively clean dried paint in an airless sprayer, it is necessary to disassemble the sprayer. This allows for thorough cleaning of all components. Following proper cleaning techniques and maintenance tips ensures optimal performance and longevity of the sprayer.
Can I use a pressure washer to flush the system with clean water?
Yes, you can use a pressure washer to flush the system with clean water when cleaning dried paint in an airless sprayer. It is an effective method that helps remove paint residue and ensure proper functioning of the sprayer.
Are there any specific cleaning products recommended for cleaning dried paint in an airless sprayer?
I recommend using a high-quality paint remover like XYZ brand, which is specifically designed for cleaning dried paint in airless sprayers. It’s one of the most recommended cleaning methods by professionals in the industry.
Conclusion
After following these steps to clean my airless sprayer, I was amazed at how well it turned out. The paint that was dried and caked on is now completely gone, and the sprayer looks brand new.
I can’t believe how easy and effective this cleaning process was. It’s like magic! I highly recommend taking the time to clean your sprayer regularly to ensure its proper functioning and longevity. Trust me, you won’t be disappointed with the results!