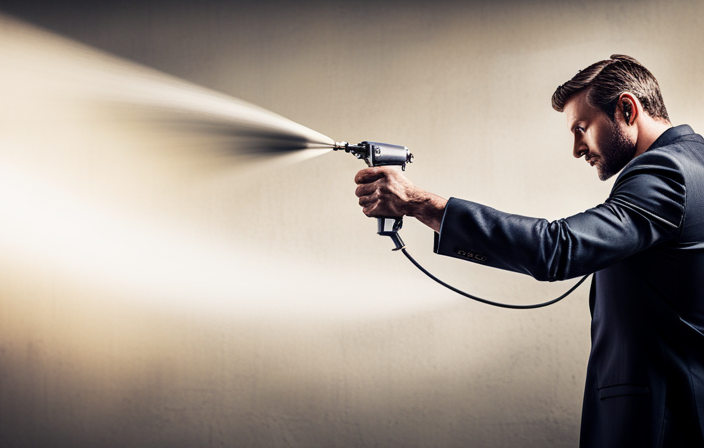
The idea of removing oil paint from an airless sprayer may seem daunting, but fear not! With the right knowledge and techniques, your sprayer will be restored to top condition in no time.
In this article, I’ll guide you through the step-by-step process of cleaning your airless sprayer and getting rid of that stubborn oil paint.
Imagine your sprayer as a blank canvas, ready to be transformed into a masterpiece once again. Just like an artist meticulously cleans their brushes, we’ll take the same care in cleaning our sprayer. By following these instructions, you’ll not only maintain the longevity of your sprayer but also ensure optimal performance.
So, grab your cleaning materials and let’s dive in. From preparing your work area to properly disposing of waste, I’ll cover it all. With a few simple steps, you’ll be able to clean oil paint from your airless sprayer with ease.
Let’s get started!
Key Takeaways
- Proper identification for waste disposal is crucial to prevent environmental damage and protect water sources from contamination.
- Regular maintenance, including proper cleaning techniques, is essential for optimal equipment performance and longevity.
- Disassembling the airless sprayer and thoroughly cleaning each part with a cleaning solution is necessary to ensure its excellent condition for years to come.
- Following best practices, including compliance with manufacturer’s instructions and using appropriate cleaning solutions, helps maximize the airless sprayer’s lifespan and optimize its performance for oil paint applications.

Spray Gun Cleaning Kit, Universal Paint Gun Cleaner Brushes Set, Paint Sprayer Cleaning Kit
- Universal Compatibility: Fits most spray guns and airbrushes
- Multi-Material Brushes: Nylon, stainless steel, brass brushes in various sizes
- Delicate to Heavy Duty: Soft, medium, stiff bristles for different cleaning needs
As an affiliate, we earn on qualifying purchases.
As an affiliate, we earn on qualifying purchases.
Prepare Your Work Area
Before diving into the exhilarating world of airless sprayer cleaning, make sure to set up your work area like a pro!
Organizing your work area is essential for a smooth and efficient cleaning process. Clear any clutter and ensure there is enough space to move around comfortably.
It’s also crucial to prioritize proper ventilation during cleaning. Oil paint can release harmful fumes, so open windows or use fans to ensure fresh air circulation. This will not only protect your health but also prevent any buildup of fumes in the work area.
Now that your work area is organized and properly ventilated, it’s time to disassemble the sprayer and begin the cleaning process.
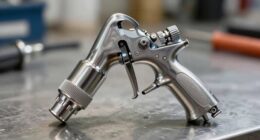
Disassemble the Sprayer
To disassemble the sprayer, start by removing the nozzle, tip guard, and any other removable parts. Twist the nozzle counterclockwise to remove it from the sprayer. Unscrew the tip guard located at the front of the sprayer. Check the manufacturer’s instructions to see if there are any additional parts that need to be disassembled.
Remember to follow safety precautions during this process. Wear gloves and protective eyewear to avoid contact with the paint or any cleaning solutions. Once all the components are disassembled, you can move on to the next step of removing excess paint from the sprayer.
Remove Excess Paint
To get the most out of your cleaning process, it’s crucial to ensure that you remove any leftover paint residue from the disassembled components, leaving them spotless and ready for future use. Did you know that a single ounce of dried paint can contaminate up to one gallon of fresh paint? Cleaning techniques play a vital role in preventing clogs and maintaining the efficiency of your airless sprayer. Start by using a clean, lint-free cloth to wipe away any excess paint from the components. Pay close attention to hard-to-reach areas and crevices. For stubborn paint, you can use a soft-bristle brush to gently scrub the surfaces. Remember to be thorough and meticulous in your cleaning process. This will ensure that your sprayer remains in optimal condition for future use. To learn more about using solvents or cleaners, refer to the subsequent section.
Use Solvents or Cleaners
When it comes to maintaining your equipment, you can achieve a sparkling finish by incorporating solvents or cleaners into your cleaning routine.
Cleaning techniques using solvents or cleaners are effective in removing oil paint from airless sprayers. Begin by wearing protective gloves and goggles to ensure safety.
Start by flushing out any remaining paint from the sprayer using a compatible solvent or cleaner. Pour the solvent or cleaner into the sprayer tank and run it through the system, including the hoses, gun, and nozzle.
Use a brush or cloth soaked in solvent to clean any stubborn paint residue. Be sure to follow the instructions provided by the manufacturer for the specific solvent or cleaner you are using.
Once the sprayer is clean, it is time to move on to the next step of cleaning the filters and nozzles, ensuring that your equipment is ready for the next painting job.
Clean the Filters and Nozzles
It is crucial to thoroughly inspect and maintain the filters and nozzles of your equipment to ensure optimal performance and a flawless finish. Cleaning the filters and nozzles regularly is essential to prevent clogs and maintain the efficiency of your airless sprayer. To clean the filters and nozzles, follow these steps:
| Step | Instructions |
|---|---|
| Step 1 | Remove the filters and nozzles from the sprayer. |
| Step 2 | Rinse them with a suitable cleaning solution. |
| Step 3 | Use a soft brush to remove any stubborn paint residue. |
| Step 4 | Allow the filters and nozzles to dry completely before reassembling. |
Make sure to use cleaning solutions recommended by the sprayer manufacturer and follow the instructions for the appropriate drying time. Once the filters and nozzles are clean and dry, you can proceed to the next step of rinsing the sprayer with water. This will ensure any remaining paint or cleaning solution is removed before further use.
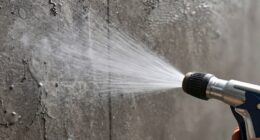
Rinse the Sprayer with Water
After thoroughly inspecting and maintaining the filters and nozzles, proceed to rinse the sprayer with water to ensure any remaining residue is completely removed.
Cleaning techniques for an airless sprayer involve using water to flush out any leftover paint. Start by filling a bucket or container with clean water.
Attach the hose to the sprayer and turn on the water supply. Begin by spraying the water into a waste container until the water runs clear.
Then, direct the water into the sprayer’s paint reservoir and spray until the water coming out is clean. Pay close attention to the filters and nozzles, making sure to clean them thoroughly.
Once the sprayer is clean, use drying methods such as air drying or using a clean cloth to remove any excess moisture. This will ensure that the sprayer is ready for reassembly.
Reassemble the Sprayer
Once all the pieces have been carefully put back together, the sprayer will be reborn, ready to unleash its transformative power once again.
To reassemble the sprayer, follow these steps:
-
Reconnect the hose: Attach the hose securely to the sprayer, ensuring a tight seal to prevent any leaks during operation.
-
Reattach the gun: Align the gun with the sprayer and firmly twist it into place until it clicks, indicating a secure connection.
-
Secure the nozzle: Screw the nozzle back onto the gun, making sure it is tightened properly to avoid any paint leakage.
-
Check for leaks: Before using the sprayer, inspect all connections for any signs of leaks. If you notice any leaks, troubleshoot by tightening the connections or replacing any damaged parts.
With the sprayer reassembled, it’s time to test its functionality and ensure it’s working properly.
Test the Sprayer
To verify the sprayer’s performance, it’s essential to conduct a thorough examination and verify that all components are functioning correctly. Start by testing the equipment by connecting it to a power source and turning it on.
Check if the motor is running smoothly and if the pressure gauge is functioning properly.
Next, inspect the spray tip for any clogs or damage. If there are any issues, troubleshoot them by cleaning or replacing the affected parts.
Additionally, test the trigger and ensure it is responsive and easy to use.
Once you have tested the sprayer and resolved any problems, you can move on to the next step of properly disposing of waste paint and cleaning materials.
Properly Dispose of Waste
When disposing of waste materials, it’s important to follow proper guidelines to prevent environmental damage and potential health risks. Did you know that according to the Environmental Protection Agency, improper disposal of hazardous waste can contaminate drinking water sources and harm aquatic life?
To properly dispose of waste from cleaning oil paint in an airless sprayer, consider the following waste disposal methods:
- Segregate waste into different containers based on the type of waste material.
- Label each container clearly to ensure proper identification.
- Contact your local waste management facility to inquire about the specific regulations and guidelines for disposing of hazardous waste.
Implementing these waste disposal methods is crucial to minimize the environmental impact and protect our water sources.
Now, let’s move on to the next section about regular maintenance tips.
Regular Maintenance Tips
Regular maintenance is crucial for optimal performance and longevity of your equipment. Cleaning techniques play a vital role in maintaining your airless sprayer used with oil paint. Always follow the manufacturer’s instructions for cleaning. Start by running a cleaning solution through the system to remove the paint and prevent build-up or clogs. Use a brush or cloth to remove excess paint from the sprayer components. Disassemble the sprayer and thoroughly clean each part with a cleaning solution, paying attention to filters or screens that can easily become clogged with paint residue. Rinse all parts with clean water and ensure they are completely dry before reassembling. By following these best practices, you can ensure that your airless sprayer remains in excellent condition for years to come.
Frequently Asked Questions
Can I use any type of solvent or cleaner to clean the airless sprayer?
Using alternative solvents or cleaners is not recommended for cleaning an airless sprayer. It can damage the equipment and affect its performance. Instead, use a compatible cleaning solution recommended by the manufacturer. Safely dispose of cleaning waste according to local regulations.
How often should I clean the filters and nozzles of the airless sprayer?
I should clean the airless sprayer’s filters and nozzles after each use to ensure optimal performance. The best method to clean oil paint in an airless sprayer is to flush it with an appropriate solvent.
Are there any specific safety precautions I should take while cleaning the airless sprayer?
When cleaning an airless sprayer, it is important to take specific safety precautions. Wear protective gloves and eyewear, ensure proper ventilation, and follow the manufacturer’s instructions for the proper cleaning process.
Can I reuse the water used for rinsing the sprayer, or should I dispose of it?
I recommend disposing of the water used for rinsing the sprayer. Reusing water for cleaning may lead to contamination and inefficiency. Proper disposal of cleaning solvents is crucial for safety and environmental reasons.
Are there any alternative methods or tools for cleaning oil paint in an airless sprayer?
There are several alternative methods and tools available for cleaning oil paint. One effective option is to use a solvent such as mineral spirits or paint thinner. Another tool that can be used is a brush cleaner, which helps remove paint from the sprayer efficiently.
Conclusion
So there you have it, folks! Cleaning oil paint from your airless sprayer is a breeze, just like flying a rocket to the moon!
With a little bit of elbow grease and some handy solvents or cleaners, your sprayer will be glistening like a brand new Ferrari in no time.
Remember to clean those filters and nozzles, reassemble the sprayer with the precision of a brain surgeon, and don’t forget to dispose of the waste like a responsible adult.
And don’t forget to maintain your sprayer regularly, because we all know how important it is to keep those paint-spraying machines in tip-top shape.
Happy spraying, my friends!