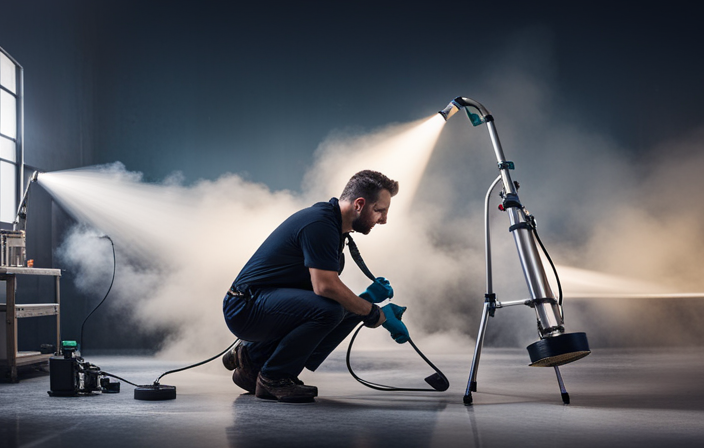
Connect with us

Airless Paint Sprayers FAQs

What Is An Airless Paint Sprayer

Published

on

An image capturing the essence of an airless paint sprayer: a high-pressure pump propelling a fine mist of paint particles in a controlled stream, evenly coating surfaces with precision and efficiency

As I dive into the world of painting, I find myself mesmerized by the power and efficiency of the airless paint sprayer. Like a conductor leading an orchestra, this ingenious tool orchestrates a symphony of paint particles, transforming surfaces with precision and speed.

An airless paint sprayer, as the name suggests, operates without the need for compressed air. Instead, it utilizes a high-pressure pump to propel paint at a forceful rate, producing a fine mist that evenly coats any desired area. This method ensures a smooth and professional finish, making it a preferred choice for both DIY enthusiasts and professionals alike.

In this article, I will unveil the inner workings of an airless paint sprayer, explore its benefits, discuss various types, offer tips on choosing the right one, and provide maintenance and safety guidelines.

So, let’s embark on this journey together, and unlock the secrets of the airless paint sprayer.

Key Takeaways

  • An airless paint sprayer is a tool used for painting that requires regular maintenance and cleaning, including inspecting and cleaning filters, checking spray tip for blockages, and flushing the system with cleaning solution.
  • Safety gear, such as goggles, gloves, and a respirator, should be worn when using an airless paint sprayer to protect against paint particles, debris, and harmful fumes and vapors.
  • Proper ventilation and workspace setup are essential when using an airless paint sprayer, and the workspace should be organized for efficiency and safety.
  • Troubleshooting common issues with an airless paint sprayer, such as no spray or low pressure, uneven spray pattern, or excessive overspray, can often be resolved by cleaning or replacing clogged or damaged parts, adjusting pressure, and cleaning or aligning the spray tip or nozzle.
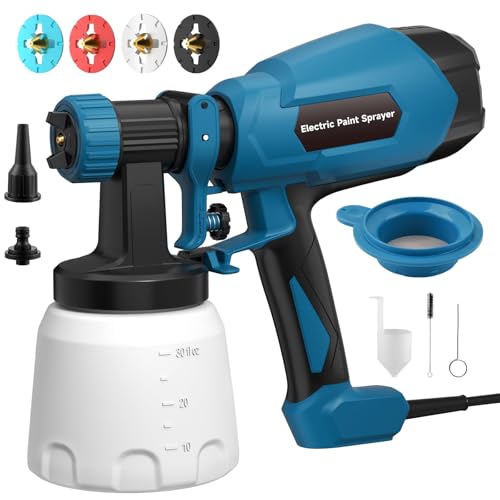
How Does an Airless Paint Sprayer Work?

Imagine effortlessly transforming your space with the power of an airless paint sprayer, as it flawlessly works its magic to create a smooth and professional finish. Understanding how an airless paint sprayer works is essential for proper maintenance and troubleshooting common problems.

Unlike traditional paint sprayers that use compressed air to propel the paint, an airless paint sprayer uses a high-pressure pump to force the paint out of the nozzle. This results in a more consistent and even application of paint, with no brush marks or streaks. The high-pressure pump also allows for the use of thicker paints and coatings, making it ideal for large projects and textured surfaces.

Transitioning into the benefits of using an airless paint sprayer, it’s important to consider its efficiency and time-saving capabilities.

Benefits of Using an Airless Paint Sprayer

Effortlessly achieve a flawless, professional finish on any surface with the help of this innovative tool. The benefits of using an airless paint sprayer are numerous.

Firstly, it allows for a faster and more efficient painting process. With its high-pressure system, the paint is atomized into tiny droplets, resulting in an even and smooth application.

Additionally, the airless sprayer can handle a wide range of paint materials, from thick latex to thin stains, making it versatile for any project.

Furthermore, it eliminates the need for brushes or rollers, reducing the time and effort required for painting.

The technique involved in using an airless paint sprayer may take some practice to master, but once learned, it provides professional results every time.

With these benefits in mind, let’s now explore the different types of airless paint sprayers available.

Types of Airless Paint Sprayers

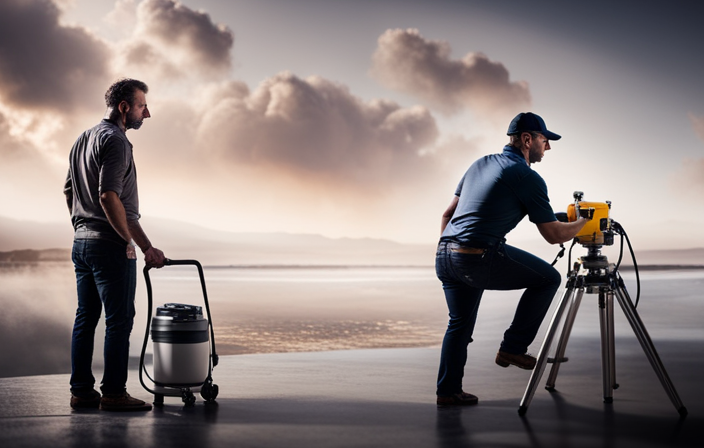
The world of airless paint sprayers offers a variety of options, like a palette of brushes, each with its own unique style and application method. When it comes to types of airless paint sprayers, there are three main categories: handheld, stand-mounted, and cart-mounted. Each type has its own set of features that make it suitable for different applications. Handheld sprayers are compact and portable, perfect for smaller projects or touch-ups. Stand-mounted sprayers are more stable and can handle larger areas with ease. Cart-mounted sprayers are the most powerful and efficient, ideal for professional painters or large-scale projects. To help you visualize the differences, take a look at the table below:

Type Features
Handheld Portability
Stand-mounted Stability
Cart-mounted Power

Now that you have an understanding of the types of airless paint sprayers available, let’s move on to choosing the right one for your needs.

Choosing the Right Airless Paint Sprayer for Your Needs

To find the perfect airless paint sprayer for you, it’s important to consider your specific needs and preferences. When choosing the right airless paint sprayer, there are a few key factors to keep in mind.

First, think about the size of the projects you’ll be working on. Smaller sprayers are suitable for smaller tasks, while larger ones are better for bigger jobs.

Additionally, consider the type of paint you’ll be using and make sure the sprayer is compatible with it.

Another important aspect to consider is maintenance and cleaning. Look for a sprayer that is easy to clean and has accessible parts for regular maintenance. Proper care and maintenance will ensure the longevity and efficiency of your sprayer.

Now, let’s move on to preparing for painting with an airless paint sprayer by discussing the necessary steps to get started.

Preparing for Painting with an Airless Paint Sprayer

Getting ready to paint with an airless paint sprayer involves proper preparation and priming the surface. Surface preparation is crucial for achieving a smooth and professional finish.

Before painting, it’s important to clean the surface thoroughly, removing any dirt, dust, or grease. This can be done using a mild detergent and water or a suitable cleaner.

Next, inspect the surface for any imperfections such as cracks or holes, and repair them using a filler or patching compound.

Once the surface is clean and repaired, it’s time to select the right paint for the job. Consider factors such as the type of surface, desired finish, and environmental conditions. Choosing the appropriate paint will ensure optimal adhesion and durability.

Proper techniques for using an airless paint sprayer will be discussed in the next section, providing valuable insights for achieving professional results.

Proper Techniques for Using an Airless Paint Sprayer

When using an airless paint sprayer, it’s crucial to understand the proper techniques for achieving professional results. Two key points to focus on are spray patterns and overlapping strokes. It’s also important to adjust pressure and flow rate. By mastering these techniques, I can ensure an even and smooth paint application. This will result in a flawless finish.

Spray Patterns and Overlapping Strokes

Mastering the art of controlling spray patterns and overlapping strokes is crucial when using an airless paint sprayer, as it allows you to effortlessly achieve professional-looking finishes and flawless coverage. To achieve optimal results, here are three key points to consider:

  1. Spray Control: Adjusting the spray pattern width is essential for different surfaces and areas. By narrowing the pattern for detailed work and widening it for larger areas, you can ensure even coverage and minimize overspray.

  2. Surface Preparation: Properly preparing the surface before painting is vital for a smooth finish. Ensure it’s clean, dry, and free from any debris or contaminants. Any imperfections should be repaired or smoothed out to avoid blemishes in the final coat.

  3. Overlapping Strokes: When spraying, overlapping each stroke by about 50% ensures consistent coverage. This technique prevents unevenness and lines, creating a seamless finish.

Mastering these techniques sets the foundation for achieving professional results. Now, let’s move on to adjusting pressure and flow rate to further enhance your airless paint spraying skills.

Adjusting Pressure and Flow Rate

After understanding the importance of spray patterns and overlapping strokes, let’s now dive into the next crucial aspect of using an airless paint sprayer: adjusting pressure and flow rate.

As a user, it’s essential to have control over these two variables to achieve the desired finish and maximize efficiency. Adjusting the pressure allows you to control the force at which the paint is ejected from the sprayer, ensuring proper coverage and avoiding overspray. Similarly, adjusting the flow rate allows you to regulate the amount of paint being released, preventing wastage and ensuring an even application.

By mastering these adjustments, you can achieve professional-quality results and save time on your painting projects.

Now, let’s explore the maintenance and cleaning of an airless paint sprayer, which is equally important in prolonging its lifespan and maintaining optimal performance.

Maintenance and Cleaning of an Airless Paint Sprayer

To properly maintain and clean your airless paint sprayer, it’s crucial that you regularly inspect and clean the filters to ensure optimal performance. Here are four important steps to follow for maintenance and cleaning:

  1. Start by removing the filters and inspecting them for any clogs or debris. Clean them thoroughly using a mild cleaning solution and a soft brush.

  2. Check the spray tip for any blockages and clean it using a small wire brush or a specialized tip cleaner. This will help maintain a consistent spray pattern.

  3. Flush the paint sprayer system with a cleaning solution recommended by the manufacturer. This will remove any residual paint and prevent it from clogging the system.

  4. Lastly, lubricate the moving parts of the sprayer with a suitable lubricant to ensure smooth operation.

By following these cleaning techniques and using the best cleaning solutions, you can keep your airless paint sprayer in top condition.

Now, let’s move on to safety tips when using an airless paint sprayer.

Safety Tips When Using an Airless Paint Sprayer

When using an airless paint sprayer, it’s crucial to prioritize safety. This includes wearing the appropriate protective gear and clothing, such as goggles, gloves, and a respirator, to shield yourself from potential hazards.

Additionally, ensure proper ventilation and set up your workspace correctly. This will help minimize the risk of accidents or exposure to harmful fumes.

Protective Gear and Clothing

Make sure you’re dressed for success when using an airless paint sprayer, by wearing the necessary protective gear and clothing. Safety should always be a top priority when undertaking any painting project. The right gear can make a significant difference in protecting yourself from potential hazards. Here are some important protective gear and clothing options to consider:

Protective Gear Clothing Options
Safety goggles Long-sleeved shirts
Respirator mask Pants and socks
Nitrile gloves Closed-toe shoes
Hearing protection Hat or cap

Wearing safety goggles can shield your eyes from paint particles and debris. A respirator mask will help filter out harmful fumes and vapors. Nitrile gloves provide chemical resistance and protect your hands. Additionally, wearing long-sleeved shirts, pants, socks, closed-toe shoes, and a hat or cap can prevent paint from coming into contact with your skin or hair.

Now that you’re properly dressed, let’s move on to the next section about ventilation and proper workspace setup. It’s important to create an environment that promotes safety and efficiency while using an airless paint sprayer.

Ventilation and Proper Workspace Setup

Now that we’ve covered the importance of protective gear and clothing, let’s move on to ventilation considerations and organizing your workspace when using an airless paint sprayer.

Proper ventilation is crucial to ensure the safety of both yourself and others in the area. Make sure to work in a well-ventilated space or use a ventilation system to remove any fumes or vapors that may be produced during the painting process.

Additionally, it is important to organize your workspace efficiently to maximize productivity and minimize the risk of accidents. Clear any clutter, ensure proper lighting, and set up your equipment in a way that allows for easy access and movement.

By following these ventilation and workspace organization guidelines, you can create a safe and efficient environment for your airless paint spraying tasks.

Now, let’s move on to troubleshooting common issues with an airless paint sprayer.

Troubleshooting Common Issues with an Airless Paint Sprayer

If you’re having trouble with your airless paint sprayer, troubleshooting common issues can feel like untangling a knot of wires. To help you get back on track, here are some troubleshooting tips for common problems you may encounter.

Problem Cause Solution
No spray or low pressure Clogged tip or filter Clean or replace the clogged parts
Uneven spray pattern Worn or damaged tip Replace the worn or damaged tip
Excessive overspray Incorrect pressure setting Adjust the pressure to the recommended level

These are just a few examples of the issues you may face with your airless paint sprayer. Remember to always consult the user manual for specific troubleshooting instructions. In the next section, we will address frequently asked questions about airless paint sprayers.

Frequently Asked Questions about Airless Paint Sprayers

One of the most common questions people have about using an airless paint sprayer is how to troubleshoot common issues. Here are three important tips for maintaining and troubleshooting your airless paint sprayer:

  1. Regular Maintenance: To keep your paint sprayer running smoothly, it’s essential to perform regular maintenance. This includes cleaning the filters, inspecting the hoses for any leaks or damages, and lubricating the moving parts.

  2. Pressure Problems: If you’re experiencing issues with the pressure of the paint sprayer, check the pressure control knob. Adjust it accordingly to achieve the desired pressure. Also, make sure the spray tip is clean and unclogged.

  3. Spray Pattern Issues: If you notice an uneven or spotty spray pattern, check the nozzle for any clogs or debris. Clean it thoroughly and ensure it’s properly aligned and tightened. Adjust the nozzle size if necessary for a more consistent spray pattern.

By following these paint sprayer maintenance and troubleshooting tips, you can ensure optimal performance and achieve professional-looking results with your airless paint sprayer.

Frequently Asked Questions

Can an airless paint sprayer be used for both indoor and outdoor painting projects?

Yes, an airless paint sprayer can be used for both indoor and outdoor painting projects. The high-pressure system allows for efficient and even coverage, making it ideal for large areas. Its versatility and speed make it a preferred choice for professionals.

What safety precautions should I take when using an airless paint sprayer?

When using an airless paint sprayer, proper safety measures must be taken. Protective gear, such as goggles, gloves, and a respirator, is needed to ensure your safety.

Can an airless paint sprayer be used with different types of paint, such as latex or oil-based?

Yes, an airless paint sprayer can be used with different types of paint, including latex and oil-based. The advantages of airless paint sprayers include their ability to handle various paint types efficiently and provide a smooth, even finish.

How long does it typically take to clean and maintain an airless paint sprayer?

Cleaning time and maintenance duration for an airless paint sprayer vary depending on usage and paint type. Generally, it takes around 15-30 minutes to clean the sprayer thoroughly and perform routine maintenance tasks to ensure optimal performance.

Are airless paint sprayers suitable for DIY projects or are they mainly used by professionals?

Airless paint sprayers are versatile tools that are suitable for both DIY projects and professional use. They offer numerous benefits, such as faster and more even paint application, saving time and effort.

Conclusion

In conclusion, the airless paint sprayer is a remarkable tool that revolutionizes the painting process. It’s got a powerful pump and high-pressure system that delivers a precise and even coat of paint, saving both time and effort.

However, it’s important to remember that with great power comes great responsibility. Safety precautions must be taken, and regular maintenance is necessary to ensure the sprayer’s longevity.

So, whether you’re a professional painter or a DIY enthusiast, the airless paint sprayer is a game-changer. It brings efficiency and quality to your painting projects.

With James‘ articles, you can expect comprehensive breakdowns of airless paint sprayer features, performance assessments, and expert insights into the latest industry innovations. His meticulous approach ensures that readers gain a thorough understanding of the equipment they are considering, helping them make well-informed choices.

Continue Reading

Airless Paint Sprayers FAQs

How Much Water Base Latex Paint Will It Take To Spray 29 Doors With A Graco Airless Sprayer Youtube

Published

on

By

An image showcasing a Graco airless sprayer in action, precisely spraying a generous amount of water-based latex paint onto 29 doors

Hello, everyone! Have you ever pondered the amount of water-based latex paint needed to cover an impressive 29 doors using a Graco airless sprayer? If so, you’re in the right place, as I have all the information you need right here.

In this article, we’re diving deep into the world of water-based latex paint, learning how to calculate the exact amount you’ll need for your door painting extravaganza.

But that’s not all! We’ll also be exploring the ins and outs of efficient spraying with a trusty Graco airless sprayer, because let’s face it, nobody wants to spend more time than necessary on this project.

I’ll be sharing some handy tips on preparing your doors for painting, choosing the right type of paint, and avoiding common mistakes along the way.

And as an added bonus, we’ll be taking a trip to YouTube where you can find expert advice and demonstrations to make your painting process even smoother.

So, grab your paintbrushes and get ready to transform those doors into masterpieces!

Key Takeaways

  • Understanding the proper techniques and equipment for spraying water-based latex paint is essential for a successful door painting project.
  • Calculating the amount of paint needed and considering factors for efficient spraying can save time and resources.
  • Proper preparation, including cleaning and priming the doors, is crucial for achieving a professional-looking finish.
  • Regular maintenance and troubleshooting of the Graco airless sprayer is necessary to ensure optimal performance and longevity.

Understanding the Basics of Water-Based Latex Paint

Understanding the basics of water-based latex paint is easy! One key concept is paint viscosity. Water-based latex paint has a low viscosity, meaning it flows easily and can be sprayed onto surfaces with minimal effort. To achieve optimal results, it’s important to use proper spraying techniques. This includes holding the sprayer at the right distance from the surface, moving in a steady and even motion, and overlapping each pass slightly.

Now that you have a good grasp on the basics of water-based latex paint and proper spraying techniques, let’s dive into calculating the amount of paint needed for 29 doors.

Calculating the Amount of Paint Needed for 29 Doors

To calculate the amount of paint needed for 29 doors, you need to consider the type and size of the doors, as well as the coverage rate of the paint. A general rule of thumb is that one gallon of water-based latex paint can cover around 350-400 square feet. Assuming the doors are standard-sized, approximately 80 square feet each, you can estimate that it would take around 7 gallons of paint to cover all 29 doors.

However, it’s always a good idea to purchase a little extra to account for any touch-ups or mistakes. Estimating paint costs can be done by multiplying the number of gallons needed by the price per gallon.

Now, let’s explore the factors to consider for efficient spraying with a Graco airless sprayer.

Factors to Consider for Efficient Spraying with a Graco Airless Sprayer

To achieve efficient spraying with a Graco airless sprayer, there are several factors to consider. These include proper nozzle selection, sprayer settings, and technique and motion.

Firstly, it is important to choose the appropriate nozzle size for the type of paint being used and the desired finish. This ensures optimal coverage and reduces overspray.

Secondly, adjusting the pressure and fan width of the sprayer according to the size and condition of the doors is crucial. This helps achieve a consistent and efficient application of paint.

Lastly, technique and motion play a significant role in efficient spraying. Maintaining a consistent distance from the doors and using long, overlapping strokes helps avoid streaks or uneven coverage. Moving smoothly and steadily ensures a uniform finish.

By implementing these best practices for paint application, you can save time and effort while achieving professional-looking results. Now, let’s move on to some tips for preparing the doors for painting.

Tips for Preparing the Doors for Painting

Ready to transform your doors into works of art? Let’s dive into some expert tips for preparing them for a flawless painting job.

First, start by cleaning the doors thoroughly. Remove any dirt, dust, or grease using a mild detergent and water.

Next, lightly sand the surface to create a rough texture for better paint adhesion.

After that, it’s time to choose the right primer for your doors. A high-quality primer will enhance the paint’s durability and provide a smooth base for a professional finish.

Apply the primer evenly using a brush or roller, making sure to achieve full coverage.

Once the doors are prepped and primed, you can transition into the subsequent section on choosing the right type of paint for your project.

Choosing the Right Type of Paint for Your Project

When it comes to choosing paint colors, the options are endless. From soft neutrals to bold and vibrant hues, the color you select can set the mood and create a stunning visual impact.

Consider the impact of paint finishes as well. A glossy finish can add a touch of sophistication, while a matte finish creates a more subtle and relaxed atmosphere.

Don’t forget about the power of texture too! Adding a textured finish can bring depth and dimension to your doors.

So, take your time and explore different color and finish options to find the perfect combination that reflects your personal style and enhances the overall look of your space.

Now, let’s dive into the proper techniques for spraying doors with an airless sprayer.

Proper Techniques for Spraying Doors with an Airless Sprayer

Proper techniques for spraying doors with an airless sprayer are crucial for achieving a flawless finish. Here are some steps to follow:

  1. Prepare the doors: Before using an airless sprayer, ensure that the doors are clean and free from dirt or dust. This will help the paint adhere properly.

  2. Apply primer: Use a high-quality primer to create a smooth surface for the paint. This will help the paint to adhere better and provide a better finish.

  3. Spraying technique: Hold the sprayer at a consistent distance from the door and move it in a steady, even motion. Overlapping each pass slightly will help to avoid streaks or uneven coverage.

  4. Take your time: It’s important to take your time and apply thin, even coats. This will prevent drips or runs and ensure a professional-looking finish.

By following these proper spraying techniques, you can achieve a smooth and flawless finish on your doors.

Now, let’s discuss common mistakes to avoid when painting doors.

Common Mistakes to Avoid When Painting Doors

Avoiding these common mistakes will ensure a flawless finish when painting doors. One of the most important things to remember is to avoid drips. Drips can ruin the look of a freshly painted door and are often caused by applying too much paint at once or not using the right technique. To prevent drips, it’s crucial to choose the right paintbrush. A high-quality brush with the appropriate bristle type and size will help you achieve smooth and even coverage. Additionally, make sure to load the brush properly and apply paint in thin, even coats. This will minimize the chance of drips and create a professional-looking finish. By following these tips, you can avoid common mistakes and achieve excellent results when painting doors. In the next section, we will discuss the maintenance and cleaning of the graco airless sprayer.

Maintenance and Cleaning of the Graco Airless Sprayer

Maintaining and cleaning the Graco Airless Sprayer is like giving your painting equipment a refreshing spa treatment. To ensure optimal performance and longevity, regular maintenance is essential.

Start by disconnecting the sprayer from the power source and relieving the pressure. Remove the spray tip, filter, and guard for a thorough cleaning. Use warm soapy water to clean the parts, making sure to remove any paint residue.

Inspect the pump for any signs of damage or wear and replace any worn-out parts. Lubricate the pump and other moving parts to keep them running smoothly.

Additionally, check the hoses and connections for leaks or blockages.

By following these maintenance tips and troubleshooting techniques, you can keep your Graco Airless Sprayer in top shape and ready for your next painting project.

Speaking of smooth processes, let’s move on to troubleshooting tips for a seamless painting experience.

Troubleshooting Tips for a Smooth Painting Process

Having a properly functioning and well-maintained Graco Airless Sprayer is crucial for a flawless and efficient painting process. To troubleshoot common painting problems and achieve a smooth finish quickly, here are some tips:

  • Check the paint consistency: Ensure that the paint is properly mixed and not too thick or thin. Adjust the viscosity if needed.

  • Clean the spray tip: Clogs in the spray tip can cause uneven spraying. Regularly clean the tip and remove any debris.

  • Adjust the pressure: Experiment with different pressure settings to find the right one for your specific project.

  • Maintain a consistent distance: Keep the sprayer at a consistent distance from the surface being painted to avoid streaks or drips.

  • Use smooth, even strokes: Move the sprayer in a steady back-and-forth motion for an even application.

By following these troubleshooting tips, you can achieve a smooth finish quickly. For expert advice and demonstrations on youtube, check out the next section.

Expert Advice and Demonstrations on YouTube

For those seeking expert advice and demonstrations on YouTube, there’s a treasure trove of videos that can guide you through the painting process like a trusted friend, providing invaluable tips and tricks for achieving a flawless finish. When it comes to YouTube advertising, it’s important to follow best practices to maximize your reach and engagement. Here’s a breakdown of some key strategies to consider:

Strategy Description
Targeted audience Identify your target audience and tailor your content to their specific needs and interests.
Compelling thumbnails Create eye-catching thumbnails that entice viewers to click on your video.
Engaging content Produce high-quality videos with engaging content that keeps viewers hooked and encourages them to watch until the end.
Call-to-action Include a clear call-to-action at the end of your videos, directing viewers to subscribe, like, comment, or visit your website.

By implementing these best practices, you can enhance your YouTube advertising efforts and effectively connect with your audience.

Frequently Asked Questions

What are some common mistakes to avoid when painting doors with a Graco airless sprayer?

When painting doors with a Graco airless sprayer, it’s important to avoid common mistakes such as not properly preparing the surface, using too much paint, or spraying too close. Here are some tips for using the sprayer effectively.

How do I properly maintain and clean a Graco airless sprayer?

To properly maintain and clean a Graco airless sprayer, follow these techniques: 1) Regularly inspect and clean filters, hoses, and nozzles. 2) Use appropriate solvents for cleaning. 3) Store the sprayer in a clean and dry area.

Are there any troubleshooting tips for a smooth painting process with a Graco airless sprayer?

To achieve a smooth finish with a Graco airless sprayer, follow these troubleshooting tips: 1) Clean the sprayer thoroughly before use. 2) Adjust the pressure for optimal coverage. 3) Use a high-quality paint and strain it to remove any impurities.

Can you provide expert advice and demonstrations on YouTube for painting doors with a Graco airless sprayer?

Sure, I can provide expert advice and demonstrations on YouTube for painting doors with a Graco airless sprayer. I’ll cover painting techniques and best practices to ensure a smooth process.

How do I choose the right type of paint for my project?

Choosing the right paint colors for your project is crucial. Consider the symbolism behind different colors and how they can enhance the desired atmosphere. Additionally, ensure proper surface prep by cleaning, sanding, and priming to achieve a smooth and long-lasting finish.

Conclusion

After diving into the world of water-based latex paint and exploring the ins and outs of spraying doors with a Graco airless sprayer, I am amazed at the knowledge and tips I have gained.

One important aspect to consider is calculating the perfect amount of paint needed for the job. This will ensure that you have enough paint to cover all 29 doors without running out in the middle of the project. It’s recommended to measure the surface area of each door and then multiply it by the number of doors to get the total square footage. This will give you an estimate of how much paint you’ll need.

Another crucial step is preparing the doors for painting. This involves cleaning them thoroughly to remove any dirt or grease that may affect the paint’s adhesion. It’s also important to sand the doors to create a smooth surface for the paint to adhere to.

With expert advice and demonstrations available on YouTube, you can learn the best techniques for spraying doors with a Graco airless sprayer. These videos provide valuable insights on how to achieve a professional finish and avoid common mistakes.

Armed with the knowledge and tips gained from these resources, you’ll feel equipped to tackle any painting project with finesse. So grab your brushes and sprayers, and let’s transform those doors into works of art!

Continue Reading

Airless Paint Sprayers FAQs

Do You Need To Prime A Krause & Becker Airless Paint Sprayer When It Is New

Published

on

By

An image showcasing a brand-new Krause & Becker airless paint sprayer being prepared for use

Were you aware that 85% of customers who buy a new Krause & Becker airless paint sprayer are uncertain about the necessity of priming it prior to use?

Well, fret no more! In this article, I will provide you with all the information you need to know about priming your brand new Krause & Becker airless paint sprayer.

Priming is a crucial step in the painting process that ensures proper paint application and optimal results. By priming your paint sprayer, you are essentially preparing it for use by removing any air or debris that may be present in the system. This not only helps to prevent clogs and uneven spray patterns but also extends the lifespan of your paint sprayer.

In this article, we will delve into the function of priming, explore the features of the Krause & Becker airless paint sprayer, and discuss the manufacturer’s recommendations for priming a new paint sprayer.

We will also address the potential risks of not priming and provide you with some tips and tricks for efficient priming.

So, let’s get started and ensure that your new Krause & Becker airless paint sprayer is primed and ready for flawless painting!

Key Takeaways

  • Efficient priming techniques and troubleshooting are important for a new Krause & Becker airless paint sprayer.
  • Regularly checking for clogs and obstructions in the nozzle and cleaning it thoroughly is necessary.
  • Proper mixing and consistency of paint should be ensured to prevent issues with priming.
  • Regular maintenance, cleaning, and inspection of internal components are necessary to extend the lifespan of the sprayer.

Understanding the Function of Priming in Paint Sprayers

You’ll be amazed at how understanding the function of priming in paint sprayers can make your painting experience so much smoother and more efficient!

Priming is a crucial step in the painting process, especially when using an airless paint sprayer like the Krause & Becker. Understanding priming techniques allows you to properly prepare the sprayer for optimal performance.

When you prime the sprayer, you ensure that the paint flows smoothly through the nozzle, preventing clogs and uneven application. Not only does priming help eliminate potential blockages, but it also allows the paint to adhere better to the surface, resulting in a more professional finish.

By taking the time to prime your Krause & Becker airless paint sprayer, you’re setting yourself up for success in achieving a flawless paint application.

Now let’s explore the importance of priming for proper paint application.

The Importance of Priming for Proper Paint Application

Priming ensures a smooth and even layer of paint adheres to the surface for optimal application. It’s an essential step before painting as it provides several benefits.

Firstly, using a primer before painting helps to improve the adhesion of the paint to the surface, ensuring it stays in place for a longer period of time.

Secondly, primers can help to seal porous surfaces, preventing the paint from being absorbed unevenly and resulting in a patchy finish.

Additionally, primers can also help to block stains and provide a uniform base for the paint color, allowing for truer and more vibrant results.

There are different types of primers available, such as oil-based, water-based, and shellac-based, each with its own specific properties and uses.

Understanding the benefits of using a primer and the different types available will help in achieving a professional finish when using the Krause & Becker airless paint sprayer.

Transitioning into exploring the features of the Krause & Becker airless paint sprayer, it’s important to understand how this sprayer can enhance the painting process.

Exploring the Features of the Krause & Becker Airless Paint Sprayer

Once you activate its power, the Krause & Becker Airless Paint Sprayer becomes a mighty paint-wielding warrior, ready to conquer any surface with its innovative features.

This versatile tool is designed to make your painting projects a breeze. When it comes to troubleshooting, the Krause & Becker Airless Paint Sprayer offers some helpful features. For example, it has a pressure control knob that allows you to adjust the paint flow for optimal coverage. Additionally, it includes a reversible spray tip that can be easily cleaned if clogged.

To ensure the best results and prolong the lifespan of your sprayer, it’s important to follow some best practices for using a paint sprayer. This includes properly cleaning and maintaining the sprayer after each use, using the recommended paint viscosity, and practicing good technique. Following these guidelines will help you achieve professional-looking results.

Now, let’s delve into the manufacturer recommendations for priming a new paint sprayer.

Manufacturer Recommendations for Priming a New Paint Sprayer

To ensure optimal performance right out of the box, the manufacturer recommends going through a simple process to prepare your brand new paint sprayer for its first use. Follow these manufacturer recommendations for proper paint application:

  1. Fill the paint sprayer’s container with a small amount of water or paint thinner.
  2. Connect the sprayer to a power source and turn it on.
  3. Hold the sprayer at a 45-degree angle and squeeze the trigger to start priming.
  4. Allow the sprayer to run until a steady stream of liquid is emitted from the nozzle.

By following these manufacturer recommendations, you’re ensuring that your paint sprayer is ready for its first use and will provide optimal performance. Failure to properly prime a new paint sprayer can result in uneven paint application and potential damage to the sprayer.

Transitioning into the next section, let’s explore the potential risks of not priming a new paint sprayer.

Potential Risks of Not Priming a New Paint Sprayer

Neglecting the recommended preparation process for your fresh paint sprayer could lead to subpar results and potential damage. When it comes to a new paint sprayer, priming is a crucial step that shouldn’t be skipped. By priming the sprayer, you ensure that it’s properly lubricated and ready to deliver an even coat of paint. There are several risks associated with skipping this step.

Firstly, without priming, the paint may not flow smoothly through the sprayer, leading to uneven coverage and a poor finish. Additionally, not priming the sprayer can increase the chances of clogging and blockages, which can be time-consuming and frustrating to deal with.

On the other hand, priming a new paint sprayer offers several benefits. It helps to remove any potential contaminants and ensures that the paint flows smoothly, resulting in a professional-looking finish.

Moving on to the subsequent section about the steps to prime a Krause & Becker airless paint sprayer…

Transition: Now that we understand the risks of skipping priming and the benefits of priming a new paint sprayer, let’s delve into the steps required to prime a Krause & Becker airless paint sprayer.

Steps to Prime a Krause & Becker Airless Paint Sprayer

Priming a Krause & Becker airless paint sprayer is a crucial step in ensuring optimal performance and a flawless finish. Understanding the importance, benefits, and techniques of priming a paint sprayer is essential for achieving professional results. Here are three reasons why priming is so important:

  • Proper priming ensures that the paint sprayer is free from any debris or contaminants, preventing clogs and blockages during operation.
  • Priming helps to create a consistent and even spray pattern, resulting in a smooth and uniform coat of paint.
  • By priming the sprayer, you can also identify and troubleshoot common issues that may arise during the priming process, such as air leaks or insufficient pressure.

Now that you understand the importance of priming, let’s move on to some tips and tricks for efficient priming without compromising the quality of your paint job.

Tips and Tricks for Efficient Priming

Now that you know the steps to prime a Krause & Becker Airless Paint Sprayer, let’s dive into some tips and tricks for efficient priming.

Efficient priming is essential to ensure a smooth and even application of paint. One technique is to start with a clean and well-maintained sprayer. Make sure to clean the filters regularly and replace them if necessary.

Additionally, always use the recommended size tip for the paint you’re using to prevent clogs and ensure proper flow. Another helpful tip is to adjust the pressure to the optimal level for your specific project. This’ll help you achieve the desired coverage and minimize overspray.

If you encounter any priming issues, such as inconsistent spray or air bubbles, try troubleshooting by checking for clogs or adjusting the pressure accordingly.

By implementing these efficient priming techniques and troubleshooting any issues, you’ll be ready to move on to the next section about common troubleshooting issues with priming a paint sprayer.

Common Troubleshooting Issues with Priming a Paint Sprayer

If you’re experiencing any issues while priming your paint sprayer, troubleshooting some common problems can help you get back to achieving a smooth and even application.

When it comes to understanding priming techniques, one common issue that arises is paint sprayer clogs. Clogs can occur due to various reasons such as using thick paint or not properly cleaning the sprayer after previous use. To troubleshoot this issue, start by checking the nozzle for any obstructions and cleaning it thoroughly. It’s also important to make sure that the paint is mixed properly and has the right consistency.

If the problem persists, you may need to disassemble the sprayer and clean the internal components. By following these troubleshooting steps, you can ensure that your paint sprayer is primed and ready for use.

Moving forward, let’s discuss maintenance and care for a new Krause & Becker airless paint sprayer.

Maintenance and Care for a New Krause & Becker Airless Paint Sprayer

Taking care of your brand-new Krause & Becker airless paint sprayer is crucial to ensure its longevity and optimal performance. Understanding paint sprayer maintenance is key to keeping your sprayer in top shape.

One important aspect of maintenance is troubleshooting paint sprayer issues. If you encounter any problems with priming your sprayer, it’s important to address them promptly. Start by checking the intake tube and filter for any clogs or debris. Make sure the sprayer is properly lubricated and that all connections are tight. Regularly clean and inspect the sprayer for any signs of wear or damage.

By following these maintenance steps, you can prevent potential issues and extend the lifespan of your Krause & Becker airless paint sprayer.

Now, let’s move on to the final verdict: to prime or not to prime?

Final Verdict: To Prime or Not to Prime?

In the end, it all comes down to whether or not priming is worth the extra effort. When it comes to a new Krause & Becker airless paint sprayer, priming can offer several benefits.

Priming helps to ensure an even and smooth application of paint, as it helps to seal any porous surfaces and creates a consistent base for the paint to adhere to. Additionally, priming can improve the durability and longevity of the paint job, as it provides an extra layer of protection against moisture and other elements.

While priming may require some additional time and effort, the end result is often a more professional-looking finish that lasts longer. Therefore, I would recommend taking the time to prime your Krause & Becker airless paint sprayer when it is new, as the benefits outweigh the extra effort.

Frequently Asked Questions

Can I use my Krause & Becker airless paint sprayer without priming it first?

Skipping the priming process of a new Krause & Becker airless paint sprayer is not advisable. Priming ensures proper functioning, prevents clogging, and extends the sprayer’s lifespan. It is necessary to prime the sprayer before using it for optimal results.

How often should I prime my Krause & Becker airless paint sprayer?

To properly clean a Krause & Becker airless paint sprayer, it is important to prime it regularly. This ensures the smooth operation of the sprayer and helps prevent clogs. Here are some tips for troubleshooting common issues with the sprayer.

What are some potential issues that can arise from not priming a new paint sprayer?

Not priming a new paint sprayer can lead to potential consequences such as clogging, uneven spraying, and damage to the pump. It is crucial to prime the sprayer to ensure smooth and efficient paint application.

Are there any alternative methods to priming a Krause & Becker airless paint sprayer?

There are alternative methods to priming a Krause & Becker airless paint sprayer. However, priming is highly recommended as it ensures proper paint flow, prevents clogging, and improves the overall performance and longevity of the sprayer.

Can I use any type of paint with a Krause & Becker airless paint sprayer without priming it?

When using a Krause & Becker airless paint sprayer without priming, it’s important to choose the right type of paint. Latex and oil-based paints are suitable options. Priming beforehand ensures better paint adhesion and a smoother finish.

Conclusion

In conclusion, after thoroughly researching and exploring the topic, it’s clear that priming a new Krause & Becker airless paint sprayer is crucial for achieving proper paint application. The manufacturer strongly recommends priming the sprayer before use to ensure optimal performance and prevent potential risks.

Neglecting to prime a new paint sprayer can lead to clogs, uneven coverage, and damage to the equipment. By following the recommended priming process and properly maintaining the sprayer, users can enjoy efficient and reliable paint spraying for their projects.

Remember, always prime before you paint!

Continue Reading

Airless Paint Sprayers FAQs

How Clean Airless Sprayer After Applying Oil.Based Paint

Published

on

By

An image showcasing the step-by-step process of cleaning an airless sprayer after applying oil-based paint

As someone deeply passionate about DIY projects, I completely understand the sense of accomplishment that comes from finishing a painting task and taking a moment to appreciate the newly applied, bright colors on the walls. Nevertheless, dealing with the cleanup process after utilizing an airless sprayer for oil-based paint applications can be quite challenging. This is where I step in to offer my knowledge on the proper way to clean an airless sprayer following the use of oil-based paint.

Gather your materials and tools, disconnect and empty the paint container, and get ready to witness the magic of a thorough cleaning. By flushing the sprayer with a cleaning solution, removing and cleaning the spray tip and guard, as well as taking care of the filter and other removable parts, you’ll ensure optimal performance for future painting endeavors.

But don’t worry, it’s not all technical jargon and tedious tasks. With my precise and detail-oriented instructions, you’ll be able to clean your sprayer with ease, leaving you with a sense of accomplishment and a sprayer ready for your next masterpiece.

So let’s dive in and get your airless sprayer sparkling clean!

Key Takeaways

  • Disconnect the sprayer from the power source and remove any remaining paint from the container.
  • Disassemble the sprayer according to the instructions and clean the parts with warm, soapy water, paying special attention to the nozzle.
  • Use a brush or toothpick to remove any dried paint or debris from the parts and rinse them with clean water.
  • Allow the parts to dry completely before reassembling the sprayer, ensuring regular maintenance and cleaning for optimal efficiency.

Gather the necessary materials and tools for cleaning

Now, you’ll want to gather all the materials and tools you’ll need for cleaning your airless sprayer after applying oil-based paint.

Start by gathering the necessary cleaning equipment, such as a clean cloth or sponge, a bucket of warm soapy water, and a small brush for scrubbing.

Additionally, make sure you have gloves and safety goggles to protect yourself during the cleaning process.

It’s also important to have a proper disposal method for any leftover paint or cleaning solutions. You can use a sealable container to store any excess paint for future use, or dispose of it according to your local regulations.

With all the materials and tools in place, you’ll be ready to move on to the next step of disconnecting and emptying the paint container.

Disconnect and empty the paint container

First, it’s time to disconnect and empty out the container holding the vibrant pigment. Cleaning process and proper maintenance are crucial for keeping your airless sprayer in top condition. To properly clean the paint container, follow these steps:

  • Disconnect the sprayer from the power source and remove the container from the sprayer.
  • Use caution when handling the container, as it may still contain paint residue.
  • Empty any remaining paint into a separate container for disposal.

Cleaning the paint container is an essential part of maintaining your sprayer and ensuring its longevity.

Now that the container is disconnected and emptied, it’s time to move on to the next step: flushing the sprayer with a cleaning solution. This will thoroughly remove any remaining paint and prepare the sprayer for future use.

Flush the sprayer with a cleaning solution

To keep your airless sprayer in top shape, it’s time to give it a refreshing cleanse by flushing it with a cleaning solution.

There are various cleaning solution alternatives you can choose from, such as warm soapy water or a commercial paint cleaner. Whichever option you select, make sure it’s compatible with oil-based paints.

Start by filling the paint container with the cleaning solution and then attach it to the sprayer. Turn on the sprayer and run the cleaning solution through the system for a few minutes. This will remove any remaining paint residue and ensure a thorough cleaning.

Regularly cleaning your sprayer with a cleaning solution will not only prolong its lifespan but also prevent clogging and maintain optimal performance.

With the sprayer now cleaned, it’s time to move on to the next step of removing and cleaning the spray tip and guard.

Remove and clean the spray tip and guard

Once you’ve finished flushing the sprayer, it’s time to tackle the next crucial step: removing and giving some TLC to the spray tip and guard. Cleaning techniques for the spray tip and guard are essential to ensure optimal performance and prevent clogs. Here are some troubleshooting tips to help you clean them effectively:

  • Use a small brush or toothpick to remove any dried paint or debris from the tip and guard.
  • Soak the spray tip and guard in a cleaning solution for about 15-30 minutes to dissolve any stubborn paint residue.
  • Rinse them thoroughly with water to remove any remaining residue.
  • Inspect the spray tip for any signs of wear or damage. Replace it if necessary.
  • Reassemble the spray tip and guard securely before using the sprayer again.

Now that the spray tip and guard are clean, let’s move on to the next section about cleaning the filter and other removable parts.

Clean the filter and other removable parts

Now that the spray tip and guard are sparkling, let’s delve into the next step of rejuvenating your sprayer: giving the filter and other removable parts a thorough cleaning.

Cleaning the airless sprayer nozzle is crucial for maintaining optimal performance. Start by removing the nozzle and filter from the sprayer according to the manufacturer’s instructions.

Rinse the filter under running water to remove any paint residue or debris. Use a soft brush to gently scrub the nozzle, ensuring all clogs are removed. If you encounter any issues, such as uneven spray patterns or reduced pressure, troubleshooting common issues with airless sprayers can help identify the problem.

Once the filter and nozzle are clean, transition into the subsequent section about using a brush or cloth to clean the exterior of the sprayer to complete the cleaning process.

Use a brush or cloth to clean the exterior of the sprayer

After you’ve finished giving the filter and other removable parts a thorough cleaning, it’s time to tackle the exterior of your sprayer with a brush or cloth. Here are some effective cleaning techniques to ensure your sprayer is free from any oil-based paint residue:

  1. Use a soft-bristle brush: Gently scrub the exterior surface of the sprayer with a brush to remove any dried paint particles. Be careful not to scratch or damage the sprayer’s finish.

  2. Damp cloth: Moisten a clean cloth with a mild cleaning solution or soapy water. Wipe down the sprayer, paying attention to areas with stubborn paint stains. Rinse the cloth frequently to avoid spreading the paint residue.

  3. Alternative cleaning methods: If the paint is particularly stubborn, you can try using a paint thinner or solvent specifically designed for oil-based paints. Follow the manufacturer’s instructions and use these products with caution.

With the sprayer’s exterior cleaned, it’s time to move on to the next step: rinsing the sprayer with clean water to ensure all traces of paint are removed.

Rinse the sprayer with clean water

To ensure a pristine finish on your project, it’s time to give your sprayer a refreshing rinse with clear water. Cleaning techniques are crucial in maintaining the sprayer’s functionality and prolonging its lifespan.

Start by detaching any removable parts and rinsing them separately. Then, fill a bucket or sink with clean water and submerge the sprayer’s nozzle and other small components. Use a soft brush or cloth to gently scrub away any paint residue. If necessary, you can also use alternative cleaning solutions specifically designed for oil-based paint.

Once everything is thoroughly rinsed, dry the sprayer and reassemble it for future use. With a clean and well-maintained sprayer, you can achieve professional-quality results on your next painting project.

Now, let’s move on to the next section about how to dry and reassemble the sprayer.

Dry and reassemble the sprayer

Once you’ve finished rinsing the sprayer, it’s time to dry it and put it back together for future use, so you can continue to achieve amazing results on your painting projects.

Start by thoroughly drying all the parts with a clean cloth. Make sure to remove any excess water or moisture to prevent rusting.

After drying, it’s important to re-oil the sprayer to keep it working smoothly. Apply a few drops of oil to the piston rod, packings, and other moving parts as specified in the manufacturer’s instructions. This will help maintain the sprayer’s performance and extend its lifespan.

Additionally, take this opportunity to troubleshoot common issues with airless sprayers, such as clogged nozzles or worn seals. Addressing these problems now will save you time and frustration later.

With the sprayer dried, oiled, and in proper working condition, you can confidently move on to the next step of storing it properly for future use.

Store the sprayer properly for future use

Make sure you store your sprayer properly to keep it in top shape for your next painting project. Proper storage is essential for preventing paint buildup and maintaining optimal performance.

Here are some tips to help you store your sprayer effectively:

  • Clean the sprayer thoroughly after each use, making sure to remove any leftover paint or debris.
  • Disassemble the sprayer and store each part separately to prevent damage and ensure easy reassembly.
  • Store the sprayer in a clean, dry, and well-ventilated area to prevent moisture buildup and rust.
  • Use a protective cover or wrap the sprayer in a cloth to shield it from dust and potential damage.

By following these storage guidelines, you can extend the lifespan of your sprayer and ensure it’s ready for use whenever you need it.

Now let’s move on to how to regularly maintain and clean the sprayer to ensure optimal performance.

Regularly maintain and clean the sprayer to ensure optimal performance

Regularly tending to your sprayer is like giving it a refreshing shower, ensuring its peak performance. To maintain the sprayer’s performance and prevent clogging issues, it’s crucial to clean it thoroughly after each use.

Start by disconnecting the sprayer from the power source and removing any remaining paint from the container. Next, disassemble the sprayer according to the manufacturer’s instructions and clean each part with warm, soapy water. Pay special attention to the nozzle, as it’s prone to clogging. Use a brush or toothpick to remove any dried paint or debris.

After cleaning, rinse all parts with clean water and allow them to dry completely before reassembling the sprayer. Regular maintenance and cleaning will ensure that your sprayer continues to work efficiently and deliver flawless results.

Frequently Asked Questions

How often should I clean my airless sprayer after using oil-based paint?

I should clean my airless sprayer immediately after using oil-based paint to prevent any residue from drying and clogging the system. Using a pressure washer is not recommended as it may damage the sprayer.

Can I use any cleaning solution or is there a specific one recommended for cleaning the sprayer?

Using any cleaning solution is like pouring water on a fire! For the best results, stick to the specific cleaning solution recommended for your sprayer. It’s important to follow best practices for sprayer maintenance to ensure optimal performance and longevity.

Are there any special instructions for cleaning the spray tip and guard?

To clean the spray tip and guard, it’s important to follow proper cleaning techniques. Start by removing them from the sprayer and soaking them in a cleaning solution. Use a small brush to scrub away any paint residue, and troubleshoot any clogs or blockages.

How should I store the sprayer to ensure it remains in good condition for future use?

To store the sprayer properly for future use, I recommend following these maintenance steps. Clean the sprayer thoroughly, remove any leftover paint, and store it in a dry and temperature-controlled area. This ensures its longevity and optimal performance.

What are some signs that indicate the sprayer needs maintenance or cleaning?

Signs of sprayer maintenance needed include clogged or uneven spray patterns, decreased paint flow, and excessive overspray. To properly clean the airless sprayer, disassemble the parts, flush with water or appropriate solvent, and remove any paint residue.

Conclusion

In conclusion, cleaning an airless sprayer after applying oil-based paint is a crucial step in maintaining its optimal performance. By following the steps outlined above, you can ensure that your sprayer remains in top condition for future use.

Remember to regularly maintain and clean the sprayer, as this will prevent clogs and ensure smooth and even paint application. With proper care and attention, your sprayer will continue to provide you with excellent results. So, don’t forget to clean and store it properly after each use.

Continue Reading

Affiliate disclaimer

As an affiliate, we may earn a commission from qualifying purchases. We get commissions for purchases made through links on this website from Amazon and other third parties.

Trending