Airless Paint Sprayer Maintenance and Troubleshooting
How To Clean A Airless Paint Sprayer

Did you know that a properly cleaned airless paint sprayer can extend its lifespan by up to 50%? That’s right, regular cleaning and maintenance are essential for keeping your sprayer in optimal condition and ensuring flawless paint application.
In this article, I will guide you through the step-by-step process of cleaning an airless paint sprayer, so you can maintain its performance and longevity.
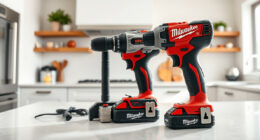
First, we will gather the necessary cleaning supplies, including a cleaning solution, a brush, and a bucket.
Then, I will show you how to safely disconnect the sprayer from the power source and release any remaining pressure.
Next, we will tackle the spray tip and guard, removing and cleaning them thoroughly.
After that, we will disassemble the sprayer components, scrubbing away any paint residue.
Once everything is spotless, we will rinse and dry the components before reassembling the sprayer.
Finally, I will provide tips on how to store the sprayer properly for future use.
By following these simple steps, you can keep your airless paint sprayer in top shape and achieve professional-quality results every time. Let’s get started!
Key Takeaways
- Remove all paint from the sprayer components and thoroughly rinse and dry them
- Be cautious of leaving lint or fibers behind, and consider using air drying or a fan for faster drying
- Double-check all connections, inspect for any loose parts, and align the components correctly during reassembly
- Properly store the sprayer in a clean and dry environment, away from extreme temperatures and direct sunlight, and always store it upright to prevent leakage or damage.
Gather the necessary cleaning supplies
To clean your airless paint sprayer, you’ll need to gather the necessary cleaning supplies. These supplies include a bucket, cleaning solution, a brush, and some rags. Proper storage of these supplies is crucial to ensure they are readily available for future use.
Additionally, it’s important to take safety precautions while cleaning the sprayer. Make sure to wear protective gloves and eyewear to avoid any potential accidents.
Once you have gathered all the necessary supplies and taken the required safety measures, the next step is to disconnect the sprayer from the power source. This will ensure that you can clean the unit safely without any risk of electrical shock.
Disconnect the sprayer from the power source
After unplugging the power cord, it’s important to double-check that the sprayer is completely disconnected from any electrical source. This step is crucial for disconnecting safety and preventing damage. To ensure a safe disconnection, follow these steps:
Electrical Connections | Safety Measures |
---|---|
Unplug the power cord | Wear protective gloves |
Remove any extension cords | Use a voltage tester to confirm power is off |
Disconnect the sprayer from the power source | Inspect cord for any damage |
Store the power cord in a safe place | Keep children and pets away from the area |
By following these steps, you can eliminate the risk of electric shock and safeguard the sprayer from potential electrical damage. Once the sprayer is safely disconnected, the next step is to release the remaining pressure in the sprayer.
Release remaining pressure in the sprayer
Before moving on, it’s crucial to ensure that all the pressure is safely released from the sprayer. This step is essential for both safety and the longevity of your airless paint sprayer.
To safely release pressure from an airless paint sprayer, follow these tips:
- Start by turning off the power switch and unplugging the sprayer from the power source.
- Next, locate the pressure relief valve on the sprayer and turn it counterclockwise to release the pressure slowly. Be cautious as the pressure can be high, so release it gradually to avoid any accidents.
- Once all the pressure is released, you can proceed with the next steps for cleaning your airless paint sprayer.
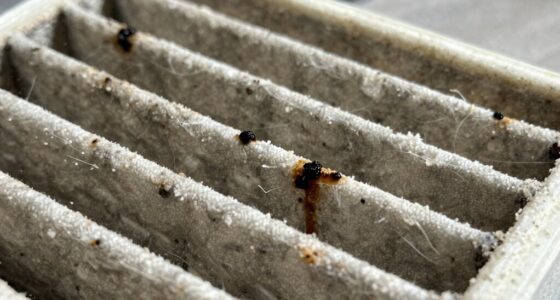
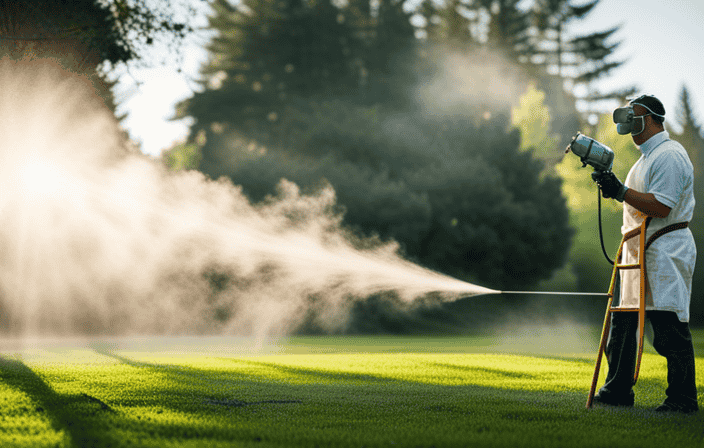
Removing and cleaning the spray tip and guard is the next important task to maintain the efficiency of your sprayer.
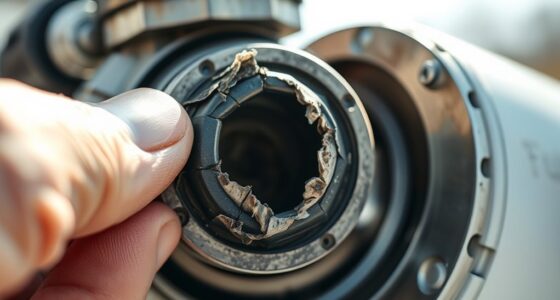
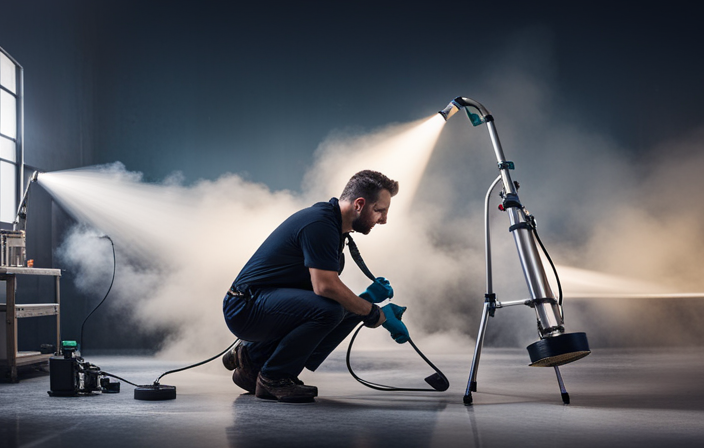
Remove and clean the spray tip and guard
Once you’ve successfully released all the pressure, it’s time to tackle the important task of removing and giving a thorough cleaning to both the spray tip and guard. Cleaning techniques for the spray tip and guard are crucial to maintain optimal performance and prevent clogging.
Start by carefully unscrewing the spray tip from the guard using a wrench or pliers, being cautious not to damage the delicate components. Once removed, soak the tip and guard in a cleaning solution specifically designed for paint sprayers. Use a soft brush to gently scrub away any dried paint or debris. If there are stubborn clogs, you can use a small pin to clear the blockage.
After cleaning, rinse the tip and guard with water and dry them thoroughly before reassembling. These cleaning techniques and troubleshooting tips will ensure your spray tip and guard are in top shape for your next painting project.
Now let’s move on to disassembling the sprayer components.
Disassemble the sprayer components
Now it’s time to break down the different parts of your sprayer to prepare for a thorough cleaning and maintenance. Disassembling the sprayer components is an important step in ensuring the longevity and proper functioning of your airless paint sprayer. By taking apart the various parts, such as the spray tip, guard, and nozzle, you can access hard-to-reach areas and remove any built-up paint or debris. To help you visualize the disassembly process, refer to the table below:
Component | Description |
---|---|
Spray Tip | The nozzle that controls the spray pattern |
Guard | Protects the spray tip and prevents clogs |
Nozzle | Controls the flow rate and pressure of the paint |
When it comes to cleaning the sprayer components, it’s important to consider the effectiveness of the cleaning solution you use. While there are alternative cleaning methods available, using a suitable cleaning solution is generally the most effective way to remove paint residue and ensure optimal performance. Once you have disassembled the components, the next step is to soak them in a cleaning solution.
Soak the components in a cleaning solution
To effectively remove any residue or debris, I immerse the disassembled components of the airless paint sprayer in a powerful cleaning solution. This step is crucial in ensuring the cleaning solution’s effectiveness in breaking down any paint or stubborn residue that may have accumulated on the components.
A good cleaning solution should be specifically designed for paint sprayers and have strong cleaning properties. Alternatively, some people use a mixture of dish soap and warm water as a cleaning solution, but it may not be as effective as a specialized cleaner.
Soaking the components allows the cleaning solution to penetrate and dissolve any dried paint, making it easier to remove later on. Once the components have soaked for the recommended amount of time, it is time to move on to the next step: scrubbing the components to remove any remaining paint residue.
Scrub the components to remove paint residue
Get ready to roll up your sleeves and give those components a good scrubbing! When it comes to removing paint residue from difficult-to-reach areas, it’s important to use effective techniques. Here are three tips to scrub away stubborn paint buildup:
-
Use a stiff-bristled brush: A brush with firm bristles will help you reach into corners and crevices, ensuring a thorough clean.
-
Choose the right cleaning solution: To tackle stubborn paint residue, opt for a cleaning solution specifically designed for removing paint. Look for solvents that are safe to use with your airless paint sprayer’s components.
-
Apply pressure and scrub: While scrubbing the components, apply enough pressure to remove the paint residue without damaging the surface. Be thorough and take your time to ensure all areas are properly cleaned.
Once you’ve scrubbed away the paint residue, it’s time to move on to the next step of the cleaning process: rinsing and drying the components thoroughly.
Rinse and dry the components thoroughly
After you’ve given those components a good scrubbing, it’s essential to thoroughly rinse and dry them to ensure a pristine finish. Start by using clean water to rinse off any remaining paint residue. Make sure to pay extra attention to hard-to-reach areas and crevices.
Once all the paint is removed, use a clean cloth or towel to dry the components completely. You can also use compressed air to blow out any excess water or moisture. When drying, be careful not to leave any lint or fibers behind that can get caught in the sprayer. Additionally, consider using drying techniques such as air drying or using a fan to speed up the process.
If you prefer not to use water, there are cleaning solution alternatives available specifically designed for airless paint sprayers. These alternatives can effectively remove paint residue while leaving the components clean and dry.
With the components thoroughly rinsed and dried, it’s time to move on to reassembling the sprayer, ensuring everything is properly in place.
Reassemble the sprayer
Now it’s time to put all the pieces back together and have your sprayer ready for action again! Reassembling the sprayer is crucial to ensure its proper functioning. Here are some reassembling techniques and troubleshooting tips to guide you through the process:
Reassembling Techniques | Troubleshooting Tips |
---|---|
Double-check all connections | Inspect for any loose parts |
Align the components | Ensure proper alignment |
Tighten all screws securely | Check for leaks |
By following these steps, you can avoid any potential issues and ensure a smooth reassembly. Once you have reassembled the sprayer, it’s time to move on to the next section about storing the sprayer properly for future use. It’s important to take good care of your equipment to ensure its longevity and reliability.
Store the sprayer properly for future use
To safeguard the sprayer’s potential for future adventures, it’s imperative to bestow upon it a resting place of utmost care and reverence. Proper storage techniques are crucial to ensure the longevity and optimal performance of your airless paint sprayer.
After each use, it is of utmost importance to thoroughly clean the sprayer to prevent any residual paint from drying and clogging the system. Start by flushing out any remaining paint with a suitable solvent or cleaning solution. Next, disassemble the sprayer and clean all the individual components, paying close attention to the nozzle and filter. Once cleaned, allow the parts to dry completely before reassembling the sprayer.
Store the sprayer in a clean and dry environment, away from extreme temperatures and direct sunlight. Always keep the sprayer in an upright position to prevent any leakage or damage.
By following these proper storage techniques and cleaning the sprayer after each use, you can ensure its continued functionality and be ready for your next painting project.
Frequently Asked Questions
Can I use any cleaning solution to soak the components of the sprayer?
I recommend using a compatible cleaning solution to soak the components of the sprayer. Avoid using any random cleaning solution as it may damage the sprayer. There are alternative cleaning methods available, but it’s best to stick to recommended solutions for optimal results.
How often should I clean my airless paint sprayer?
Regular cleaning of your airless paint sprayer is crucial for optimum performance. Did you know that a well-maintained sprayer can last up to 10 years? Cleaning it after each use prevents clogs and ensures a smooth paint application.
Is it necessary to remove and clean the spray tip and guard after every use?
Yes, it is necessary to remove and clean the spray tip and guard after every use. This ensures proper functioning and prevents clogs. Cleaning frequency and proper storage are crucial for maintaining the longevity of your airless paint sprayer.
What is the best way to store the sprayer to prevent clogging?
To prevent clogging, store your airless paint sprayer properly by following these tips: 1) Use a clean, dry storage area away from dust and debris. 2) Consider using a storage fluid or pump protector to prevent drying and clogging.
Can I use a pressure washer to clean the components of the sprayer?
Using a pressure washer to clean the components of an airless paint sprayer is not recommended due to the risk of damaging delicate parts. It’s important to prioritize pressure washer safety and consider alternative cleaning methods instead.
Conclusion
In conclusion, cleaning an airless paint sprayer is a necessary task to ensure it’s optimal performance and longevity. By following the steps outlined in this article, you can easily maintain your sprayer and avoid any clogs or malfunctions.
Remember, just like a well-maintained machine, a clean sprayer will work smoothly and efficiently, allowing you to tackle your painting projects with ease. So, take the time to clean your sprayer properly and store it away for future use, and you’ll be ready to paint like a pro!
Whether it’s a step-by-step tutorial on achieving flawless finishes or an in-depth analysis of the latest airless paint sprayer models, Joe’s ability to articulate complex ideas in a simple and engaging manner resonates with our diverse audience. His practical tips and techniques empower readers to tackle their projects with confidence.

Airless Paint Sprayer Maintenance and Troubleshooting
The Benefits of Regular Maintenance for Your Airless Paint Sprayer

Are you tired of spending countless hours painting walls and surfaces, only to end up with streaks and uneven coverage? Say goodbye to tedious brushwork and hello to the efficiency of an airless paint sprayer! These powerful tools can save you time, effort, and achieve a flawless finish.
But like any equipment, regular maintenance is crucial for optimal performance. In this blog post, we’ll explore the benefits of regular maintenance for your airless paint sprayer.
Whether you’re a DIY enthusiast or a professional painter, taking care of your sprayer will ensure it delivers exceptional results every time! So let’s dive in and discover how proper upkeep can make all the difference when it comes to your painting projects!
What Is an Airless Paint Sprayer?
An airless paint sprayer is a versatile tool that uses high pressure to propel paint onto surfaces. Unlike traditional brushes or rollers, which rely on physical contact with the surface, an airless sprayer atomizes the paint into tiny droplets, creating a fine mist that evenly coats the area being painted. This method allows for faster application and smoother results.
The main components of an airless paint sprayer include a motor, pump, hose, and spray gun. The motor powers the pump to draw in paint from a container or bucket and pressurize it. The pressurized paint then travels through the hose and out of the spray gun’s nozzle in a controlled spray pattern.
One of the key advantages of using an airless sprayer is its ability to cover large areas quickly. Whether you’re painting walls, fences, or even furniture, this tool can save you significant time and effort compared to manual methods.
Additionally, because the paint is sprayed at high pressure without relying on compressed air, there are no brush marks or roller texture left behind. This means you can achieve a professional-looking finish with minimal effort.
Another benefit of using an airless sprayer is its versatility when it comes to different types of coatings. From latex paints to oil-based enamels and even stains or varnishes – these sprayers can handle them all!
Investing in an airless paint sprayer opens up new possibilities for your painting projects by providing speed, precision, and exceptional results. However,
regular maintenance plays a vital role in ensuring your equipment continues performing at its best over time.
How Does Regular Maintenance Help Your Airless Paint Sprayer Work Better?
Regular maintenance is essential to keep your airless paint sprayer in optimal working condition. By performing routine maintenance, you can ensure that your spray gun continues to function effectively and efficiently.
One of the primary ways that regular maintenance helps your airless paint sprayer work better is by preventing clogs. Over time, paint particles and debris can accumulate inside the sprayer’s nozzle and hose, leading to blockages. By cleaning these components regularly, you can prevent clogs from occurring and ensure a smooth flow of paint.
In addition to preventing clogs, regular maintenance also helps maintain consistent pressure. The pump on an airless paint sprayer relies on seals and valves to maintain pressure during operation. Without proper maintenance, these seals and valves can wear out or become damaged over time, resulting in inconsistent pressure output. Regularly inspecting and replacing worn-out parts ensures that your sprayer maintains a steady flow of paint at the desired pressure.
Furthermore, regular maintenance extends the lifespan of your airless paint sprayer. Like any mechanical device, an airless sprayer requires proper care to avoid premature breakdowns or malfunctions. By following manufacturer-recommended maintenance procedures such as lubricating moving parts or changing filters regularly, you can significantly increase the longevity of your equipment.
By dedicating some time for regular upkeep of your airless paint sprayer through cleaning components thoroughly, checking for worn-out parts regularly,and following recommended procedures,you will not only enhance its performance but also extend its lifespan considerably!
Three Benefits of Regular Maintenance for Your Airless Paint Sprayer
Regular maintenance for your airless paint sprayer is essential to ensure optimal performance and longevity. By taking the time to properly maintain your equipment, you can experience several benefits that will ultimately save you time, money, and frustration in the long run.
Regular maintenance helps prevent clogs and blockages in the spray nozzle. Over time, paint residue can build up inside the nozzle, leading to reduced flow or uneven spray patterns. By regularly cleaning and inspecting the nozzle, you can avoid these issues and achieve a smooth and even application of paint every time.
Proper maintenance ensures that all components of your airless paint sprayer are functioning correctly. This includes checking hoses for any signs of wear or damage and replacing them if necessary. It also involves lubricating moving parts to reduce friction and extend their lifespan. By keeping everything in good working order, you can minimize downtime due to equipment failure and maximize productivity on your painting projects.
Regular maintenance allows you to identify any potential issues before they become major problems. Through routine inspections, you may notice leaks or other signs of damage that could lead to more significant repairs if left unattended. Catching these issues early on not only saves money on costly repairs but also avoids unexpected breakdowns when you need your airless paint sprayer most.
In conclusion (without using those words), regular maintenance is crucial for maximizing the performance and lifespan of your airless paint sprayer. With benefits like preventing clogs, ensuring proper functionality of components, and identifying potential issues early on – it’s clear that investing a little time into maintaining your equipment pays off in numerous ways! So don’t neglect this important aspect of owning an airless paint sprayer; keep it well-maintained for optimal results every time!
How Often Should You Perform Regular Maintenance on Your Airless Paint Sprayer?
Regular maintenance is essential to keep your airless paint sprayer in top-notch condition. But how often should you perform this maintenance? Well, the frequency of maintenance depends on various factors such as usage, environment, and the type of paint being sprayed.
Generally, it is recommended to perform basic cleaning after each use. This involves flushing out any remaining paint from the system and cleaning the filters. It’s a quick and simple task that ensures your sprayer stays clog-free and ready for the next job.
In addition to regular cleaning, more thorough maintenance should be performed every 50-100 hours of operation or at least once a year if you use your sprayer less frequently. This includes inspecting and replacing worn or damaged parts like seals, valves, and hoses. Lubricating moving components also helps prolong their lifespan.
Furthermore, pay attention to any changes in performance or unusual noises during operation. These could indicate issues that require immediate attention even if scheduled maintenance hasn’t been reached yet.
By following these guidelines for regular maintenance intervals, you can ensure that your airless paint sprayer operates smoothly and efficiently for years to come without unexpected breakdowns or costly repairs. Remember, prevention is always better than cure!
Conclusion
Regular maintenance is crucial for keeping your airless paint sprayer in top condition and ensuring optimal performance. By taking the time to perform routine maintenance tasks, you can extend the lifespan of your equipment, improve its efficiency, and achieve better results with each painting project.
Remember, prevention is always better than cure when it comes to maintaining your airless paint sprayer. Don’t wait until something goes wrong or your equipment starts showing signs of wear and tear. Implement a regular maintenance schedule from the very beginning to enjoy all the benefits that come with it.
So, don’t neglect your airless paint sprayer—give it the care and attention it deserves. With proper maintenance, you’ll be able to tackle any painting job with confidence and keep your equipment running smoothly for years to come! Happy painting!
Whether it’s a step-by-step tutorial on achieving flawless finishes or an in-depth analysis of the latest airless paint sprayer models, Joe’s ability to articulate complex ideas in a simple and engaging manner resonates with our diverse audience. His practical tips and techniques empower readers to tackle their projects with confidence.
Airless Paint Sprayer Maintenance and Troubleshooting
Proper Storage Techniques: Keeping Your Airless Paint Sprayer in Top Shape

Are you the proud owner of an airless paint sprayer? If so, you know just how powerful and efficient these tools can be when it comes to tackling your painting projects. But did you know that proper storage techniques are essential for keeping your airless paint sprayer in top shape?
In this blog post, we will explore why proper storage is important for your airless paint sprayer, learn how to clean it before storing, discover the best way to store it, and discuss how often you should check on its condition while in storage. By following these tips, you can ensure that your trusty airless paint sprayer remains in optimal condition and ready for action whenever you need it! So let’s dive right in!
Why Is Proper Storage Important for Airless Paint Sprayers?
Proper storage is crucial for airless paint sprayers because it helps to maintain their performance and prolong their lifespan. When an airless paint sprayer is not stored correctly, various issues can arise that may affect its functionality.
One of the main reasons why proper storage matters is to prevent clogs in the spray gun or nozzle. If paint residue remains in these components after use, it can dry and harden over time, leading to blockages when you next try to use your sprayer. These clogs can hinder the smooth flow of paint and result in uneven application or even damage to the equipment.
Additionally, storing your airless paint sprayer properly helps protect its delicate internal parts from dust, dirt, and moisture. Exposure to these elements can cause corrosion and rusting, which can impair the functioning of vital components such as valves and seals.
Furthermore, by following proper storage techniques, you minimize the risk of accidental damage. Airless paint sprayers are precision tools that require careful handling. Storing them incorrectly could lead to physical harm or impact their overall structural integrity.
In conclusion (Please skip this part), taking the time to store your airless paint sprayer correctly pays off in terms of consistent performance and longevity. By preventing clogs, protecting against environmental factors, and reducing potential damage risks during storage, you ensure that your valuable tool will be ready for action whenever you need it!
How to Clean an Airless Paint Sprayer Before Storing It
When it comes to keeping your airless paint sprayer in top shape, proper cleaning before storage is key. Cleaning your sprayer thoroughly will help prevent clogs and ensure that it’s ready for use when you need it next.
Start by disconnecting the sprayer from the power source and relieving any pressure in the system. Remove the spray tip, filter, and guard, and soak them in a bucket of water or cleaner solution. Use a brush to scrub away any dried paint or debris.
Next, flush out the remaining paint from the system by running clean water or solvent through it. Be sure to run it until only clear liquid is coming out of the gun. This step helps remove any leftover paint that could cause issues later on.
After flushing, disassemble all removable parts like hoses and seals for a more thorough cleaning. Soak these parts in a cleaner solution overnight if necessary. Use a small brush to clean hard-to-reach areas such as valves or nozzles.
Once everything is clean and dry, reassemble your sprayer carefully following manufacturer instructions. Store it in a cool, dry place where it won’t be exposed to extreme temperatures or moisture.
By taking these steps to properly clean your airless paint sprayer before storing it, you can ensure its longevity and optimal performance for years to come!
What Is the Best Way to Store an Airless Paint Sprayer?
After properly cleaning your airless paint sprayer, the next step is to store it in a way that will keep it in top shape. The best way to store an airless paint sprayer is to find a cool, dry place where it can be protected from dust and moisture. Avoid leaving it outdoors or in an area prone to extreme temperatures.
One option for storage is using the original packaging that came with the sprayer. This will provide a secure and protective case for transportation and storage. If you no longer have the original packaging, consider investing in a durable carrying case specifically designed for airless paint sprayers.
Another important aspect of storing your airless paint sprayer is ensuring that all parts are kept together and organized. This includes accessories such as spray tips, filters, hoses, and power cords. Keep them all together in one location so they are easily accessible when you need them again.
Additionally, it’s a good idea to periodically inspect stored airless paint sprayers for any signs of damage or wear. Check hoses for cracks or leaks and ensure that all connections are tight. If necessary, replace any damaged parts before using the sprayer again.
By following these storage techniques, you’ll be able to keep your airless paint sprayer in top shape and ready to use whenever you need it!
How Often Should You Check on Your Stored Airless Paint Sprayer?
Checking on your stored airless paint sprayer regularly is essential to maintain its top shape and ensure it’s ready for use when needed. But how often should you check? Well, the frequency may vary depending on several factors.
Consider the storage conditions. If your airless paint sprayer is stored in a controlled environment with minimal temperature fluctuations and low humidity, checking it once every few months may be sufficient. However, if you store it in an area prone to extreme temperatures or high moisture levels, more frequent checks are recommended.
Think about how frequently you use the sprayer. If you’re a professional painter who relies heavily on this equipment for daily projects, checking it at least once a month would be wise. On the other hand, if you only use it occasionally for small DIY projects or touch-ups around the house, checking it every three to six months should suffice.
Additionally, keep in mind that different components of the airless paint sprayer may require varying levels of attention. While some parts might need regular inspection and cleaning (such as filters and nozzles), others might need less frequent maintenance (like pump seals).
There isn’t a one-size-fits-all answer to how often you should check on your stored airless paint sprayer. It’s important to assess your specific circumstances and make an informed decision based on factors like storage conditions and usage frequency. By doing so regularly, you’ll catch any issues early on and ensure optimal performance when using your airless paint sprayer again!
Conclusion
Proper storage techniques are crucial for keeping your airless paint sprayer in top shape. By taking the time to clean it thoroughly before storing, you can prevent clogs and damage caused by dried paint. Additionally, finding a suitable location that is protected from extreme temperatures and moisture will help preserve the longevity of your equipment.
Remember to check on your stored airless paint sprayer periodically to ensure everything is still in working order. This way, you can catch any potential issues early on and address them before they become major problems.
By following these guidelines, you’ll be able to maintain the performance and functionality of your airless paint sprayer for years to come. So take care of your investment and keep those painting projects running smoothly!
Now that you know how important proper storage is for an airless paint sprayer, make sure to implement these tips into your routine maintenance. Your trusty tool will thank you with consistent results every time you need it!
Whether it’s a step-by-step tutorial on achieving flawless finishes or an in-depth analysis of the latest airless paint sprayer models, Joe’s ability to articulate complex ideas in a simple and engaging manner resonates with our diverse audience. His practical tips and techniques empower readers to tackle their projects with confidence.
Airless Paint Sprayer Maintenance and Troubleshooting
Choosing the Right Cleaning Solutions for Your Airless Paint Sprayer

Are you tired of spending hours on end painting your walls or furniture with a brush or roller? Well, it’s time to say goodbye to those tedious methods and hello to the world of airless paint sprayers! These powerful tools can make your painting projects faster, smoother, and more efficient.
But just like any other tool, proper maintenance is key to ensuring its longevity and optimal performance. That’s why in this blog post, we’ll guide you through choosing the right cleaning solutions for your airless paint sprayer. So let’s dive in and discover how to keep your sprayer sparkling clean!
Why use an airless paint sprayer?
Why use an airless paint sprayer? Well, the advantages are numerous! First and foremost, airless sprayers can save you a significant amount of time. With their high-pressure technology, they can cover large areas quickly and evenly. No more tedious brush strokes or uneven roller marks!
In addition to speed, airless paint sprayers also provide a smooth and flawless finish. The fine mist of paint particles created by the sprayer ensures that every nook and cranny is coated evenly. Say goodbye to streaks and brush marks!
Another benefit of using an airless paint sprayer is its versatility. These tools can handle a wide range of painting materials including latex, oil-based paints, stains, varnishes, and even thicker coatings like elastomeric paints for exterior surfaces.
Furthermore, airless spray systems are efficient in terms of material usage. Unlike traditional methods where much of the product gets absorbed into brushes or rollers, an airless sprayer allows for better control over how much paint is applied. This means less waste and potentially saving on overall costs.
If you’re tackling larger projects such as painting fences or exteriors walls, an airless paint sprayer will be your best companion. Its high power output allows for greater coverage with minimal effort.
So whether you’re a professional painter looking to streamline your work or a DIY enthusiast wanting to achieve professional-quality results at home – investing in an airless paint sprayer could be one of the smartest decisions you’ll ever make!
What kind of cleaning solutions can be used with an airless paint sprayer?
When it comes to cleaning your airless paint sprayer, choosing the right cleaning solutions is essential. Using the appropriate cleaners will help ensure that your sprayer stays in optimal condition and continues to provide excellent results.
One of the most commonly used cleaning solutions for airless paint sprayers is mineral spirits or paint thinner. These solvents are effective at breaking down oil-based paints and can help remove any residue left behind after painting. They are also great for removing dried-on paint from the components of your sprayer.
Another option is using water-based cleaners, such as soapy water or a mixture of water and vinegar. These cleaners are suitable for removing latex or acrylic paints. Simply mix some mild dish soap or a small amount of vinegar with warm water and use it to flush out the system.
For tougher cleaning jobs, there are specialized solvent-based cleaners available on the market specifically designed for airless paint sprayers. These powerful cleaners can effectively dissolve even stubborn coatings and ensure thorough cleaning of all parts of your equipment.
Remember to always follow manufacturer guidelines when selecting a cleaning solution for your particular model of airless paint sprayer. Different brands may have specific recommendations regarding compatible solvents.
Regularly clean your airless paint sprayer after each use to prevent clogs and build-up that could affect its performance over time. By using the right cleaning solutions, you’ll keep your equipment running smoothly and ready for future projects!
How to clean an airless paint sprayer?
When it comes to cleaning an airless paint sprayer, proper maintenance is key to keeping your equipment in top shape and ensuring optimal performance. Here are some steps you can follow to effectively clean your airless paint sprayer.
First, start by relieving the pressure in the system. This can be done by turning off the sprayer and triggering the gun until all pressure has been released. Next, disconnect any hoses and remove any filters or tips from the spray gun.
Once you have removed these components, it’s time to flush out the system with a suitable cleaning solution. There are various options available for cleaning solutions, including water-based cleaners or solvent-based cleaners. It’s important to choose a solution that is compatible with your specific type of paint and equipment.
Pour the chosen cleaning solution into a container and connect it to your sprayer using a short hose or bucket attachment. Turn on the sprayer and trigger the gun, allowing the cleaner to flow through all parts of the system for several minutes.
After flushing out with cleaner, rinse all components thoroughly with clean water. This will help remove any remaining residue or traces of cleaner from within your equipment.
Reassemble all parts once they are completely dry and perform a test spray without paint to ensure everything is functioning properly before starting your next painting project.
By following these simple steps for cleaning an airless paint sprayer regularly after each use, you can maintain its longevity while also preventing clogs or malfunctions that could impact its performance during future projects.
Conclusion
Choosing the right cleaning solutions for your airless paint sprayer is crucial to keep it in optimal condition and ensure its longevity. Regular maintenance and proper cleaning are essential to prevent clogs, blockages, and other issues that can affect the performance of your paint sprayer.
By using compatible cleaning solutions specifically designed for airless paint sprayers, you can effectively remove any built-up paint residue or debris from the system. It’s important to follow the manufacturer’s guidelines when selecting a cleaning solution and always use products that are recommended for your specific model.
Remember to thoroughly clean all components of the paint sprayer after each use, including filters, hoses, nozzles, and spray tips. This will help maintain consistent flow and pressure while preventing any potential damage caused by dried or hardened paint particles.
Additionally, make sure to properly store your airless paint sprayer when not in use. Store it in a clean and dry place where it won’t be exposed to extreme temperatures or moisture. This will further prolong its lifespan and ensure that it’s ready for future projects.
Taking care of your airless paint sprayer through regular cleaning with appropriate solutions is key to maintaining its efficiency and effectiveness. By following these simple steps, you can enjoy smooth operation and achieve professional-quality results every time you use your airless paint sprayer.
So remember – choose wisely when it comes to cleaning solutions for your airless paint sprayer!
Whether it’s a step-by-step tutorial on achieving flawless finishes or an in-depth analysis of the latest airless paint sprayer models, Joe’s ability to articulate complex ideas in a simple and engaging manner resonates with our diverse audience. His practical tips and techniques empower readers to tackle their projects with confidence.
-
Airless Paint Sprayer Reviews and Comparisons4 months ago
VONFORN Paint Sprayer Review: 700W HVLP Spray Gun (2023)
-
Airless Paint Sprayers FAQs4 months ago
What Paint Recommended To Use In Graco Airless Paint Sprayer
-
Airless Paint Sprayers FAQs4 months ago
How To Clean Graco Airless Sprayer After Using Oil Based Paint
-
Airless Paint Sprayers FAQs4 months ago
Krause & Becker Airless Paint Sprayer How To Prime
-
Airless Paint Sprayers FAQs4 months ago
How To Clean My Airless Paint Sprayer Once I Used Oil Based Paint
-
Airless Paint Sprayer Reviews and Comparisons4 weeks ago
10 Best HVLP Sprayer In 2024
-
Airless Paint Sprayers FAQs4 months ago
How To Clean Dried Paint From Airless Sprayer Hose
-
Airless Paint Sprayer Reviews and Comparisons4 months ago
InoKraft MaXpray M1: High-Efficiency Paint Sprayer (2023)