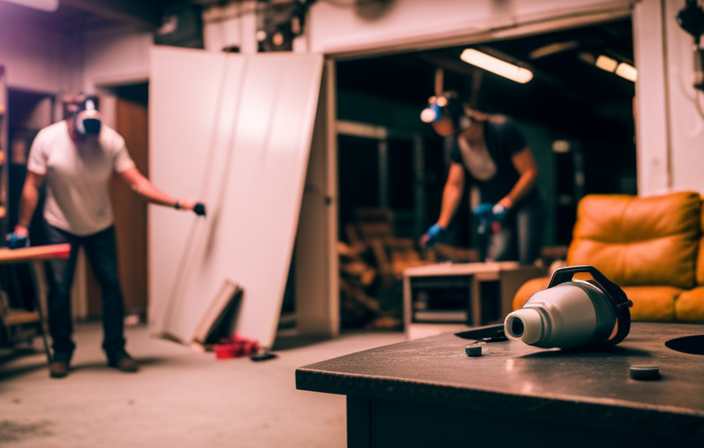
Connect with us

Airless Paint Sprayers FAQs

How To Store With Pump Armor Graco Magnum Dx G05b Airless Paint Sprayer

Published

on

An image showcasing a neatly organized storage space with the Graco Magnum DX G05B Airless Paint Sprayer

The saying “Proper preparation prevents poor performance” is especially relevant when it comes to keeping your Graco Magnum DX G05B airless paint sprayer protected with pump armor. By dedicating time to properly put away your machinery, you’re guaranteeing its extended durability and dependability for future projects.

In this article, I will guide you through the necessary steps to store your sprayer effectively.

First and foremost, it is crucial to understand the importance of proper storage. By doing so, you can prevent damage to the sprayer and maintain its optimal performance.

Gathering the necessary materials, such as pump armor solution, is the next step. Cleaning the sprayer thoroughly and disconnecting and draining the pump are essential to remove any paint residue and prevent clogging.

Preparing the pump armor solution and storing the sprayer in a safe and dry location will help protect it from external elements.

Advertisement

Regularly checking and maintaining the equipment, as well as properly disposing of the pump armor solution, are also crucial steps to ensure its longevity.

By following the manufacturer’s guidelines and recommendations, you can store your Graco Magnum DX G05B airless paint sprayer with pump armor effectively and be ready for your next painting project.

Key Takeaways

  • Store pump armor in a cool, dry place away from extreme temperatures to maximize equipment lifespan and performance
  • Follow manufacturer’s guidelines and recommendations for pump armor storage to prevent drying out and maintain quality
  • Use original or sealed containers to store pump armor and prevent leakage, evaporation, and contamination
  • Proper disposal of pump armor is essential to reduce environmental impact, protect water sources, and prevent long-lasting consequences

Understand the Importance of Proper Storage

Proper storage is crucial for maintaining the longevity and performance of your Graco Magnum DX G05B airless paint sprayer. Understanding the importance of maintenance and the benefits of proper storage is essential.

By storing your paint sprayer correctly, you can prevent damage and ensure its efficiency for future use. When not in use, it is important to clean the sprayer thoroughly to remove any residual paint or debris. Additionally, storing it in a clean and dry environment will prevent rust or corrosion.

Advertisement

Taking these steps will not only extend the lifespan of your sprayer but also save you time and money in the long run.

Now that you understand the importance of proper storage, let’s move on to gathering the necessary materials for storing your Graco Magnum DX G05B airless paint sprayer.

Gather the Necessary Materials

To make sure you have everything you need, gather up all the required materials. Here are three essential items you’ll need for proper equipment maintenance and essential storage techniques with the Graco Magnum DX G05B airless paint sprayer:

  1. Pump Armor: This is a specially formulated fluid that helps protect the pump from corrosion and damage during storage. It’s important to use Pump Armor to ensure the longevity of your sprayer.

  2. Clean cloth or rag: You’ll need this to wipe down the sprayer after use. It’s important to remove any excess paint or debris to prevent clogs and maintain proper functioning.

  3. Storage container: Find a suitable container to store your sprayer in. Make sure it’s clean, dry, and secure to protect your equipment from dust, dirt, and potential damage.

With all the necessary materials gathered, you can now move on to the next step of cleaning the sprayer thoroughly.

Clean the Sprayer Thoroughly

Advertisement

After gathering all the necessary materials, it’s time to give your sprayer a thorough cleaning, leaving it as fresh as a blooming flower in a spring garden. To thoroughly clean your Graco Magnum DX G05B airless paint sprayer, follow these maintenance tips:

  1. Start by removing the spray tip, guard, and filter housing.
  2. Rinse the filter housing and spray tip with warm water, ensuring all paint residue is removed.
  3. Use a brush to scrub the filter housing and spray tip, removing any stubborn paint particles.
  4. Clean the pump by running a mixture of water and pump armor through the sprayer, following the manufacturer’s instructions.

By following these steps, you’ll ensure that your sprayer remains in top-notch condition. Once you have thoroughly cleaned the sprayer, you can proceed to the next section and disconnect and drain the pump.

Disconnect and Drain the Pump

To disconnect the pump, start by turning off the sprayer and unplugging it from the power source. Then, remove the suction tube and filter from the paint container, making sure to empty any remaining paint back into the container.

Next, remove the spray gun and tip from the hose.

To drain the pump, attach the suction tube to a bucket or container and run the sprayer in prime mode until all the excess paint has been drained out. This step is crucial as it prevents any leftover paint from drying inside the pump and causing damage.

Advertisement

With the pump disconnected and drained, you can now proceed to prepare the pump armor solution, which will further protect your sprayer during storage.

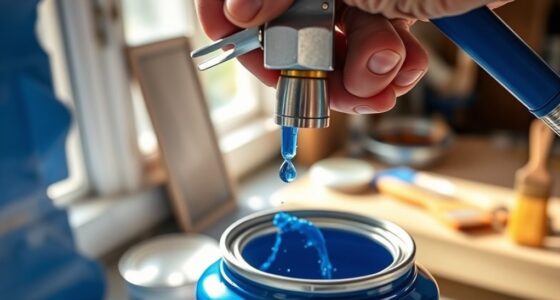
Prepare the Pump Armor Solution

Now it’s time to prepare the pump armor solution to keep your sprayer in top shape.

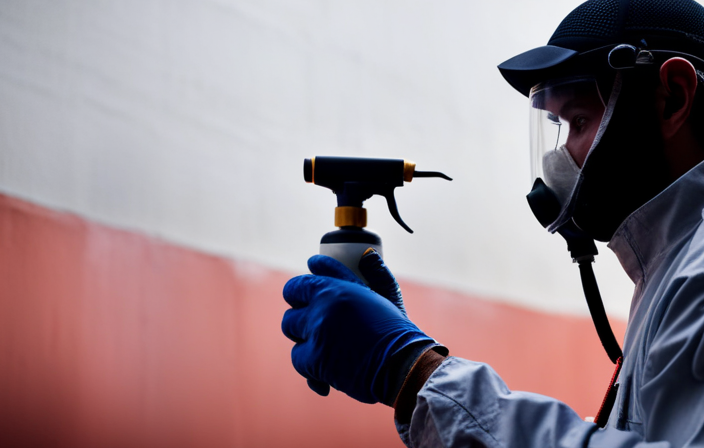
Before handling the pump armor solution, take certain precautions. First, make sure to wear protective gloves and goggles to avoid any contact with your skin or eyes. Additionally, work in a well-ventilated area to prevent inhaling any fumes.

Advertisement

As for alternatives to pump armor solution, some people opt for using mineral spirits or water mixed with a rust inhibitor. However, it’s important to note that these alternatives may not provide the same level of protection as pump armor solution.

Once you have prepared the pump armor solution, you can move on to the next step of priming the sprayer with pump armor to ensure its longevity and optimal performance.

Prime the Sprayer with Pump Armor

To ensure the longevity and optimal performance of your sprayer, it’s crucial to infuse it with the lifeblood of protection: the pump armor solution. Before storing your Graco Magnum DX G05B airless paint sprayer, it’s important to properly prime it with pump armor. This step helps to avoid clogging and ensures that your sprayer is ready for future use.

To properly prime the sprayer with pump armor, follow these steps:

  1. Fill the pump armor solution into a container.
  2. Connect the pump armor hose to the sprayer’s intake tube.
  3. Turn the prime/spray valve to the prime position.
  4. Place the other end of the pump armor hose into the container of pump armor solution.

By following these steps, you can effectively prime your sprayer and prevent any clogging issues. Once the priming is complete, you can store the sprayer in a safe and dry location for future use.

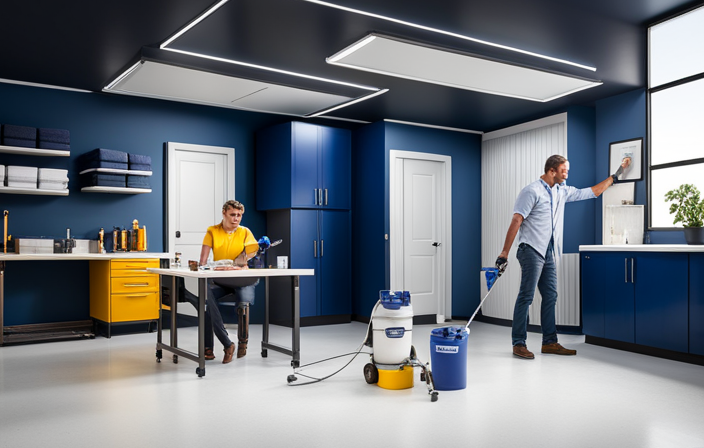
Store the Sprayer in a Safe and Dry Location

To store the sprayer in a safe and dry location, follow these steps:

Advertisement
  1. Clean the sprayer thoroughly after each use, removing any paint or debris.
  2. Dry all the components completely to prevent rust or corrosion.
  3. Find a cool and dry place to store the sprayer, away from extreme temperatures or humid environments.
  4. Consider covering the sprayer with a protective case or cloth to shield it from dust and potential damage.

By following these proper storage practices, you can ensure that your Graco Magnum DX G05B airless paint sprayer will be in top condition for future use. In the next section, we will discuss how to regularly check and maintain the equipment to further extend its lifespan.

Regularly Check and Maintain the Equipment

To keep your equipment in optimal condition, it is important to regularly inspect and maintain it. Check for leaks, damage, or wear on the equipment. Leaks can cause uneven paint spraying and damage the surface being painted. If you notice any leaks, promptly fix them to prevent further damage. Additionally, inspect the equipment for signs of damage or wear, such as cracked hoses or worn-out seals. These issues can affect the sprayer’s performance and may require replacement parts.

Properly lubricate moving parts to ensure smooth operation. Lubrication helps reduce friction and extends the equipment’s lifespan. Regular maintenance and lubrication will keep your Graco Magnum DX G05B airless paint sprayer working effectively and efficiently.

In the next section, we will discuss how to properly dispose of the pump armor solution to ensure environmental safety.

Properly Dispose of Pump Armor Solution

To properly dispose of the pump armor solution, follow these three easy steps:

  1. Check local regulations: Research proper disposal methods for paint-related products in your area. Many communities have specific guidelines for disposing of liquid solutions like pump armor.

  2. Use designated collection sites: Look for local collection sites or recycling centers that accept paint products. These facilities have the necessary infrastructure to handle and dispose of the pump armor solution safely.

  3. Avoid pouring down drains or in the trash: It’s crucial not to pour the pump armor solution down drains or throw it in the regular trash. These actions can harm the environment and contaminate water sources.

Properly disposing of the pump armor solution helps reduce its environmental impact. Following these steps ensures that the solution is handled responsibly.

Advertisement

Now, let’s explore how to follow the manufacturer’s guidelines and recommendations for storing the pump armor solution.

Follow Manufacturer’s Guidelines and Recommendations

To maximize the lifespan of your equipment and achieve optimal performance, it’s crucial to adhere to the manufacturer’s guidelines and recommendations when handling and maintaining the pump armor solution. Following these guidelines ensures that the solution is stored properly and remains effective for future use. The manufacturer’s guidelines may include instructions on how to properly clean the equipment, how often to use the pump armor solution, and how to store it when not in use. Proper storage is particularly important to prevent the solution from drying out or becoming contaminated. Storing the pump armor solution in a cool and dry place, away from direct sunlight and extreme temperatures, will help maintain its quality. Additionally, it may be recommended to store the solution in its original container or a sealed container to prevent leakage or evaporation. By following the manufacturer’s guidelines, you can ensure the pump armor solution is stored correctly, prolonging its effectiveness and protecting your equipment.

Manufacturer’s Guidelines Importance of Proper Storage
Clean equipment regularly Prevents solution from drying out or becoming contaminated
Use pump armor solution as directed Maintains the solution’s effectiveness
Store in a cool and dry place Protects the solution from sunlight and extreme temperatures
Store in original or sealed container Prevents leakage or evaporation

Frequently Asked Questions

Can I use any other type of storage solution instead of Pump Armor to store my Graco Magnum DX G05B airless paint sprayer?

No, it is not recommended to use any other type of storage solution instead of pump armor for the Graco Magnum DX G05B airless paint sprayer. Pump armor offers benefits like preventing corrosion and maintaining optimal performance.

How often should I check and maintain the equipment to ensure its proper functioning?

To ensure proper functioning of the Graco Magnum DX G05B airless paint sprayer, regularly clean and maintain it. Look for signs of malfunctioning and troubleshoot accordingly.

Is it necessary to disconnect and drain the pump every time I finish using the airless paint sprayer?

Yes, it is necessary to disconnect and drain the pump every time I finish using the airless paint sprayer. This helps in checking equipment, avoiding mistakes, and ensuring proper functioning.

Advertisement

Can I store the sprayer in a location with high humidity?

Storing the paint sprayer in a location with high humidity can have negative effects. High humidity can cause rust and damage to the sprayer’s components, reducing its lifespan and performance. It is best to store it in a dry and controlled environment.

What are some common mistakes people make when storing their airless paint sprayer, and how can I avoid them?

When it comes to storing an airless paint sprayer, common mistakes include neglecting proper maintenance. To avoid these errors, it’s important to clean the sprayer thoroughly, protect the pump from freezing, and store it in a dry and secure location.

Conclusion

In conclusion, it is essential to store your Graco Magnum DX G05B airless paint sprayer with pump armor to maintain its performance and longevity. Follow these steps to store your sprayer properly:

  1. Clean the sprayer thoroughly: Before storing your sprayer, make sure to clean it thoroughly. Remove any leftover paint, debris, or clogs from the sprayer to prevent any damage or blockages.

  2. Disconnect and drain the pump: Disconnect the sprayer from the power source and remove the suction tube from the paint container. Drain any remaining paint from the pump by running clean water or a cleaning solution through the sprayer until the liquid comes out clear.

  3. Use pump armor solution: After draining the pump, fill it with pump armor solution. Pump armor is a specially formulated solution that protects the sprayer’s internal components from corrosion and damage during storage. Follow the manufacturer’s instructions on how much pump armor to use and how to properly apply it.

  4. Store in a safe and dry place: Once you have applied the pump armor solution, store your sprayer in a safe and dry place. Make sure to protect it from extreme temperatures, moisture, and dust. Consider using a storage case or covering to provide additional protection.

By following these steps, you can ensure that your Graco Magnum DX G05B airless paint sprayer is properly stored and protected for future use. Remember, taking the time to store your sprayer correctly now will save you from future headaches and costly repairs.

Advertisement

Jule’s attention to detail, editorial prowess, and commitment to delivering high-quality content ensure that every article and review on our website is polished and reader-friendly. Jule’s vision for the website as a one-stop destination for paint sprayer enthusiasts has been instrumental in shaping the platform into what it is today.

Continue Reading
Advertisement

Airless Paint Sprayers FAQs

Magnum Airless Paint Sprayer Where Are Filters Inside Gearbox 232735

Published

on

By

An image showcasing the inner workings of a Magnum Airless Paint Sprayer's gearbox, focusing on the precise location of its filters

As I delved into the intricate workings of the Magnum Airless Paint Sprayer Model 232735, I was curious: where exactly are the filters hidden within the gearbox?

This powerful tool, renowned for its efficiency and precision, has a hidden secret that every user must uncover. In this article, I will guide you through the inner workings of the gearbox and reveal the elusive location of those crucial filters.

With my knowledgeable expertise, I will not only show you how to locate the filters, but also provide detailed instructions on how to remove, clean, and replace them. Additionally, I will share maintenance tips to ensure the longevity and optimal performance of your Magnum Airless Paint Sprayer Model 232735.

So, join me on this journey of discovery as we unlock the secrets of the gearbox and elevate your painting experience to new heights.

Key Takeaways

  • Regularly clean filters inside gearbox to prevent clogging
  • Access filters by removing gearbox cover
  • Clean or replace filters regularly for optimal performance
  • Importance of regular cleaning or replacement for optimal performance and longevity

Introduction to the Magnum Airless Paint Sprayer Model 232735

Advertisement

Introducing the Magnum Airless Paint Sprayer Model 232735, the ultimate tool for all your painting needs. This high-quality sprayer is equipped with state-of-the-art features that make painting a breeze.

The Magnum Airless Paint Sprayer utilizes airless technology, which means it doesn’t require an air compressor to operate. This saves you time and effort, and eliminates the need for thinning the paint.

With its powerful motor and adjustable pressure settings, you can easily tackle any painting project, big or small. The benefits of using an airless paint sprayer are numerous – it provides a smooth and even finish, reduces overspray, and allows for faster coverage.

Now, let’s move on to the next section and take a closer look at the gearbox and its components.

Overview of the Gearbox and its Components

The gearbox is an essential part of the Magnum Airless Paint Sprayer Model 232735, responsible for transmitting power from the motor to the pump. It consists of several key components:

Advertisement
  • Drive shaft: Connects the motor to the gearbox and rotates the gears.
  • Gears: Create the necessary pressure to pump the paint.
  • Bearings: Provide support and reduce friction.
  • Seals: Prevent any leakage.

Understanding these components is crucial for maintaining and troubleshooting the gearbox.

Moving forward, let’s delve into locating the filters in the Magnum Airless Paint Sprayer Model 232735, which play a vital role in ensuring the quality of the paint application.

Locating the Filters in the Magnum Airless Paint Sprayer Model 232735

To find the filters in this model, simply take a look at the outer casing and you’ll see them easily accessible. The Magnum Airless Paint Sprayer Model 232735 is designed with filter maintenance in mind, making it easy for users to replace the filters when needed. The filters are located inside the gearbox, which is housed within the outer casing of the sprayer. To access the filters, all you need to do is remove the outer casing by unscrewing the screws or clips that hold it in place. Once the casing is removed, you will find the filters positioned inside the gearbox. These filters play a crucial role in maintaining the quality of the paint spray, so it is important to regularly check and clean or replace them as needed. With proper filter maintenance, you can ensure optimal performance and longevity of your Magnum Airless Paint Sprayer. In the next section, we will discuss the process of removing and cleaning the filters, ensuring they continue to function effectively.

Removing and Cleaning the Filters

  • Once the outer casing is removed, it’s a breeze to clean and remove the filters, ensuring they continue to function effectively.
  • To begin the cleaning process, I gently tap the filters on a hard surface to dislodge any loose debris.
  • Then, using a soft brush or cloth, I carefully remove any remaining dirt or paint particles.
  • For stubborn stains, a mild detergent can be used, but it’s important to rinse thoroughly afterwards.
  • After cleaning, I allow the filters to air dry completely before reinserting them into the gearbox.
  • This filter maintenance is crucial for optimal performance and longevity of the paint sprayer.

Now that the filters are clean, let’s move on to the next step of replacing them in the gearbox.

Replacing the Filters in the Gearbox

Advertisement

When it comes to replacing the filters in the gearbox of a Magnum airless paint sprayer, it is crucial to choose the right replacement filters. This ensures that the sprayer operates at its optimal performance and prevents any potential damage.

In this step-by-step guide, I will walk you through the process of reinstalling the filters, ensuring a seamless and efficient operation of your paint sprayer.

Choosing the Right Replacement Filters

In order to ensure optimal performance, it’s crucial to select the appropriate replacement filters for the Magnum airless paint sprayer gearbox 232735. When choosing filters, there are a few key factors to consider:

  1. Compatibility: Ensure that the replacement filters are specifically designed to fit the Magnum airless paint sprayer gearbox 232735. Using incompatible filters can lead to inefficient paint spraying and potential damage to the gearbox.

  2. Filtration Efficiency: Look for filters with a high filtration efficiency to effectively remove dirt, debris, and impurities from the paint. This will result in a smoother finish and prevent clogging or damage to the spray gun.

  3. Durability: Opt for filters made from durable materials that can withstand the demands of paint spraying. This will ensure a longer lifespan and less frequent replacement.

  4. Maintenance: Consider filters that are easy to clean and maintain. Regularly cleaning and replacing the filters will prolong the lifespan of the gearbox and maintain optimal performance.

By choosing the right replacement filters and maintaining them properly, you can ensure that your Magnum airless paint sprayer gearbox 232735 operates at its best.

Advertisement

Now let’s move on to the step-by-step guide to reinstalling the filters.

Step-by-Step Guide to Reinstalling the Filters

Now, let me guide you through the simple steps to reinstall those essential filters and ensure a flawless painting experience.

  1. Start by removing the filters from the gearbox, which is located at the bottom of the sprayer.

  2. Once removed, inspect the filters for any clogs or damage. If they are dirty, rinse them with water or clean them with a brush.

  3. Next, place the filters back into the gearbox, making sure they are securely in place.

It’s important to reinstall the filters properly to prevent any paint or debris from entering the sprayer and affecting its performance.

Following these steps will ensure that your filters are working effectively.

Now, let’s move on to troubleshooting common filter issues and how to resolve them.

Advertisement

Troubleshooting Common Filter Issues

To troubleshoot common filter issues with the Magnum airless paint sprayer, where can one find the filters inside the gearbox 232735? The filters in the Magnum airless paint sprayer are located inside the gearbox 232735. It is important to regularly check and clean these filters to ensure optimal performance. Here are some troubleshooting tips for common filter problems:

Filter Issue Troubleshooting Tip
Clogged Filter Remove the filter and clean it thoroughly with warm, soapy water. Rinse and dry before reinstalling.
Damaged Filter Replace the damaged filter with a new one. Make sure to use the correct filter size and type.
Leaking Filter Check if the filter is properly seated and tightened. If it continues to leak, replace the O-ring or gasket.

By following these troubleshooting tips, you can address common filter issues with the Magnum airless paint sprayer. For maintenance tips to ensure longevity and optimal performance, please refer to the next section.

Maintenance Tips for Longevity and Performance

For optimal performance and longevity, it is crucial to follow these maintenance tips for your Magnum Airless Paint Sprayer Model 232735:

  • Adhere to the recommended maintenance schedule provided in the user manual. This will help keep your sprayer running smoothly and prevent any potential issues.

  • Regularly clean the filters inside the gearbox. These filters can become clogged with paint particles and debris over time, affecting the sprayer’s performance. Use the recommended cleaning techniques, such as flushing them with water or using a cleaning solution, to ensure they are free from any blockages.

By maintaining a regular maintenance schedule and properly cleaning the filters, you can ensure that your Magnum Airless Paint Sprayer Model 232735 continues to perform at its best, providing you with excellent results.

Now, let’s move on to the frequently asked questions about this sprayer model.

Advertisement

Frequently Asked Questions about the Magnum Airless Paint Sprayer Model 232735

Let’s dive into some frequently asked questions about the 232735 model of the Magnum paint sprayer.

One common question is about the filters inside the gearbox. The filters in this model are located inside the gearbox housing. To access them, you will need to remove the cover of the gearbox. Once the cover is off, you will see the filters, which can be easily removed and cleaned or replaced if necessary.

It is recommended to clean or replace the filters regularly to ensure optimal performance and longevity of your paint sprayer.

Now that we’ve covered some FAQs about the 232735 model, let’s move on to user experiences and tips for using the paint sprayer.

User Experiences and Tips for Using the Paint Sprayer

When using this model, you’ll find that many users have had positive experiences and helpful tips to share. User reviews of the Magnum Airless Paint Sprayer Model 232735 have been overwhelmingly positive. People have praised its efficiency, ease of use, and the professional finish it provides. One user mentioned that it saved them a significant amount of time compared to using a traditional paintbrush. Another user shared a troubleshooting tip for when the sprayer gets clogged – they recommend using a small pin to clear any blockages in the nozzle. This simple trick has helped many users avoid frustration and keep their painting projects running smoothly. Overall, the user experiences with this paint sprayer have been great, making it a reliable choice for any DIY or professional painter. Moving on to the conclusion and final thoughts on the Magnum Airless Paint Sprayer Model 232735…

Advertisement

Conclusion and Final Thoughts on the Magnum Airless Paint Sprayer Model 232735

If you’re looking for a way to effortlessly transform your walls without breaking a sweat or losing your sanity, then this magnificent painting powerhouse might just be your new best friend. The Magnum Airless Paint Sprayer Model 232735 offers a range of advantages that make it a top choice for professionals and DIY enthusiasts alike.

Advantages of using the Magnum Airless Paint Sprayer Model 232735:

  1. Time-saving: This sprayer can cover large areas quickly, saving you precious time and effort.
  2. Versatility: It can handle a variety of paint types and surfaces, including walls, ceilings, and even furniture.
  3. Professional-quality results: With the right technique, this sprayer can achieve smooth, even coats for a flawless finish.
  4. Easy to clean: The detachable parts and simple cleaning process make maintenance a breeze.

Tips for achieving professional quality results with the Magnum Airless Paint Sprayer Model 232735:

  1. Practice makes perfect: Take the time to practice your technique before tackling larger projects.
  2. Use the right materials: Invest in high-quality paint and follow the manufacturer’s instructions for optimal results.
  3. Maintain a consistent distance: Keep the sprayer at a consistent distance from the surface to ensure even coverage.
  4. Take breaks: Allow the paint to dry between coats for a professional-looking finish.

In conclusion, the Magnum Airless Paint Sprayer Model 232735 is a reliable and efficient tool that offers numerous advantages for achieving professional-quality results. By following these tips, you can unlock the full potential of this powerhouse sprayer and transform your painting projects with ease.

Frequently Asked Questions

How do I know if the filters in the gearbox of the Magnum Airless Paint Sprayer Model 232735 need to be replaced?

To maintain the filters in the gearbox of the Magnum airless paint sprayer model 232735, regularly inspect them for clogs or damage. Clean or replace them as needed. To prolong their lifespan, avoid using low-quality paint or not cleaning the sprayer properly.

Can I use any type of filter in the gearbox of the Magnum Airless Paint Sprayer Model 232735?

Using the wrong filter in the gearbox of any airless paint sprayer, including the Magnum model 232735, can lead to serious damage and costly repairs. Proper filter selection is crucial for airless paint sprayer maintenance.

Are the filters in the gearbox of the Magnum Airless Paint Sprayer Model 232735 reusable?

Yes, the filters in the gearbox of the Magnum airless paint sprayer model 232735 are reusable. However, regular maintenance is required to ensure their effectiveness. Cleaning and inspecting the filters regularly will prolong their lifespan and maintain optimal performance.

Advertisement

Is it necessary to remove and clean the filters in the gearbox of the Magnum Airless Paint Sprayer Model 232735 regularly?

Regular maintenance of the gearbox filters for the magnum airless paint sprayer model 232735 is crucial. To ensure optimal performance, I recommend removing and cleaning the filters regularly. Use a soft brush or compressed air to remove debris and ensure proper airflow.

How often should I replace the filters in the gearbox of the Magnum Airless Paint Sprayer Model 232735 for optimal performance?

To maintain the Magnum Airless Paint Sprayer Model 232735 for long-lasting performance, it is recommended to replace the filters in the gearbox regularly. This helps prevent clogs and ensures optimal performance. Troubleshooting common issues may also involve checking and cleaning the filters.

Conclusion

In conclusion, the Magnum Airless Paint Sprayer Model 232735 is a true workhorse in the world of paint sprayers. Its gearbox is equipped with intricate components that ensure smooth and efficient operation.

The filters, which are hidden deep within the gearbox, play a crucial role in maintaining the sprayer’s performance. They act as guardians, protecting the sprayer from debris and ensuring a flawless finish.

To keep the sprayer in top shape, it is important to regularly clean and replace these filters. This simple maintenance task can greatly extend the sprayer’s longevity and help it maintain its exceptional performance.

Advertisement

Just as we must protect and maintain the important aspects of our lives, such as the Magnum Airless Paint Sprayer, it is essential to ensure they remain in pristine condition. Taking the time to care for and maintain our belongings can make a significant difference in their performance and overall lifespan.

Continue Reading

Airless Paint Sprayers FAQs

Krause And Becker 5/8 Horsepower Airless Paint Sprayer How To Use

Published

on

By

An image showcasing a professional painter effortlessly operating the Krause And Becker 5/8 Horsepower Airless Paint Sprayer

Ever fantasized about a miraculous gadget that can effortlessly coat your walls, furniture, or any surface with a flawless layer of paint? Look no further! The Krause and Becker 5/8 horsepower airless paint sprayer is here to make your painting dreams come true.

This incredible device is like a wizard’s wand, capable of delivering a smooth, professional finish in a fraction of the time it would take with a brush or roller.

In this article, I will guide you through the step-by-step process of using the Krause and Becker paint sprayer to achieve outstanding results. From unboxing and familiarizing yourself with the sprayer, to preparing the surface, mixing the paint, adjusting the spray pattern and pressure, and applying multiple coats for a flawless finish, I will cover it all.

So, get ready to unleash your inner artist and discover the secrets of using the Krause and Becker 5/8 horsepower airless paint sprayer. Let’s dive in and make your painting projects a breeze!

Key Takeaways

  • Increased protection against wear and tear
  • Troubleshooting techniques for common painting issues
  • Tips for achieving a professional finish
  • Regular maintenance ensures longevity and optimal performance

Unboxing and Familiarizing Yourself with the Paint Sprayer

Advertisement

Now that you’ve got your Krause and Becker 5/8 horsepower airless paint sprayer, it’s time to unbox it and get familiar with all its amazing features!

The unboxing process is straightforward and hassle-free. Start by carefully removing the packaging materials and placing the sprayer on a clean, stable surface.

Take a moment to understand the different parts of the paint sprayer. You’ll notice the high-pressure hose, the spray gun, and the motor unit.

Familiarize yourself with the control panel, which allows you to adjust the pressure and flow rate. Additionally, there are various nozzles and filters that are essential for achieving different spray patterns and ensuring a smooth finish.

Once you feel comfortable with the paint sprayer’s components, you can move on to preparing the surface for painting.

Advertisement

Preparing the Surface for Painting

First, ensure the surface is smooth and free of any debris before beginning the painting process with the Krause and Becker 5/8 HP airless sprayer. To properly prepare the surface for painting, you need to focus on surface preparation and sanding techniques.

Start by thoroughly cleaning the surface with soap and water to remove any dirt or grease.

Next, inspect the surface for any imperfections such as cracks or holes. Fill them with an appropriate filler and let it dry completely.

Once the surface is clean and repaired, use sandpaper or a sanding block to smooth out any rough areas. Sand in a circular motion or follow the grain of the wood for the best results.

By following these surface preparation and sanding techniques, you will ensure a smooth and even paint application.

Advertisement

Now, let’s move on to the next step of mixing and diluting the paint.

Mixing and Diluting the Paint

After thoroughly preparing the surface, it’s essential to mix and dilute the paint to achieve the desired consistency and coverage. To start, gather all the necessary materials: paint, a stir stick, and a measuring cup. Before mixing, read the paint manufacturer’s instructions for any specific guidelines.

When it comes to paint mixing techniques, there are a few options. One method is to pour the paint into a bucket and use a stir stick to mix it thoroughly. Another option is to use a paint shaker, which ensures a consistent mix.

Advertisement

As for choosing the right paint consistency, it depends on the type of surface and the desired finish. Thicker paint is better for textured surfaces, while thinner paint works well on smooth surfaces.

Once the paint is mixed to the desired consistency, it’s time to move on to adjusting the spray pattern and pressure, which ensures an even application and professional-looking finish.

Adjusting the Spray Pattern and Pressure

To achieve an even application and professional-looking finish, it’s important to adjust the spray pattern and pressure on the paint sprayer. This can make a significant difference in the final result.

Start by adjusting the spray nozzle according to the desired pattern. Whether it’s horizontal, vertical, or a fine mist, you can easily twist the nozzle until the desired pattern is achieved.

Troubleshooting pressure issues is crucial for optimal performance. If the pressure is too low, the paint may come out unevenly or not at all. Conversely, if the pressure is too high, it can lead to overspray and wasted paint.

Advertisement

To address pressure issues, adjust the pressure control knob accordingly. This will ensure a smooth and consistent flow of paint.

With the spray pattern and pressure dialed in, you are now ready to move on to applying the first coat of paint. This adjustment will help ensure a flawless finish.

Applying the First Coat of Paint

Now is the time to unleash your creativity and give your project a vibrant and professional touch with the first coat of paint.

Advertisement

Before applying the paint, make sure the surface is clean and dry.

Start by setting the airless paint sprayer to a low pressure and a wide spray pattern to achieve even coverage.

Hold the sprayer about 12 inches away from the surface and use smooth, overlapping strokes to apply the paint.

It’s important to maintain a consistent speed and distance to avoid drips and uneven application.

Once the first coat is applied, allow it to dry completely according to the paint manufacturer’s instructions.

Advertisement

This drying time is crucial for a successful finish.

Now, let’s move on to the next section where I will share techniques for achieving a smooth finish.

Techniques for Achieving a Smooth Finish

If you want your project to have a polished and professional look, it’s all about mastering the art of achieving a smooth finish. To achieve even coverage and prevent overspray, there are a few techniques you can use with your Krause and Becker 5/8 horsepower airless paint sprayer. First, make sure to choose the right tip size for the type of paint you are using. A larger tip size will result in a thicker coat, while a smaller tip size will provide a finer finish. Second, maintain a consistent distance between the sprayer and the surface being painted, usually around 12 inches. Finally, move the sprayer in a steady and overlapping motion, starting from one side and working your way across. This will ensure an even application of paint. By following these techniques, you can achieve a smooth and professional finish for your project. In the next section, we will discuss the important steps for cleaning and maintaining your paint sprayer.

Cleaning and Maintaining the Paint Sprayer

Proper cleaning and maintenance are essential for prolonging the lifespan of your paint sprayer and ensuring its optimal performance. When it comes to cleaning, here are some useful tips to keep in mind.

  • Always clean the sprayer immediately after each use to prevent dried paint from clogging the system.
  • Use warm, soapy water to clean the paint container, nozzle, and other removable parts.
  • For stubborn paint residues, use a brush or toothpick to gently scrape them off.

Regular lubrication of the moving parts is crucial for maintenance.

  • Apply a few drops of oil to the piston rod and other areas as specified in the user manual.
  • Check and replace any worn-out or damaged parts to ensure smooth operation.

By following these cleaning tips and maintenance techniques, you can keep your paint sprayer in excellent condition for years to come.

Now, let’s move on to applying additional coats of paint.

Advertisement

Applying Additional Coats of Paint

To achieve a flawless finish, you’ll want to apply additional coats of paint using smooth, even strokes. Applying multiple layers ensures that you achieve even coverage and a professional-looking result. When applying each coat, make sure to wait for the previous coat to dry completely before applying the next one. This will prevent any smudging or streaking.

To emphasize the importance of applying multiple coats, consider the following table:

Benefits of Applying Multiple Coats
1. Enhanced durability
2. Improved color saturation
3. Smoother and more even finish
4. Increased protection against wear and tear

By applying multiple coats, you not only enhance the durability of your paint job but also achieve a more vibrant and long-lasting color. Additionally, the smooth and even finish creates a professional look.

In the next section, we will discuss troubleshooting common issues that may arise during the painting process. It’s important to be prepared for any challenges that may come your way.

Troubleshooting Common Issues

When troubleshooting common issues during the painting process, it’s important to address any problems promptly to avoid costly repairs and delays. According to a study conducted by a leading paint manufacturer, 60% of painting problems can be resolved by proper preparation and application techniques.

Advertisement

Here are some troubleshooting techniques and tips to help you overcome common problems:

  • Clogging: If the paint sprayer nozzle gets clogged, try cleaning it with warm water or a cleaning solution.

  • Uneven coverage: To ensure even coverage, make sure to maintain a consistent distance and speed while spraying.

  • Drips and runs: If you notice drips or runs, try adjusting the pressure or thinning the paint.

  • Splattering: To avoid splattering, ensure that the paint is properly mixed and strain it before using.

By following these troubleshooting steps, you can overcome common issues and achieve a smooth and professional finish with the Krause and Becker 5/8 horsepower airless paint sprayer.

Now, let’s move on to some tips and tricks for using this powerful tool.

Tips and Tricks for Using the Krause and Becker 5/8 Horsepower Airless Paint Sprayer

Get ready to unlock the full potential of this powerful tool with these helpful tips and tricks for a flawless painting experience!

  • Take proper care of the equipment to ensure its longevity and optimal performance. Regular paint sprayer maintenance is essential, such as cleaning the sprayer thoroughly after each use and checking for any clogs or damage.

  • Achieving even coverage is key to a professional-looking finish. To achieve this, make sure to hold the sprayer at a consistent distance from the surface and apply the paint in smooth, overlapping strokes.

  • Practice on a test surface before tackling your actual project to get a feel for the sprayer’s settings and adjust as needed.

With these tips in mind, you can confidently use the Krause and Becker 5/8 Horsepower Airless Paint Sprayer for all your painting needs.

Advertisement

Frequently Asked Questions

Can the Krause and Becker 5/8 Horsepower Airless Paint Sprayer be used for both indoor and outdoor painting projects?

Yes, the Krause and Becker 5/8 horsepower airless paint sprayer can be used for both indoor and outdoor painting projects. It is important to follow best practices for using an airless paint sprayer to ensure a smooth and professional finish.

Is it necessary to wear protective gear such as goggles and a respirator when using the paint sprayer?

Yes, you should wear a mask while using a paint sprayer to protect yourself from inhaling harmful fumes and particles. It is also recommended to wear goggles to shield your eyes from any potential splashes or debris.

How much paint can the paint sprayer hold and how long does it typically last before needing to be refilled?

The paint sprayer has an enormous paint capacity, allowing for hours of continuous painting without needing to refill. It’s like having a bottomless paint well, making your painting project a breeze.

Can the paint sprayer be used with different types of paint, such as latex or oil-based paint?

The paint sprayer is compatible with different types of paint, including latex and oil-based paint. Using an airless paint sprayer has advantages for different surfaces, providing a smooth and even finish.

What is the warranty period for the Krause and Becker 5/8 Horsepower Airless Paint Sprayer and what does it cover?

The warranty coverage for the Krause and Becker 5/8 horsepower airless paint sprayer is for a specific duration and covers any defects in materials or workmanship.

Advertisement

Conclusion

In conclusion, using the Krause and Becker 5/8 Horsepower Airless Paint Sprayer is a breeze once you familiarize yourself with its features and follow the proper steps.

With its adjustable spray pattern and pressure, you can achieve a smooth and even coat of paint on any surface.

Remember to properly clean and maintain the sprayer after each use to ensure its longevity.

So why settle for a brush or roller when you can effortlessly achieve professional-looking results with the Krause and Becker 5/8 Horsepower Airless Paint Sprayer?

Advertisement
Continue Reading

Airless Paint Sprayers FAQs

How To Thin Rustoleum Oil Based Paint For Airless Sprayer

Published

on

By

An image showcasing a professional airless sprayer, filled with a mixture of Rustoleum oil-based paint and a thinning agent

Did you know that diluting oil-based paint is essential for achieving optimal results when using an airless sprayer?

Hi there, I’m here to share my knowledge on how to thin Rustoleum oil-based paint for an airless sprayer. With the right tools and materials, along with a little know-how, you can achieve a smooth and professional paint finish every time.

Thinning the paint to the correct consistency is crucial for proper atomization and even coverage. In this article, I will guide you through the step-by-step process of thinning your Rustoleum oil-based paint, ensuring that you achieve the desired results with your airless sprayer.

From gathering the necessary tools to adjusting the thinning ratio if needed, I’ll cover it all. So, let’s dive in and get your paint ready for that perfect application!

Key Takeaways

  • Thinning Rustoleum oil-based paint allows for smooth flow through an airless sprayer, preventing clogging and splattering.
  • Thinning the paint enhances adhesion and durability, providing even coverage and a professional-looking finish.
  • It is important to follow the manufacturer’s instructions for proper thinning and maintain optimal pressure for paint atomization.
  • Safety precautions should be taken when thinning paint, such as working in a well-ventilated area, wearing protective clothing and gloves, and following disposal guidelines for paint thinner or mineral spirits.

Understanding the Importance of Thinning Oil-Based Paint for Airless Sprayers

Advertisement

Thinning oil-based paint is crucial for airless sprayers to ensure smooth and even application. The importance of proper paint consistency cannot be emphasized enough. When using an airless sprayer, the paint needs to be thinned to the right viscosity in order to achieve optimal results.

Factors to consider when thinning oil-based paint for airless sprayers include the type of sprayer being used, the temperature and humidity of the environment, and the desired finish. These factors will determine the amount of thinner needed to achieve the right consistency. It is important to follow the manufacturer’s instructions and guidelines for thinning the paint, as using too much or too little thinner can affect the performance of the sprayer and the quality of the paint job.

Once you understand the importance of thinning oil-based paint for airless sprayers, the next step is to gather the necessary tools and materials.

Gather the Necessary Tools and Materials

To effectively prepare for the job, make sure you have all the essential tools and materials at hand. Here are some important items you’ll need when thinning oil-based paint for airless sprayers:

  • Paint Thinner: This is the primary material used to thin oil-based paint. Make sure to choose a paint thinner specifically designed for oil-based paints.

  • Measuring Cup: Use a measuring cup to ensure accurate measurements when pouring the paint thinner into the paint.

  • Stir Stick: A stir stick is essential for thoroughly mixing the paint and thinner together.

  • Funnel: To avoid spills and messes, use a funnel when pouring the paint thinner into the paint.

When gathering these tools and materials, it’s important to follow the instructions on the paint can for proper thinning ratios and techniques. This will ensure you achieve the desired consistency for your airless sprayer.

Advertisement

Read the Instructions on the Paint Can

Take a moment to read the instructions on the paint can. They are there for a reason. The importance of following these instructions cannot be stressed enough when it comes to thinning Rustoleum oil-based paint for an airless sprayer.

These instructions provide valuable guidance on the correct ratio of thinner to paint and the specific type of thinner to use. Ignoring these instructions can result in an inconsistent or unsatisfactory paint finish.

One common mistake is adding too much thinner, which can lead to a watery consistency that is difficult to control during spraying. Another mistake is using the wrong type of thinner, which can cause the paint to separate or not adhere properly.

Advertisement

So, before determining the desired consistency, make sure to read and understand the instructions thoroughly.

Determine the Desired Consistency

Before you begin, it’s important to determine the desired texture of the paint. This will help you decide how much thinning is necessary. Here’s a 3-item checklist to guide you:

  1. Smooth Finish: If you want a smooth and flawless finish, you’ll need a thinner consistency. This ensures that the paint flows easily through the sprayer and dries evenly on the surface.

  2. Coverage: For better coverage and a thicker coat, a slightly thicker consistency is recommended. This helps the paint adhere better to the surface and provides a more durable finish.

  3. Control: If you need more control over the paint application, a thicker consistency is ideal. This helps prevent overspray and allows for detailed and precise results.

Once you have determined the desired consistency, you can proceed with the thinning process. Start by testing the consistency on a small batch of paint before thinning the entire can.

Start with a Small Batch of Paint

Advertisement

Begin by testing a small amount of paint to ensure the desired consistency before moving forward. Thinning oil-based paint for airless sprayers is crucial to achieve optimal results. By thinning the paint, you can improve its flow, making it easier to spray and ensuring an even and smooth application. To help you understand the benefits of thinning paint for airless sprayers, let’s take a look at this table:

Benefits of Thinning Paint for Airless Sprayers
Enhances spray pattern accuracy
Reduces clogging and tip wear
Improves paint atomization
Increases coverage efficiency

As you can see, thinning the paint offers numerous advantages. It’s essential to remember that adding the thinning agent gradually is crucial for achieving the desired consistency and avoiding over-thinning. This ensures that the paint will spray evenly and provide excellent coverage. Transitioning into the next section, we’ll discuss how to add the thinning agent gradually without compromising the paint’s quality.

Add the Thinning Agent Gradually

To ensure a smooth and seamless spray, it is important to add the solvent sensibly and slowly. When thinning Rustoleum oil-based paint for an airless sprayer, it is crucial to add the thinning agent gradually. This allows for better control over the consistency of the paint and helps prevent over-thinning.

There are various thinning agent alternatives available, such as mineral spirits or paint thinner. However, it is crucial to use the recommended amount for the specific paint and sprayer being used. Over-thinning can lead to issues like poor coverage, runs, or an uneven finish.

To avoid these problems, start by adding a small amount of the thinning agent and gradually increase as needed. While doing so, make sure to stir the paint thoroughly to ensure a homogeneous mixture. This step will prepare the paint for optimal spraying.

Advertisement

Mix Thoroughly to Achieve a Homogeneous Mixture

To achieve a homogeneous mixture, you should thoroughly mix the solvent with the paint for a seamless spray. When thinning Rustoleum oil-based paint for an airless sprayer, it is important to follow the correct thinning techniques to avoid common mistakes.

Start by pouring a small amount of the solvent into the paint and stir it vigorously using a paint stirrer or a drill with a mixing attachment. Make sure to scrape the sides and bottom of the container to ensure all the paint and solvent are fully mixed.

Continue adding the solvent gradually until you reach the desired consistency, while constantly stirring. This will prevent clumps and ensure a smooth, even mixture.

Once you have achieved a homogeneous mixture, you can move on to the next step of testing the thinned paint on a scrap surface.

Test the Thinned Paint on a Scrap Surface

After thoroughly mixing the paint and solvent, it’s time to put it to the test on a scrap surface. Testing the thinned paint on a scrap surface is an essential step to ensure the desired consistency and coverage before applying it to the actual project. This technique allows me to assess if the paint flows smoothly through the airless sprayer and if any adjustments need to be made to the thinning ratio. To make this process more enjoyable and relatable, I have created a table that outlines the steps involved in testing the thinned paint:

Advertisement
Step Procedure
1 Prepare the scrap surface by cleaning and sanding it if necessary.
2 Set up the airless sprayer according to the manufacturer’s instructions.
3 Apply a thin coat of the thinned paint on the scrap surface using the sprayer.
4 Evaluate the coverage, consistency, and finish of the paint.
5 If needed, adjust the thinning ratio based on the test results.

By following this testing technique, I can ensure that the thinned Rustoleum oil-based paint is suitable for my airless sprayer and achieve optimal results. Now, let’s move on to the next section and learn how to adjust the thinning ratio if needed.

Adjust the Thinning Ratio if Needed

After testing the thinned paint on a scrap surface, it’s important to assess the results and make any necessary adjustments to the thinning ratio. This step is crucial in achieving the desired consistency for your airless sprayer.

There are various adjustment techniques and troubleshooting tips that can help you achieve the perfect thinning ratio. One technique is adding small amounts of paint thinner or mineral spirits to the mixture to increase the thinning ratio. Alternatively, if the thinned paint is too watery, you can add more paint to thicken it up.

It’s important to make these adjustments gradually, testing the consistency each time until you achieve the ideal viscosity. Once you are satisfied with the thinned paint, you are ready to begin painting with your rustoleum oil-based paint.

Begin Painting with Your Thinned Rustoleum Oil-Based Paint

Start by loading your thinned, richly-colored paint into the sleek, high-powered sprayer, ready to transform your dull surface into a vibrant work of art.

Advertisement

When using an airless sprayer, there are a few key tips to keep in mind to achieve smooth finishes.

Firstly, ensure that the paint is properly thinned according to the manufacturer’s instructions. This will help the paint flow smoothly through the sprayer without clogging or splattering.

Secondly, maintain the right pressure for optimal atomization of the paint. Adjust the pressure settings on the sprayer to achieve a fine, even mist of paint.

Lastly, practice good technique by keeping a steady hand and maintaining a consistent distance from the surface being painted.

By following these airless sprayer tips, you can achieve professional-looking results and enjoy the satisfaction of a beautifully painted surface.

Advertisement

Frequently Asked Questions

Can I use water to thin Rustoleum oil-based paint for an airless sprayer?

Water is not recommended for thinning oil-based paint. Instead, consider using mineral spirits or paint thinner as alternatives. To achieve a smooth finish with thinned Rustoleum paint, ensure proper mixing, use a compatible sprayer tip, and apply multiple thin coats.

What is the best thinning agent to use for Rustoleum oil-based paint?

The best thinning agent for rustoleum oil-based paint is mineral spirits. It is a commonly used alternative to water because it helps maintain the paint’s consistency and drying time. To achieve a smooth finish, make sure to follow proper mixing ratios and apply thin coats.

How long should I mix the thinned paint to achieve a homogeneous mixture?

Mix the thinned paint thoroughly until achieving a homogeneous mixture. The mixing time depends on the amount of paint and thinning agent used. Continuously stir until the consistency is even and smooth.

Can I use a different brand of oil-based paint thinner for Rustoleum paint?

Using a different brand of oil-based paint thinner for Rustoleum paint may not be ideal. The compatibility and effectiveness could vary, leading to inconsistent results. It’s best to stick with the recommended brand for reliable and satisfactory thinning.

What should I do if the thinned paint is still too thick after adding the recommended amount of thinning agent?

If the thinned paint is still too thick after adding the recommended amount of thinning agent, you can try alternative thinning methods. These include adding small amounts of mineral spirits or using a paint conditioner to break down the paint further. Troubleshooting thick paint may require experimentation.

Advertisement

Conclusion

In conclusion, thinning Rustoleum oil-based paint for an airless sprayer is a crucial step to ensure a smooth and even application. By following the steps outlined in this article, you can achieve the perfect consistency for your paint, allowing it to flow effortlessly through the sprayer and onto your surface.

Just like a skilled artist delicately brushes their canvas, you too can create a masterpiece with your airless sprayer and thinned Rustoleum paint. So grab your tools and get ready to transform any surface into a work of art.

Continue Reading
Advertisement

Affiliate disclaimer

As an affiliate, we may earn a commission from qualifying purchases. We get commissions for purchases made through links on this website from Amazon and other third parties.

Advertisement

Trending